11 Christmas Village Display Ideas That Hide Every Ugly Cord
Good christmas village display ideas start with a ritual most collectors know by heart. You lift the lid on the storage box, peel back the tissue, and there’s the little bakery with the chipped chimney you’ve meant to glue for three years. You blow a bit of dust off the roof. You plug in the cord and hold your breath until that tiny amber bulb flickers on.
And then you set everything down in one straight row on the sideboard. Church, cottage, cottage, shop, cottage. Behind them, a nest of white cords and a power strip the size of a brick. It looks less like a snowy alpine town and more like a strip mall at closing time.
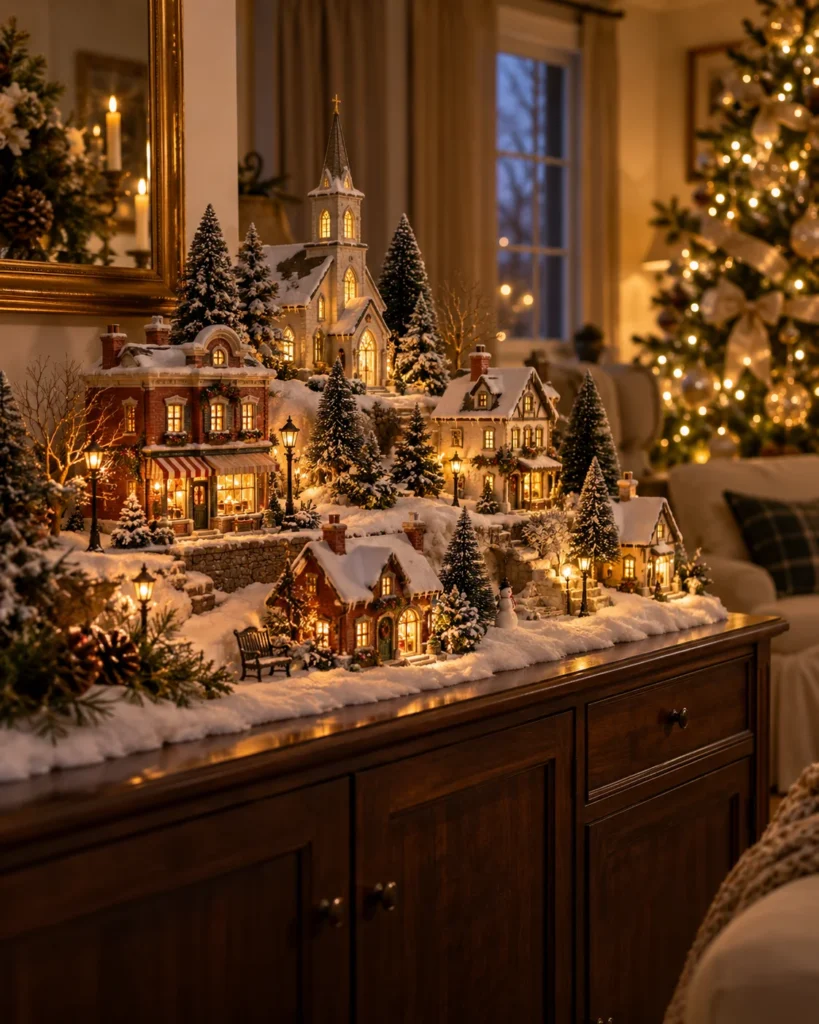
It doesn’t have to. With a few hidden risers, a smarter way to run cords and some furniture you already own, a small village can look deep, layered and real without taking over the whole room. Here’s how to display christmas village pieces so they look like a place, not a shelf of houses.
The Technical Masterclass: How to Solve the 3 Village Headaches
Every frustrating village setup comes down to three problems. Fix these first and every idea later in this list gets easier.
Challenge 1: The Cord Disaster
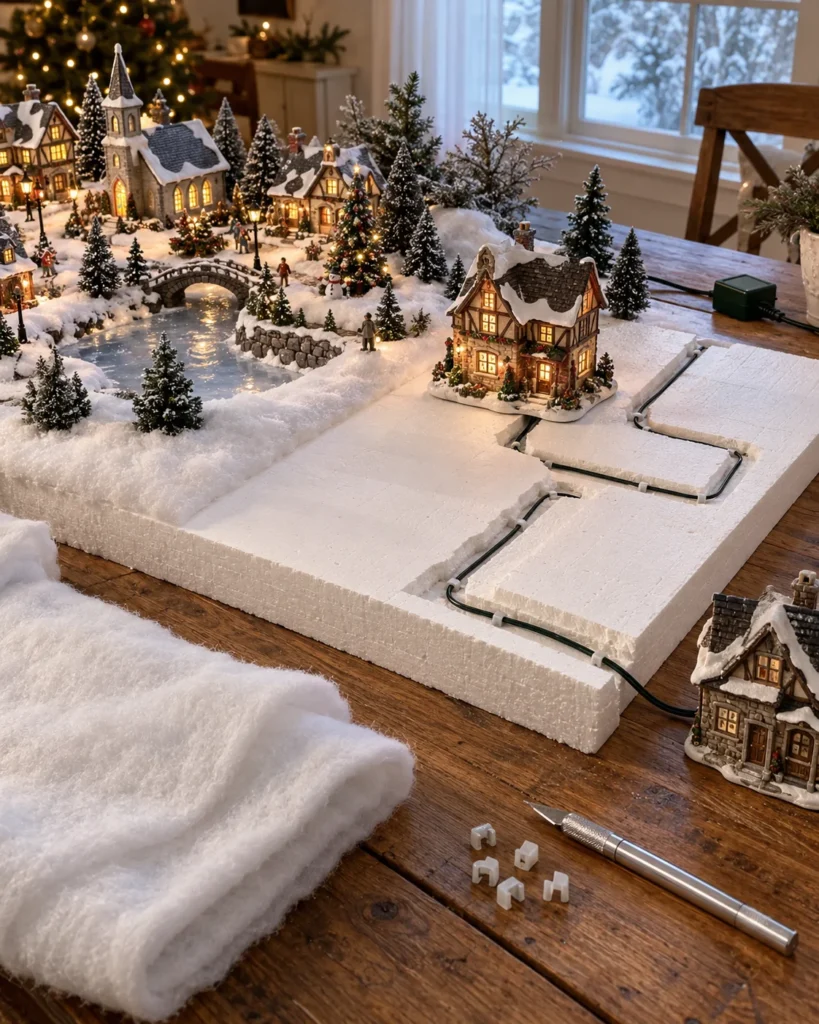
If you’ve ever wondered how to hide christmas village cords, the answer is to build the landscape on top of them. Cut a sheet of foam insulation board to fit your display surface, then carve shallow trenches into it with a craft knife. Lay each cord in its trench, run it to the back edge, and the snow layer goes right over the top. This cord trenching trick hides every wire and gives you a base you can reuse every year.
Foam Board Channels
Carve trenches, bury cords, then drill one small hole under each building so the bulb cord drops straight down out of sight.
Flat Adhesive Cable Clips
Run cords down the back of shelves and furniture legs. Clear or white clips disappear against most finishes.
Battery Micro Lights
For small displays, swap plug-in bulbs for battery micro fairy lights tucked inside each house. No cords at all.
Safety Note: Use a power strip with a built-in surge protector, never run cords under rugs, and don’t chain one strip into another. Put the whole display on a plug-in timer so it turns off overnight.
Challenge 2: The Flat Grid Problem
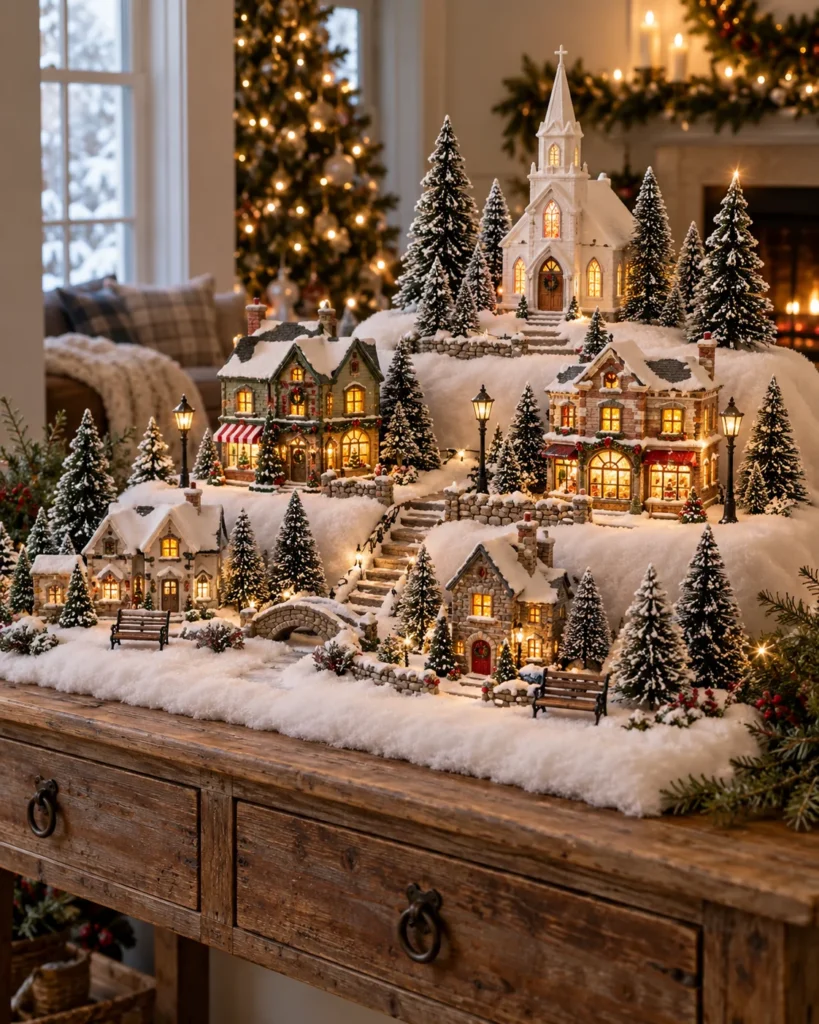
Real towns aren’t flat. They climb hills, and the tallest buildings sit up where everyone can see them. Use the Rule of Three Heights to stage a natural pyramid. Your tallest pieces, like a church steeple or a lighthouse, go high in the back center. Mid-size shops step down on either side. Small cottages, trees and figures sit lowest at the front.
The Rule of Three Heights
Cottages, trees, skaters, a bench
Shops, the inn, the bakery
Church, lighthouse, clock tower
Hide the risers under your snow layer so the town looks like it grew on a hillside.
Challenge 3: The Snow Dilemma
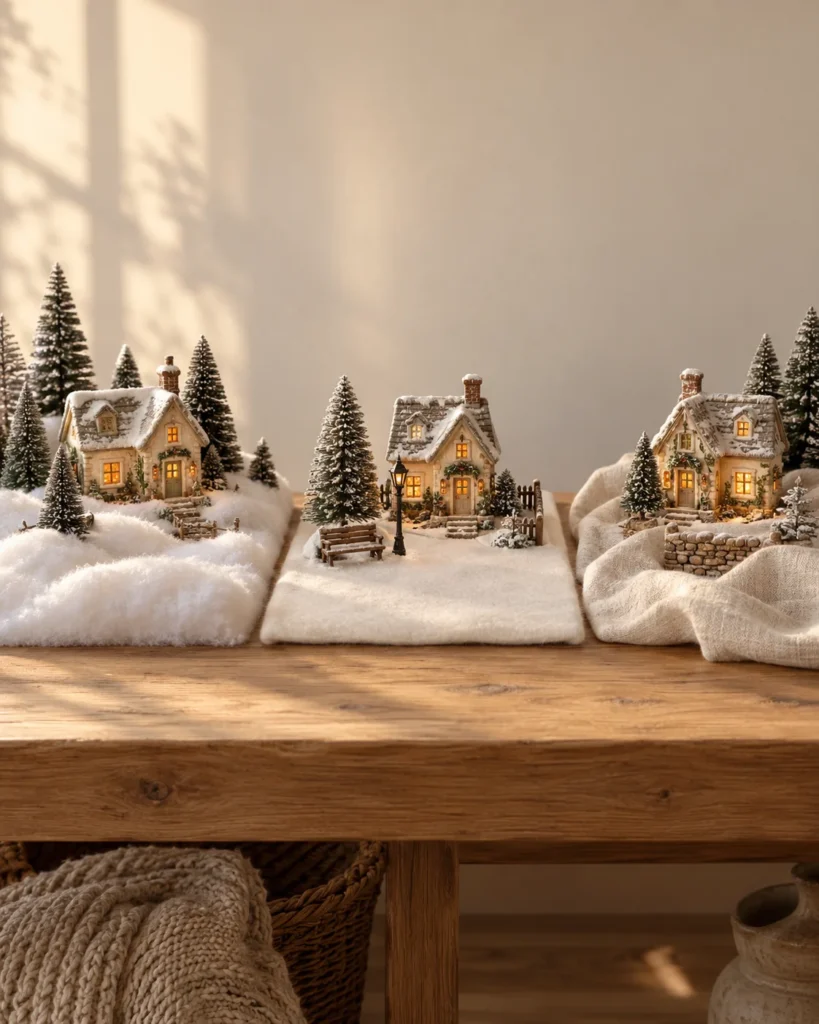
Loose plastic snow looks fun for one afternoon. Then it’s in the carpet, in the vacuum, stuck to the cat and somehow inside the houses. Here’s how the common snow options compare.
| Snow Type | Mess Level | Kid and Pet Safe | Best Use |
|---|---|---|---|
| Snow skirt batting | Very low | Yes, stays in one piece | Covering risers and hills |
| White felt sheet | None | Yes | Flat streets and shelves |
| Linen or flour sack cloth | None | Yes | Neutral and vintage sets |
| Loose plastic scatter | High | No, easy to swallow | Sealed displays only |
Architectural and Living Room Centerpieces
These three use the bones of the room, the mantel, the bookcase and the wall, so the village feels built in rather than set down.
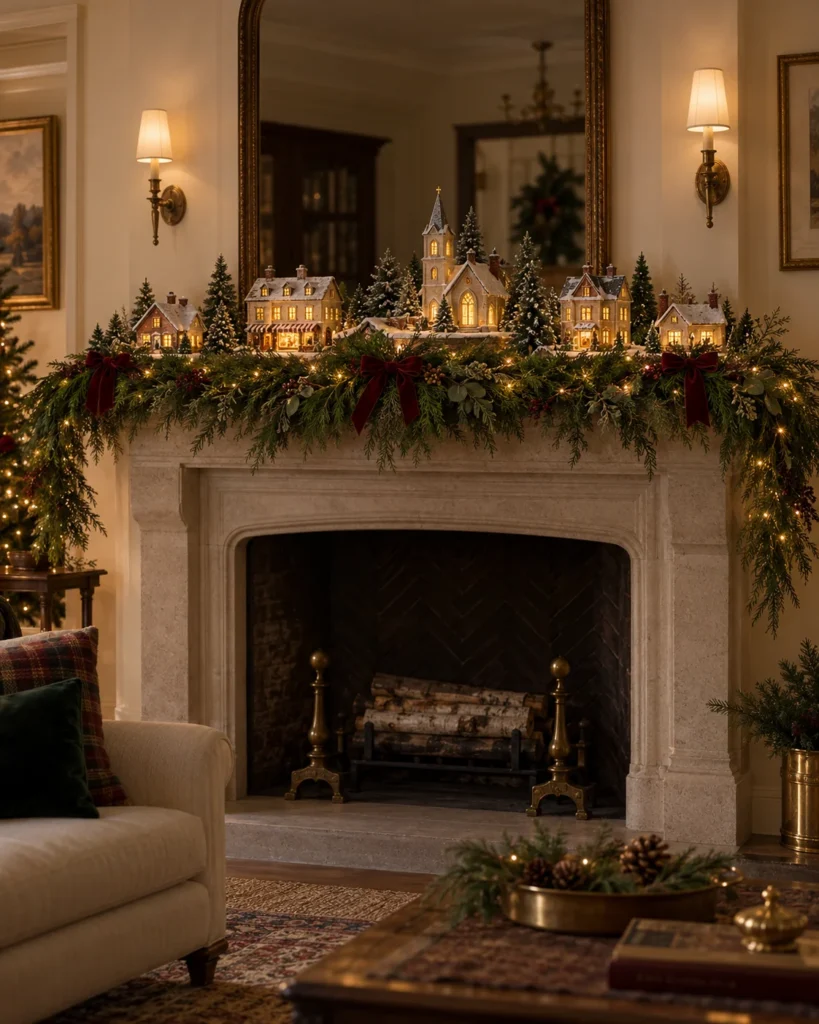
1. The Fireplace Mantel Ridge
Feels like · a town strung along a mountain ridge
Line the back of the mantel with staggered wooden riser blocks, then set your buildings on top at different heights. Drape a heavy cedar garland along the front edge so it covers every base, cord and power strip.
The Ridge Vibe: Long, layered, rising and falling.
The Heat Rule: Only stage on the mantel if you’re not burning a real fire below, or keep greenery well clear of the firebox.
Staging Detail: Put your tallest building slightly off center so the line feels natural.
2. The Multi-Tier Bookshelf Town
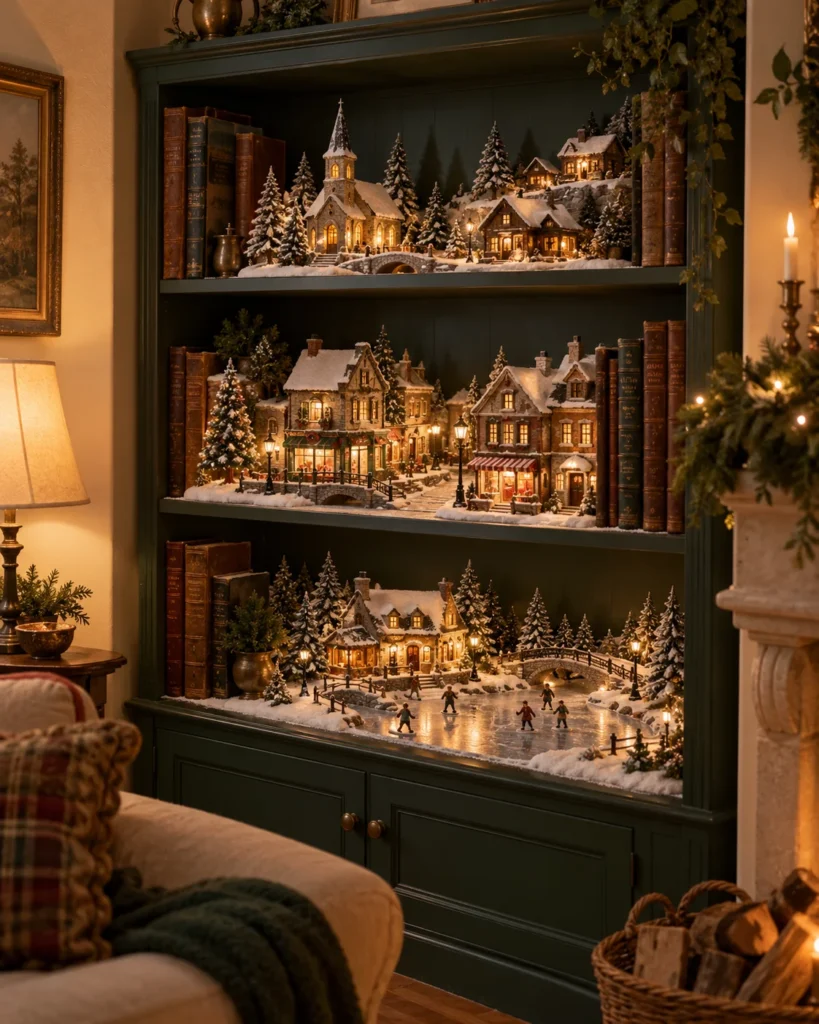
Feels like · a whole valley seen from the top of the hill
A bookshelf christmas village display gives each shelf its own neighborhood. Alpine chapel and pine trees up top, main street shops in the middle, a frozen riverfront with skaters on the lowest shelf.
The Shelf Vibe: Storybook, organized, full of little scenes.
The Cord Rule: Drill a small hole in the back panel of each shelf, or run cords down the side with flat clips.
Staging Detail: Push some books to the ends of each shelf as bookends that frame the scene.
3. The Floating Picture Ledge Horizon
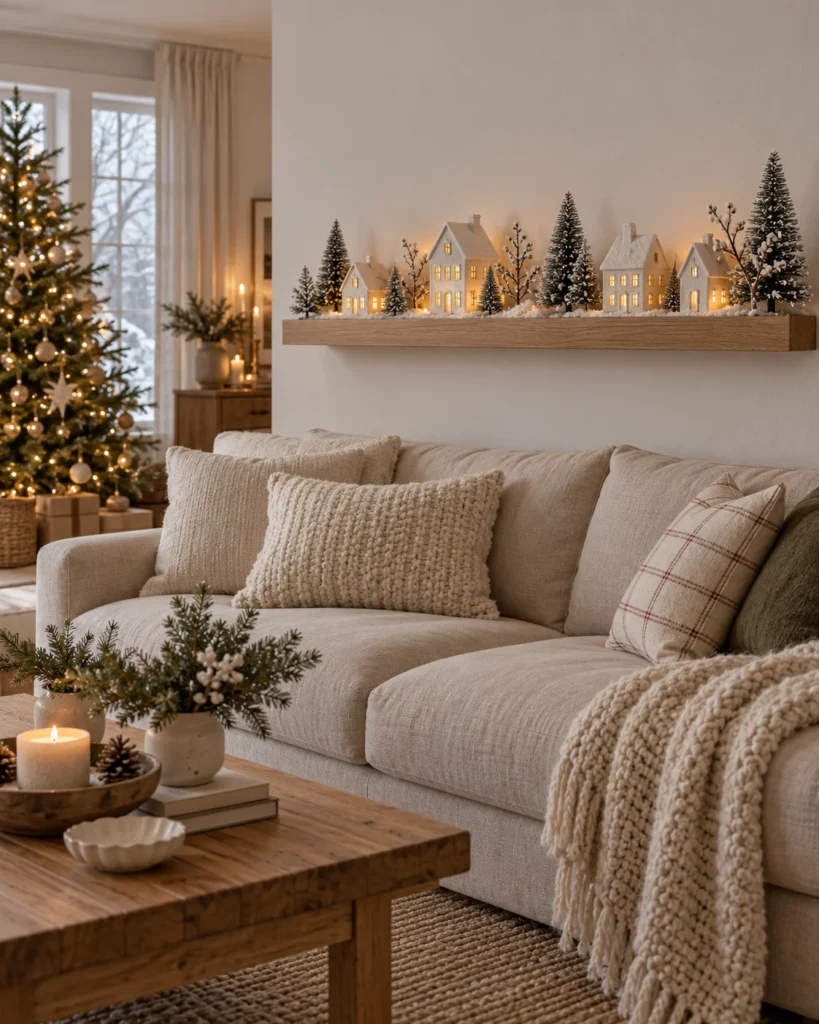
Feels like · a skyline seen across a frozen lake
A slim wall-mounted picture ledge holds one long row of buildings well above the reach of toddlers and curious cats. It’s the best small space christmas village idea if your heirloom pieces are fragile.
The Horizon Vibe: Clean, linear, safely out of reach.
The Safety Rule: Choose a ledge with a front lip and stick a dab of museum putty under each house.
Staging Detail: Battery lights work best here, so there are no cords dangling down the wall.
The Cat and the Clock Tower
A collector I know set her late mother’s village on the coffee table every year. Every year her cat knocked something off. One December it was the clock tower, which had been in the family since the eighties. She glued it back together and moved the whole town up to a floating ledge above the sofa. The cat lost interest, and she said the village actually looked better up there, glowing at eye level.
Repurposed Furniture and Vintage Containers
Not enough room for a full town? Corral a few favorite buildings inside something with character. It frames them and makes moving the whole display easy.
4. The Antique Tool Caddy or Sled Base
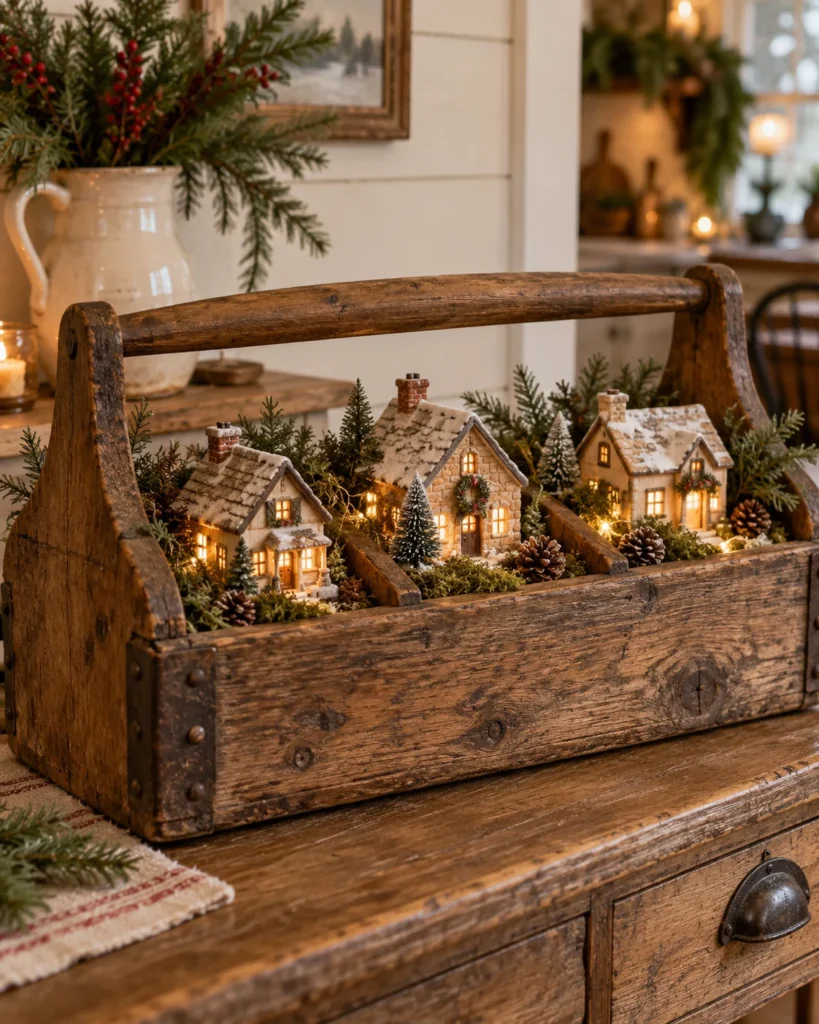
Feels like · a woodland hamlet found in grandpa’s workshop
Set three or four hero cottages inside an old carpenter’s toolbox or on a vintage wooden sled. Fill around them with natural moss and tiny bottle brush trees, and tuck amber micro LEDs into the gaps.
The Caddy Vibe: Rustic, compact, totally portable.
The Fit Rule: Choose buildings that sit just below the rim so the sides frame them.
Staging Detail: Tape the battery pack to the underside of the caddy so nothing shows.
5. The Galvanized Tiered Farmhouse Stand
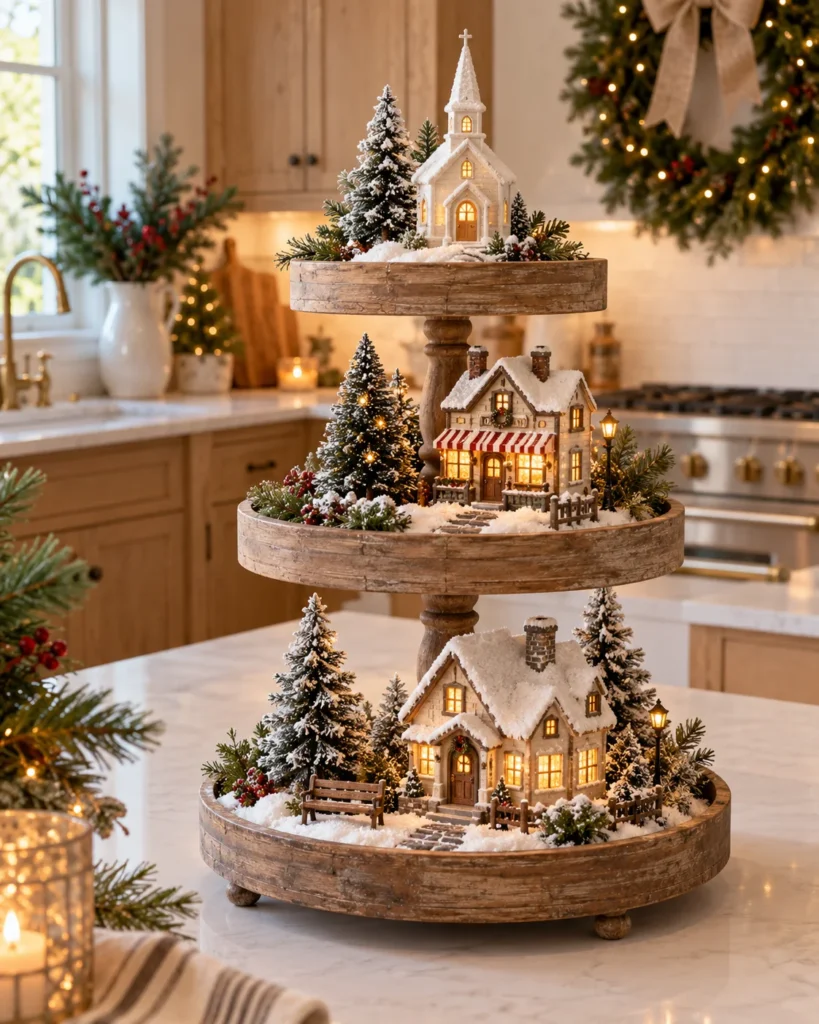
Feels like · a little town that spirals up a hill
A two or three tier galvanized stand turns a small village into a buffet or kitchen island centerpiece. Biggest building on the bottom tier, a cottage on the middle, a tiny chapel on top.
The Tier Vibe: Farmhouse, round, easy to view from all sides.
The Balance Rule: Keep the heaviest pieces low so the stand doesn’t tip.
Staging Detail: If it lives in the kitchen, pair it with these Christmas kitchen decor ideas so the whole room feels connected.
6. The Glass-Top Shadowbox Coffee Table Vitrine
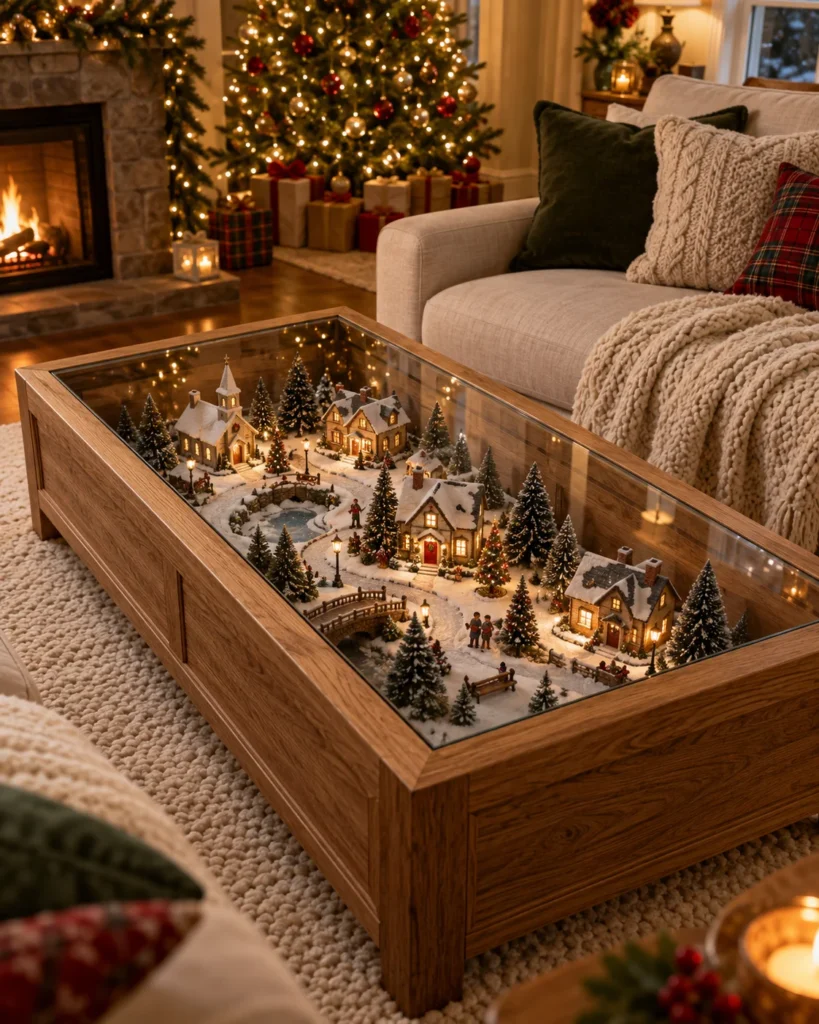
Feels like · looking down at a valley from an airplane
If you have a coffee table with a glass-covered display compartment, it makes a perfect dust-free miniature valley. Lay felt snow on the bottom, add low cottages and trees, and light it from inside.
The Vitrine Vibe: Protected, surprising, fun to peer into.
The Heat Rule: Use LED lights only. Closed glass traps warmth from older incandescent bulbs.
Staging Detail: Arrange it to be viewed from above, with streets winding through instead of rows.
Enclosed Glass and Micro-Moments
Sometimes one building on its own makes a bigger statement than twenty in a row.
7. The Large Glass Lantern Enclosures
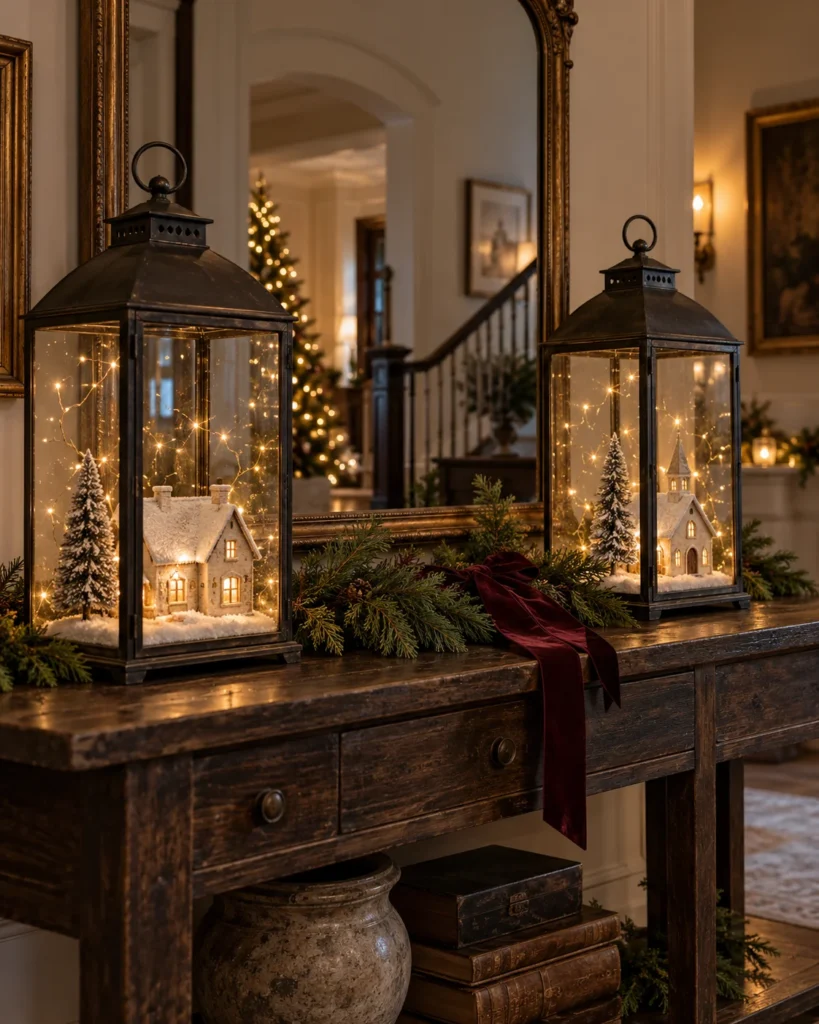
Feels like · a single lit window on a snowy night
Place one glowing cottage inside an oversized lantern on your entry console. Add a pinch of batting snow and a single bottle brush tree. It greets guests the second they walk in.
The Lantern Vibe: Framed, focused, welcoming.
The Light Rule: Battery micro lights only inside an enclosed lantern.
Staging Detail: A pair of lanterns on either side of a console looks balanced and intentional.
8. Footed Cake Stand Cloche Vignettes
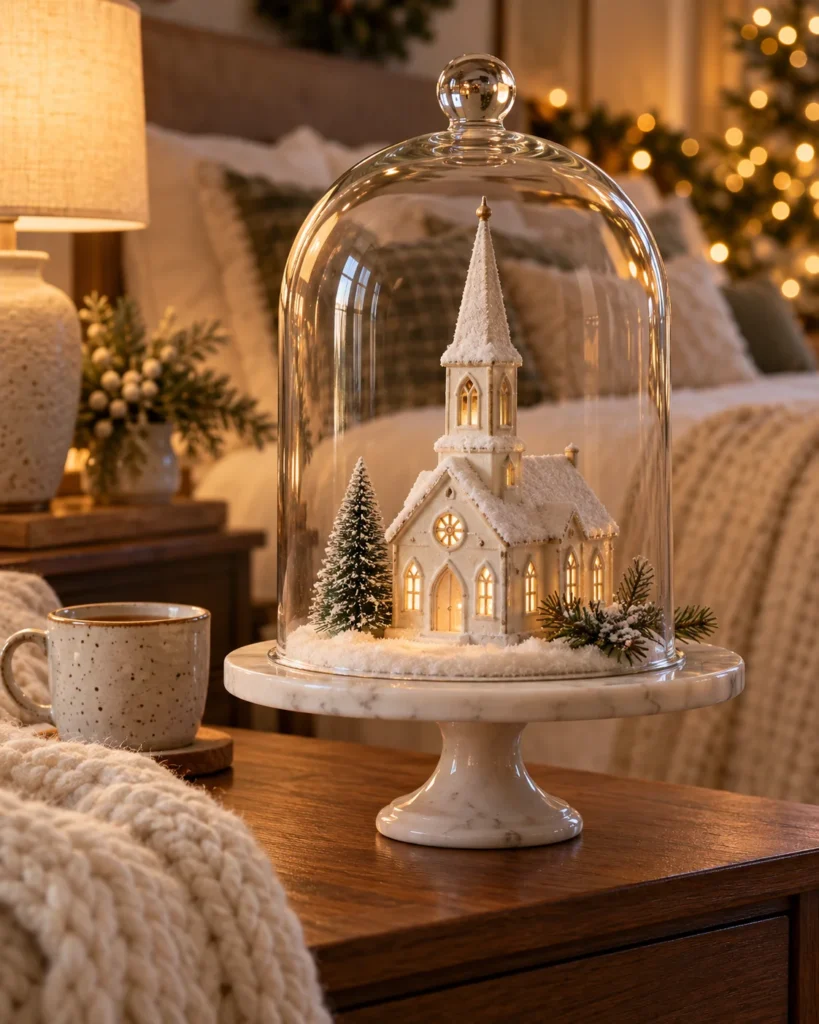
Feels like · a museum piece on display
Instead of one big crowded town, scatter single historic buildings under glass domes across side tables. Each one becomes its own little moment, and dust never settles on the roof.
The Cloche Vibe: Precious, quiet, collected.
The Spacing Rule: Three cloches spread across a room feel curated. Three on one table feel crowded.
Staging Detail: The same cloche trick works as a table centerpiece too, like in these simple Christmas dinner table settings.
Immersive and Grounded Landscapes
These three ideas build a whole scene around the buildings, so the village feels like it has weather, water and woods.
9. The Vintage Beveled Mirror Skating Pond
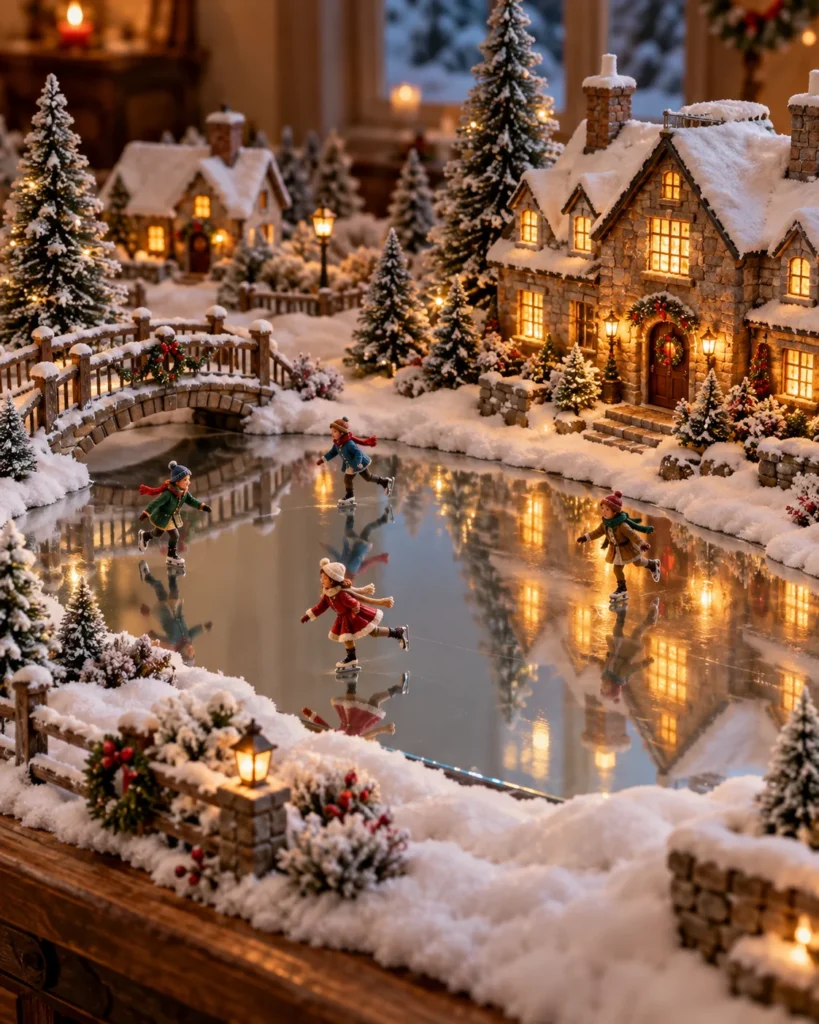
Feels like · the town square on a frozen Saturday
Lay an old frameless beveled mirror flat as the town pond. Bank cotton snowdrifts around the edges, add tiny skaters on the glass and ring it with miniature spruce trees.
The Pond Vibe: Reflective, lively, full of movement.
The Edge Rule: Cover the mirror’s sharp edges completely with batting so nobody gets cut.
Staging Detail: Place a lit building right at the edge so its windows reflect in the ice.
10. The Woven Wicker Basket Tree Nest
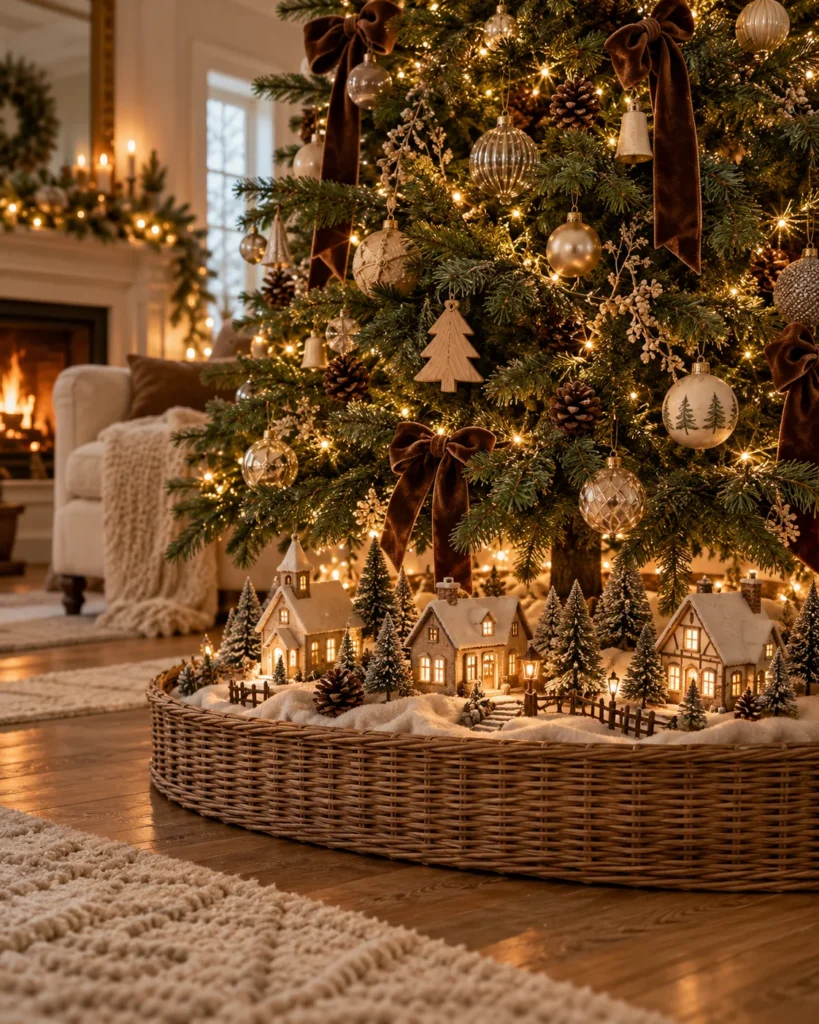
Feels like · a hamlet sheltering under a giant pine
Set a low village right into a broad wicker tree collar at the foot of your Christmas tree. The tree towers over the little houses like a forest. If you go big and playful with the tree, these Grinch Christmas tree ideas pair surprisingly well with a Whoville-style village underneath.
The Nest Vibe: Cozy, low, storybook.
The Pet Rule: Skip this one if your dog or cat sleeps under the tree. Choose the ledge or bookshelf instead.
Staging Detail: Plug the village into the same timer as the tree so they glow together.
11. The Credenza Backlit Skyline
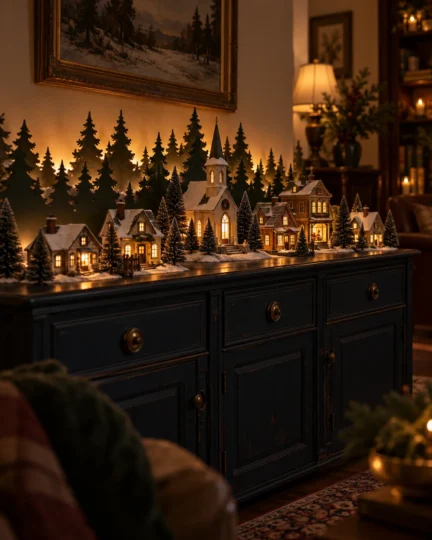
Feels like · a town at the edge of a dark forest
On a dark sideboard, set the buildings in a zigzag instead of a straight line. Behind them, stand a paper cutout of a forest silhouette, and tuck a warm LED strip behind that. The trees glow from behind like dusk.
The Skyline Vibe: Dramatic, deep, cinematic.
The Depth Rule: Leave a few inches between the cutout and the wall so the light can spread.
Staging Detail: Cut two forest layers, one taller in back, for real depth layering.
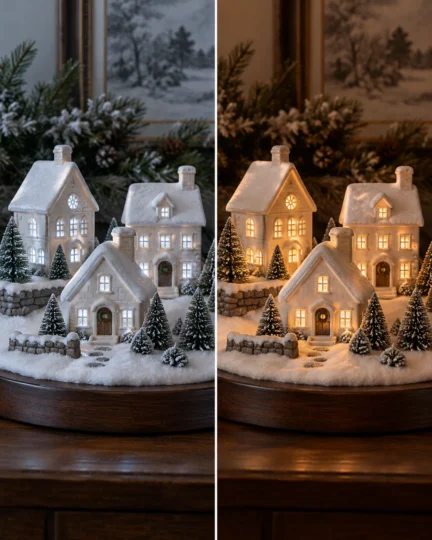
The Daylight Bulb Mistake
Someone once told me she’d replaced every old bulb in her village with bright daylight LEDs because they were cheaper and lasted longer. The houses went from cozy to looking like little offices at night. Same buildings, wrong light. She switched back to warm amber bulbs and said it felt like getting her village back.
Actionable Staging Checklist and Lighting Temperature Guide
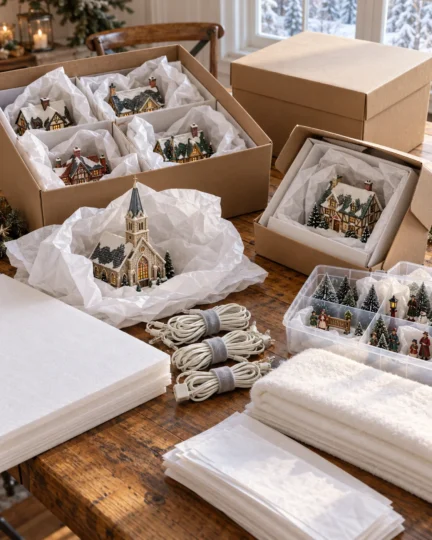
Save this one. It covers what to buy before the season and how to pack up so next year starts easy.
Questions Collectors Ask Me Every Year
Can I mix different village brands?
Yes. Stick to buildings of a similar scale and a similar color story, and use the same snow base under everything. It ties them together.
How many buildings do I need for a good display?
Fewer than you’d think. Three to five buildings staged with height and depth look better than fifteen in a row.
What’s the easiest way to hide the power strip?
Tuck it behind the tallest riser at the back, then drape garland or a snow skirt over it. Leave a little air around it so it doesn’t get warm.
Are village pieces safe around kids?
Ceramic pieces chip and tiny figures are choking hazards. Use high ledges, glass cloches or enclosed lanterns if little ones are around, and skip loose scatter snow.
My favorite part comes late in the evening. The dishes are done, the house is quiet, and you switch off the big lamps one by one. Then it’s just the village, a few dozen tiny windows glowing amber across the room. Nobody needs to say anything. You sit for a minute and let that little town be the brightest thing in the house.