16 Chic & Easy Christmas Wreath Crafts for Kids (Mess-Free Holiday Magic)
Christmas wreath crafts for kids look so easy on Instagram. Somewhere, a mom in a cream sweater is hanging a flawless kid-made wreath while her children smile on cue. Meanwhile, at my kitchen table, there’s glitter in the butter dish and my coffee went cold forty minutes ago.
Here’s the good news. You don’t have to choose between cute and survivable. These 16 ideas look lovely on a door or mantel, use things you already own, and keep the mess to a level your vacuum can actually handle.
Pick one, pour a fresh cup of coffee, and let’s make something you’ll genuinely want to hang.
Quick-Scan Craft Matrix
Use this guide to find the right project for your child’s age and your mess tolerance today.
| Craft Project | Age | Mess | Time | Vibe |
|---|---|---|---|---|
| Torn Paper and Book Page | 4+ | Low | 30 min | Soft vintage neutral |
| Dried Orange and Rosemary Hoop | 5+ | Low | 25 min | Scandi organic |
| Fingerprint Holly Keepsake | 2+ | Medium | 15 min | Minimal framed art |
| Clothespin Card Display | 5+ | Very Low | 30 min | Functional chic |
| Chunky Knit Yarn | 6+ | Very Low | 45 min | Textured Scandi |
| Gilded Bow-Tie Pasta | 4+ | Medium | 40 min | Metallic classic |
| Sage Handprint | 2+ | Medium | 20 min | Keepsake art |
| Cinnamon and Star Anise Mini Hoops | 5+ | Low | 20 min | Warm cottagecore |
| Felt Eucalyptus and Olive Leaf | 6+ | Low | 40 min | Long-lasting green |
| Puzzle Piece Botanical | 5+ | Low | 35 min | Eco-smart |
| Wool Felt and Pom-Pom Hoop | 3+ | Low | 25 min | Playful winter |
| Foraged Berry and Pinecone | 4+ | Low | 45 min | Nature-walk rustic |
| Ribbon Scrap Tie | 4+ | Zero | 30 min | Boutique texture |
| Cupcake Liner Rosette | 4+ | Low | 30 min | Vintage charm |
| Baked Cinnamon Dough Stars | 3+ | Medium | 1 hr plus drying | Old-world kitchen |
| Tonal Button Mosaic | 5+ | Low | 40 min | Heirloom |
Before You Start: Kid Craft Safety
- Grown-up jobs: the oven, hot glue, wire cutting and anything with a craft knife.
- Small parts: buttons, beads, pom-poms and star anise are choking hazards for children under 3. Keep them for older kids and supervise.
- Paint and glue: choose products labeled washable and non-toxic for little hands.
- Not for snacking: cinnamon dough, painted pasta and foraged berries look tempting but should never be eaten.
16 Easy and Chic Christmas Wreath Crafts for Kids
1. Torn Paper and Vintage Book Page Wreath
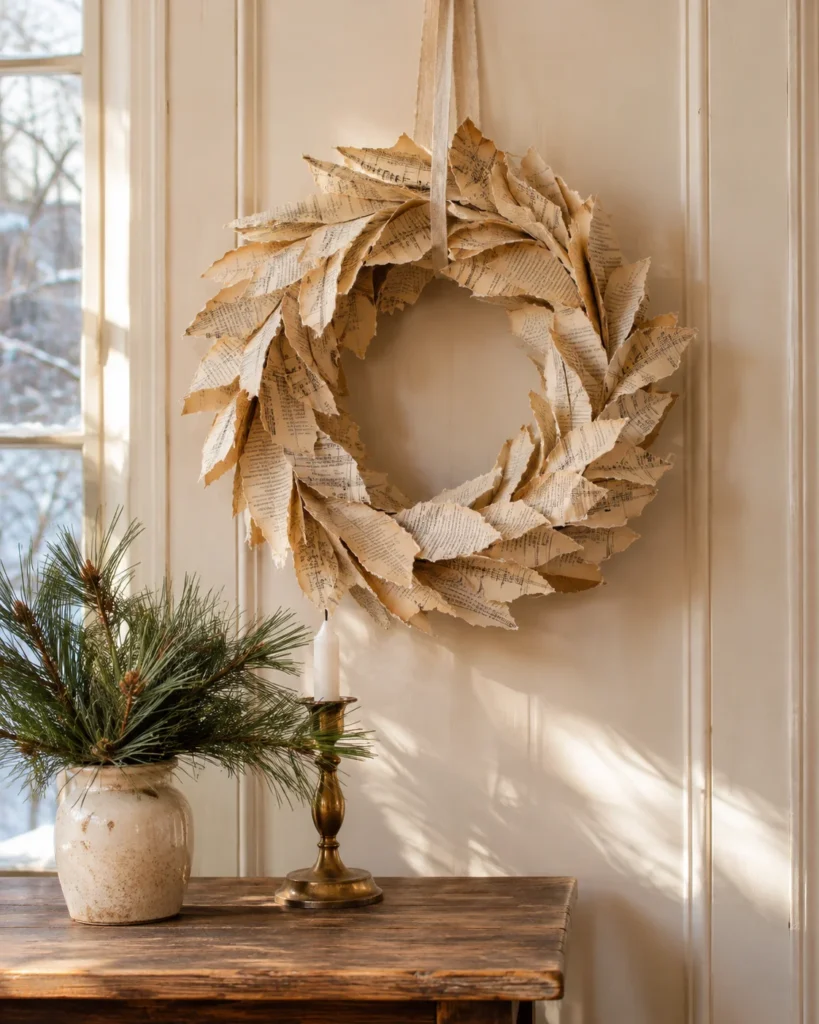
Feels like · a charming Parisian bookshop
Aesthetic Snapshot: A soft, feathery ring of creamy paper layers.
Materials:
- Cardboard ring cut from a cereal box
- Old book pages, sheet music or brown kraft paper
- Glue stick
- Twine or a strip of raw linen for hanging
Steps:
- Let the kids tear pages into long strips and curly scraps. Tearing is the fun part, and it creates that soft, organic edge scissors never will.
- Glue the pieces around the ring in overlapping layers, working in one direction so it looks like delicate feathers.
- Add a second, looser layer on top for dimension, then tie on a twine hanging loop.
Bliss Tip: Hand out paper inside a rimmed baking sheet. Every stray scrap stays contained, and cleanup is as simple as tipping the tray into your recycling bin.
2. Dried Orange and Fresh Rosemary Hoop
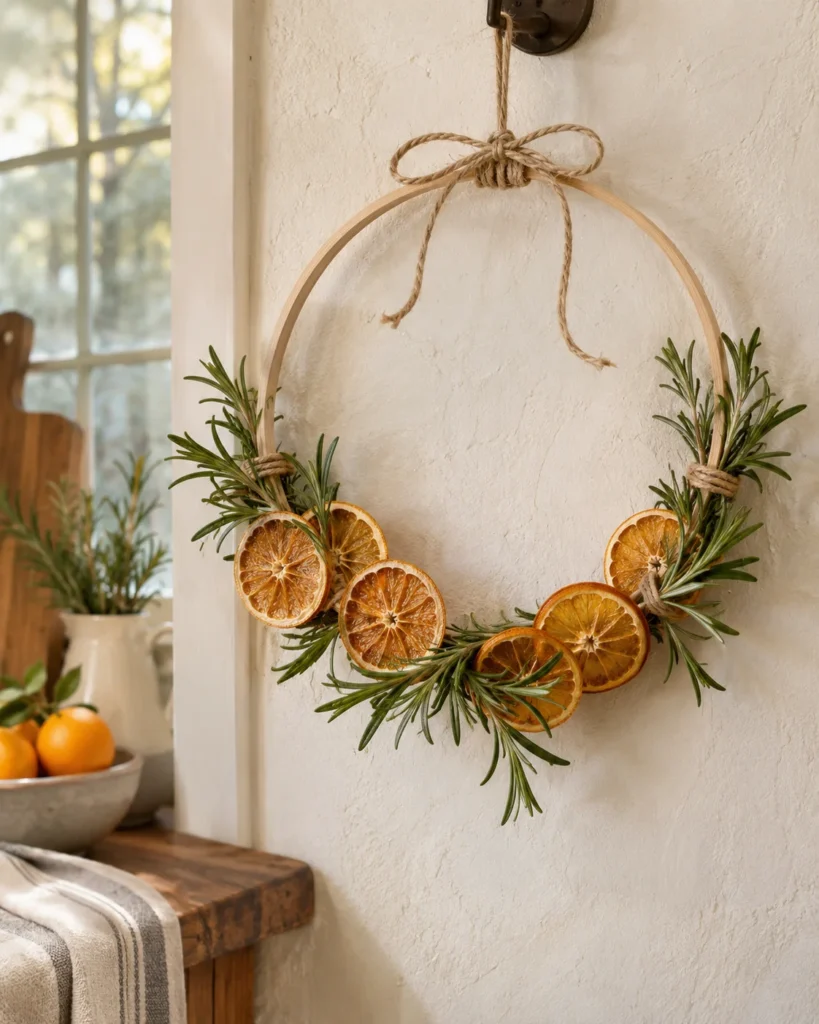
Feels like · a Swedish bakery in December
Aesthetic Snapshot: A slim brass or wooden hoop dotted with glowing citrus slices and fragrant greens.
Materials:
- Embroidery hoop or metal macramé ring
- 2 to 3 oranges, sliced thin and dried
- Fresh rosemary sprigs
- Floral wire or thin twine
Steps:
- A grown-up bakes the orange slices at 200°F / 95°C for 3 to 4 hours, flipping every hour, until fully dry. Let them cool completely.
- Kids lay fresh rosemary sprigs along one curve of the hoop and wrap them tightly with twine.
- Thread twine through two or three orange slices and tie them in a neat cluster over the greenery.
Bliss Tip: Decorate only the bottom third of the hoop. That off-center, minimal look reads instantly modern and halves the assembly work for tiny hands.
3. Fingerprint Holly Keepsake Wreath
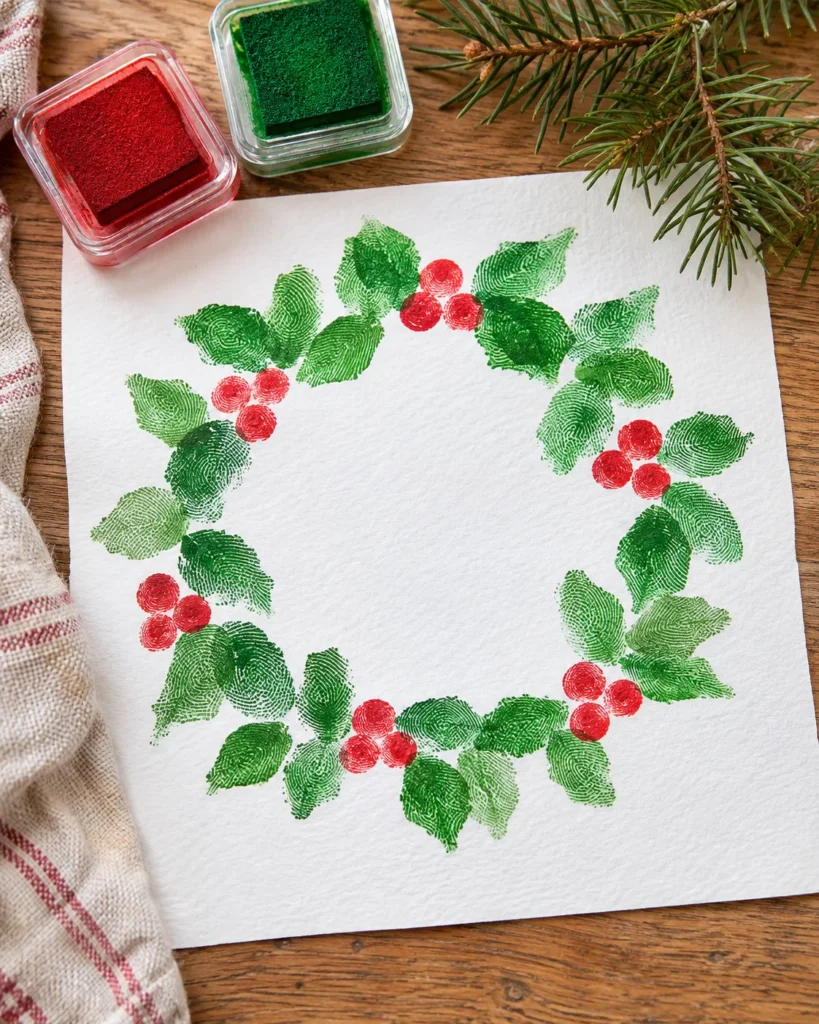
Feels like · a memory you’ll frame forever
Aesthetic Snapshot: A delicate ring of tiny green fingerprint leaves and red dot berries on crisp paper.
Materials:
- Heavy white cardstock or watercolor paper
- Green and red washable ink pads
- A small plate or bowl to trace a circle
- Fine-tip black archival pen
Steps:
- Lightly trace a pencil circle on your paper using the plate as a guide.
- Have your child press green fingertips around the line in slight V shapes so they look like holly leaves.
- Add pinky-finger red prints in clusters of three for berries, then write their name and the year underneath.
Bliss Tip: Washable ink pads beat acrylic paint every time. Less drip, instant drying, and a quick baby wipe cleans fingers in ten seconds flat.
4. Neutral Wooden Clothespin Card Display Wreath
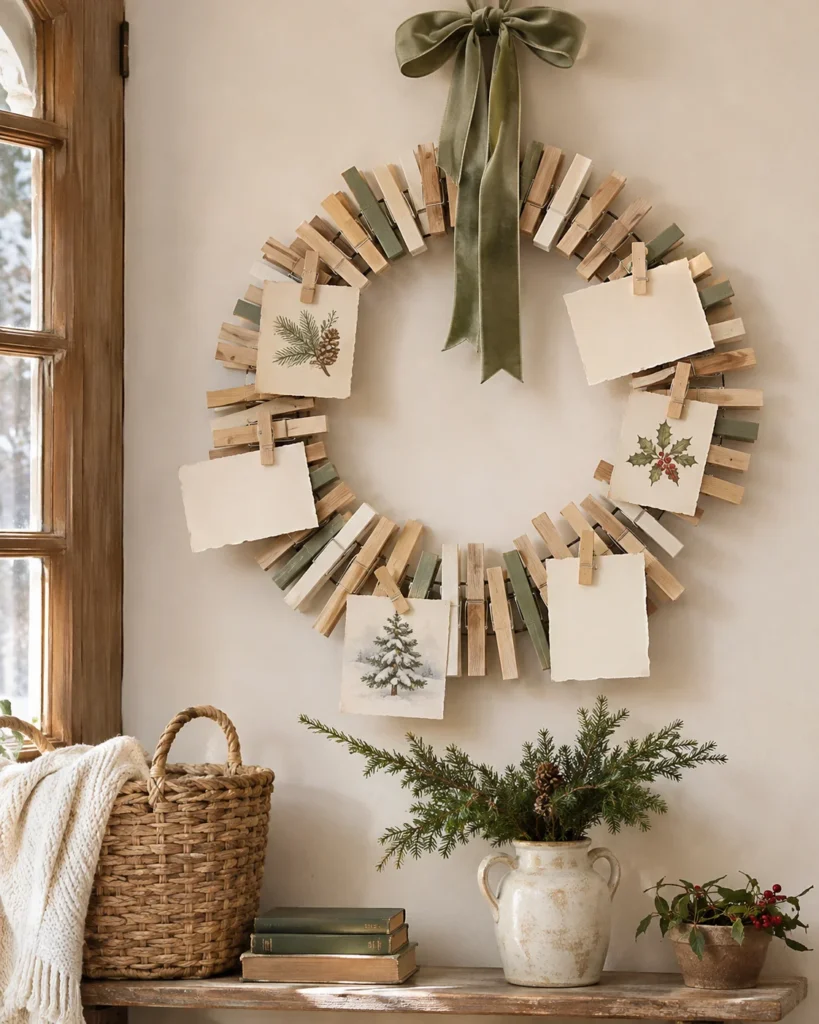
Feels like · a cozy cabin mail corner
Aesthetic Snapshot: A clean natural-wood ring that doubles as a hanging station for Christmas cards, keeping kitchen counters clear.
Materials:
- 30 to 40 wooden clothespins
- A wire wreath frame or sturdy embroidery hoop
- Cream or sage chalk paint, optional
- Velvet or grosgrain ribbon for hanging
Steps:
- For subtle color, paint a handful of clothespins and let them dry ahead of time.
- Kids clip the clothespins around the frame, alternating raw wood and painted ones.
- Hang the wreath and clip holiday cards onto the outward-facing pins as mail arrives through December.
Bliss Tip: This one is completely mess-free, ideal for toddlers who just want to clip and unclip things. Hang it near your entryway so greeting cards become part of the decor.
The Wreath That Wasn’t Perfect
A friend’s five-year-old once made a paper wreath that was, honestly, more of an oval. One side was thick with layers, the other had a bare patch where he’d gotten bored. She almost tucked it in a drawer. Instead she hung it on the pantry door. Six years later, it’s the first thing he asks about every December. The lopsided ones are the ones you keep.
5. Cozy Chunky Knit Yarn Wreath
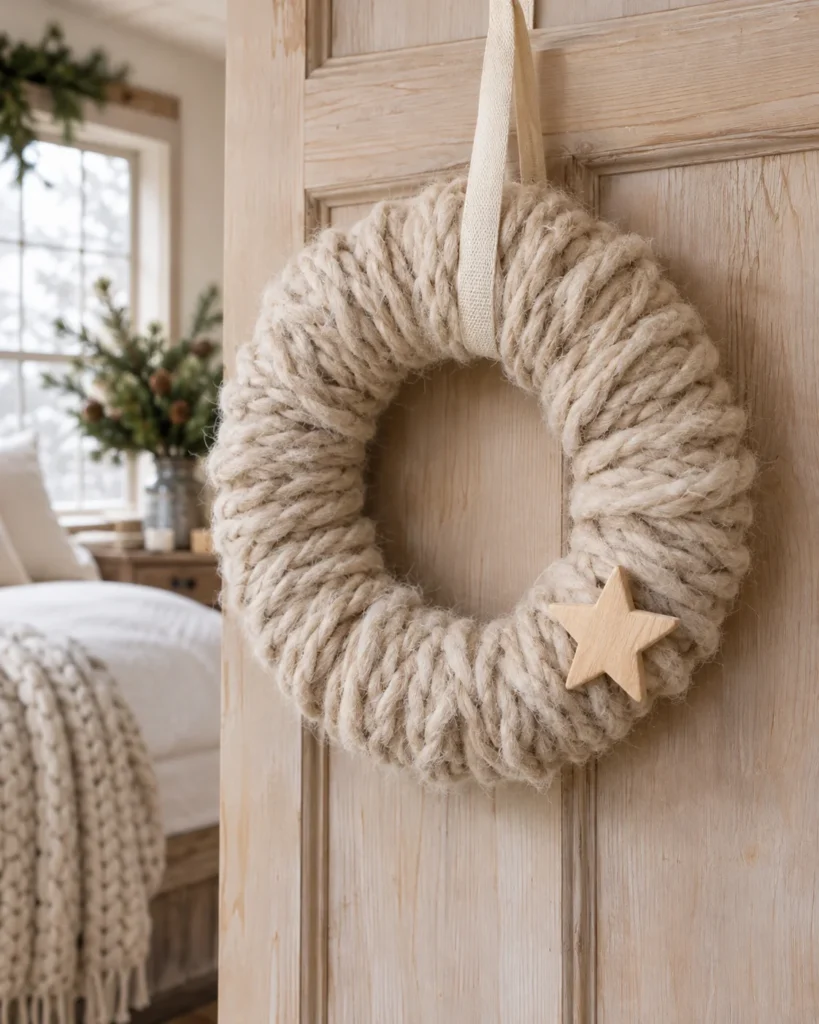
Feels like · your favorite oversized winter sweater
Aesthetic Snapshot: A plush, oatmeal-colored ring that looks like a cozy knit wrapped around the door.
Materials:
- Foam or dense cardboard wreath ring
- Chunky wool or chenille yarn in cream, oat or heather grey
- Painter’s tape to hold the first wrap
- One small wooden bead or felt star
Steps:
- Tape the yarn tail to the back of the wreath form.
- Kids wind the yarn around the ring, keeping each loop close to the last. It’s surprisingly calming for kids and parents alike.
- Tuck the end securely in the back, then add a simple wooden star off to one side.
Bliss Tip: Wind the yarn into a compact ball before starting so it doesn’t roll away under the sofa. For younger kids, hand them a short length at a time and let them wrap that section only.
6. Gilded Bow-Tie Pasta Wreath
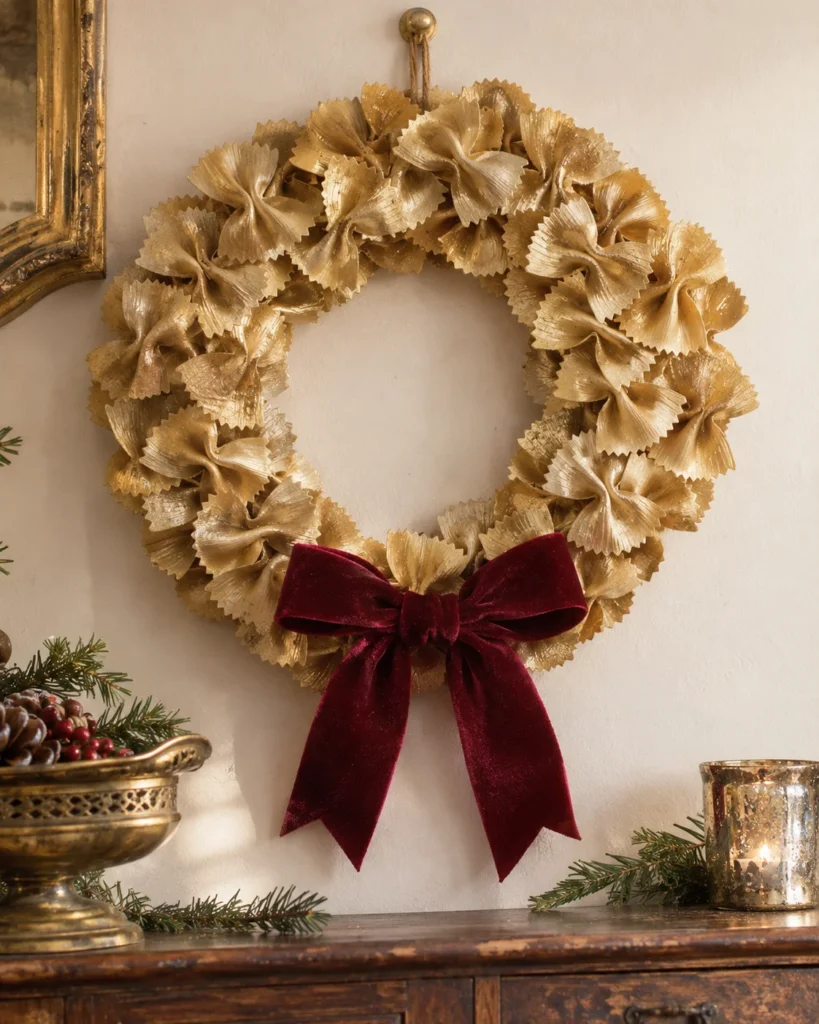
Feels like · grandma’s vintage brass ornaments
Aesthetic Snapshot: The nostalgic preschool pasta wreath, grown up with a warm champagne-gold finish.
Materials:
- 1 box of farfalle bow-tie pasta
- Gold or brass non-toxic acrylic paint
- Paper plate ring with the center cut out
- School glue or tacky craft glue
Steps:
- Paint the pasta ahead of time. Put raw pasta into a sealed zip-top bag with a squirt of paint and let the kids shake it. Dry on wax paper.
- Kids apply rings of glue along the paper plate and press the dry pasta bows close together.
- Fill any gaps with a second layer, let it dry flat, and finish with a velvet ribbon bow at the base.
Bliss Tip: The bag-shake method gives full, even coverage with no gold-painted hands or messy brushes.
7. Tone-on-Tone Sage Handprint Wreath
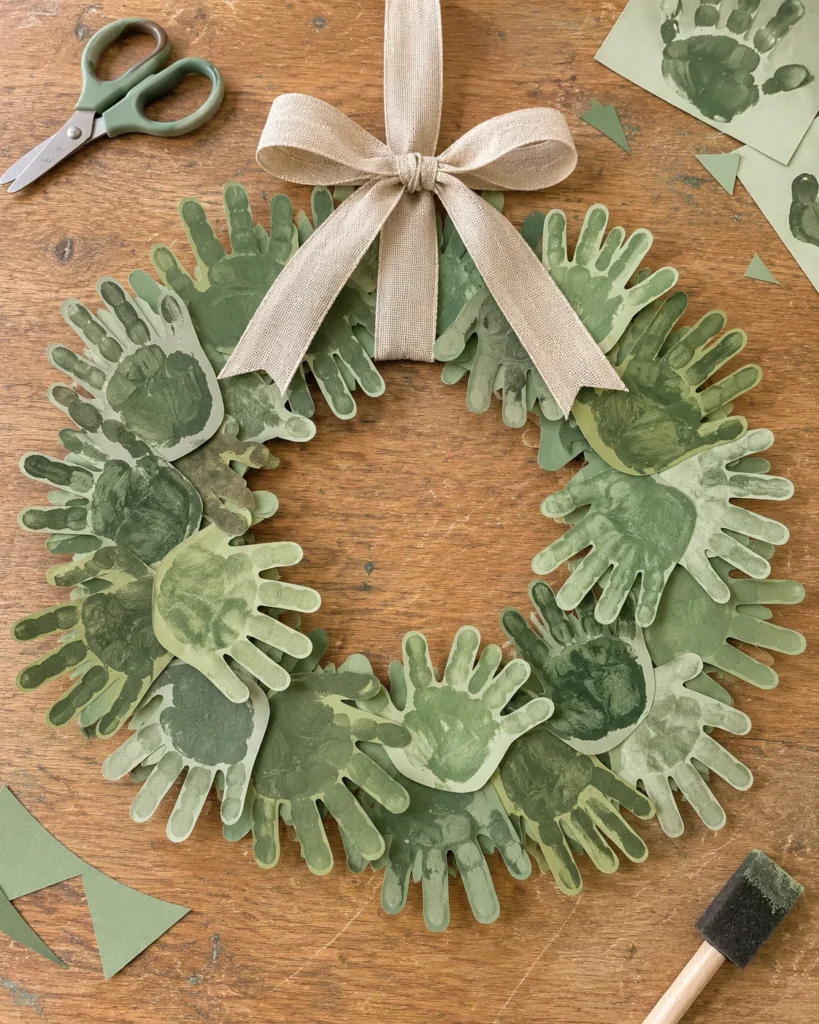
Feels like · boutique botanical wallpaper
Aesthetic Snapshot: Soft sage handprints layered on muted eucalyptus tones.
Materials:
- Pale sage and dusty olive cardstock
- Medium-green washable tempera paint
- Paper plate and foam sponge brush
- Safety scissors and a glue stick
Steps:
- Brush paint lightly onto your child’s hand with a foam brush instead of dipping their palm, for crisp prints.
- Stamp 8 to 10 handprints onto cardstock and let them dry.
- Cut them out and glue them in a circle, palms overlapping and fingers pointing outward. Finish with a pale linen ribbon.
Bliss Tip: Keep damp washcloths right beside the workstation. That short walk between the craft table and the sink is where most paint accidents happen.
8. Rustic Cinnamon Stick and Star Anise Mini Hoops
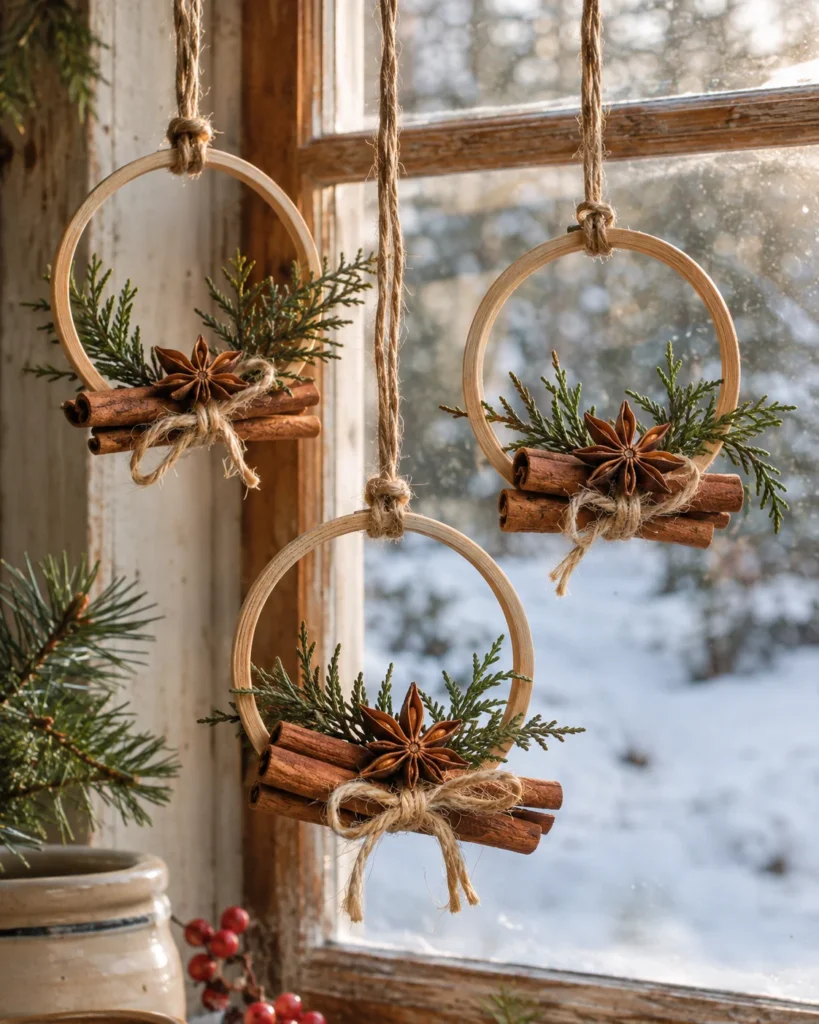
Feels like · a spice market at Christmas
Aesthetic Snapshot: Palm-sized wooden hoops with fragrant cinnamon bundles, hung in multiples like little spiced charms.
Materials:
- 3 to 4 inch natural wooden craft rings
- Whole cinnamon sticks
- Whole star anise pods
- Jute twine and glue dots
Steps:
- Kids stack two cinnamon sticks together and tie them around the center with twine.
- Tie the bundle securely to the bottom curve of the wooden ring.
- Press one star anise over the twine knot with a glue dot, and tie a hanging loop at the top.
Bliss Tip: Make three or four to hang from window latches or cabinet knobs. Extra cinnamon bundles look gorgeous tucked into a centerpiece too, like these Christmas dough bowl decorating ideas.
The Craft Table That Took Over the House
One December I set out every supply at once. Paint, pasta, pom-poms, glue, ribbon. Within twenty minutes, three kids were working on four projects and nothing was finished. The next weekend I put out supplies for one wreath only, on one tray per child. Everyone finished, the cleanup took five minutes, and nobody cried. One project per sitting is the whole secret.
9. Organic Felt Eucalyptus and Olive Leaf Wreath
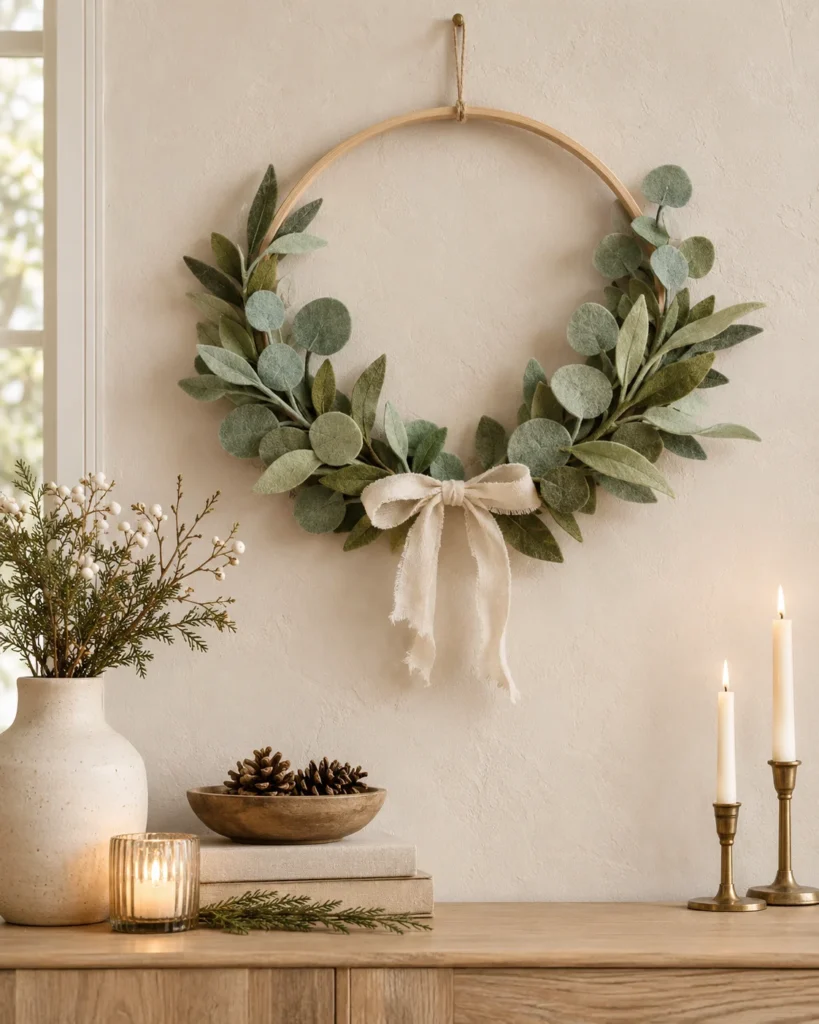
Feels like · a greenhouse that never wilts
Aesthetic Snapshot: Soft felt leaves in muted botanical tones that look surprisingly real, without dropping needles on your rugs.
Materials:
- Felt sheets in sage, olive and muted mint
- Cardstock leaf template
- Kid-safe scissors
- Embroidery hoop and tacky craft glue
Steps:
- Trace leaf templates onto felt. Older kids can cut while younger ones sort leaves by shade.
- Dab glue on the stem ends and press leaves around the hoop in an overlapping pattern.
- Leave the top third of the hoop bare for an airy Scandi look, and finish with a torn muslin bow.
Bliss Tip: Craft felt doesn’t fray, shed or wilt, so you can pack this flat in tissue paper and hang it again year after year.
10. Upcycled Puzzle Piece Botanical Wreath
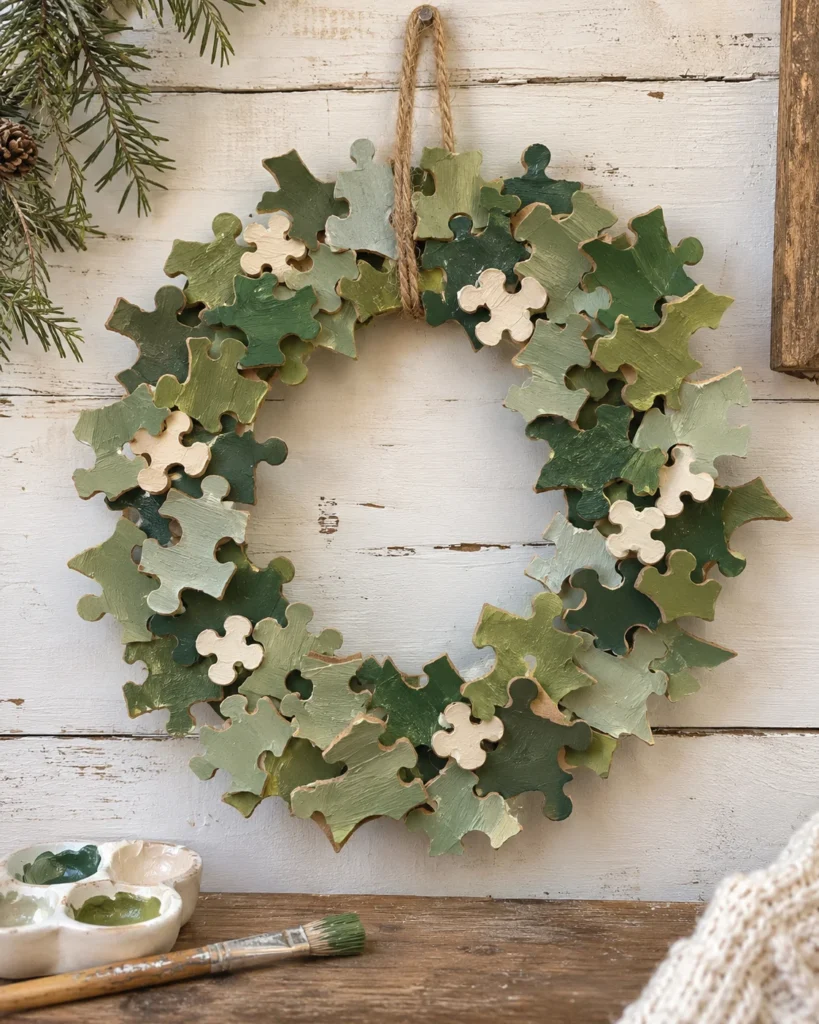
Feels like · a mossy forest floor
Aesthetic Snapshot: A textured moss-green ring made from that puzzle missing three corner pieces you never had the heart to toss.
Materials:
- Old cardboard puzzle pieces
- Forest green, sage and ivory acrylic paints
- Cardboard ring cut from a delivery box
- School glue
Steps:
- Paint puzzle pieces in mixed greens on a tray the evening before.
- Once dry, kids glue pieces over the cardboard ring, angling edges outward like leaves.
- Add a few ivory pieces as winter berries, and tie with natural jute rope.
Bliss Tip: Paint the pieces the night before. On craft day it’s all gluing, with no wet paint, no smears and instant results.
11. Wool Felt and Snowball Pom-Pom Hoop
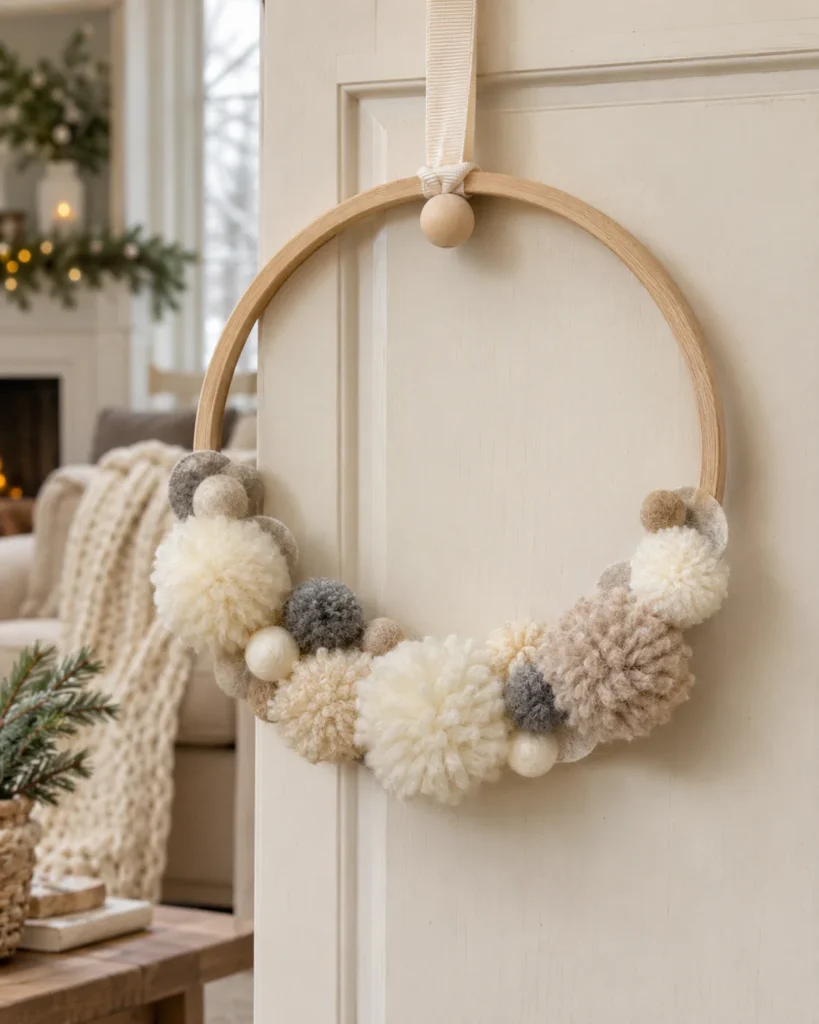
Feels like · a little Scandinavian snowdrift
Aesthetic Snapshot: Cloud-soft clusters of ivory and oatmeal pom-poms that kids love to touch.
Materials:
- Natural wood embroidery hoop
- Wool pom-poms in cream, off-white and heather grey
- Small felt circles for backing
- Tacky craft glue
Steps:
- Glue 3 to 4 felt circles along the lower curve of the hoop as a base.
- Kids dip pom-poms into a shallow puddle of glue and press them tightly onto the felt, mixing sizes.
- Add one small wooden bead at the top and hang with a cream grosgrain ribbon.
Bliss Tip: Pom-poms bounce everywhere. Sort them by size in a muffin tin so they can’t roll across the rug, and keep them away from children under 3.
12. Foraged Winter Berry and Pinecone Wreath
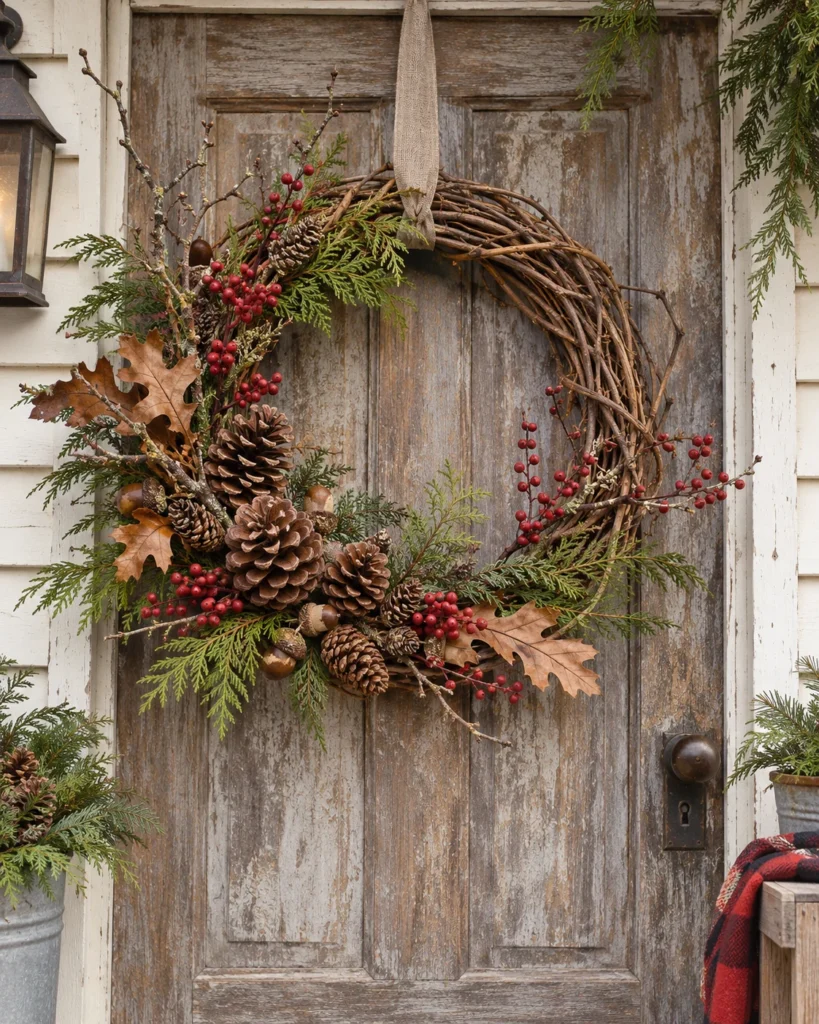
Feels like · a family walk through the winter woods
Aesthetic Snapshot: A woodland wreath of wild pinecones and winter sprigs that turns an afternoon walk into home decor.
Materials:
- Grapevine wreath form from a craft or hardware store
- Foraged pinecones, acorn caps and dry twigs
- Faux red berry picks
- Floral paddle wire or twine
Steps:
- Head outside on a crisp afternoon with paper bags and let the kids gather nature treasures.
- Back home, brush off dirt and let damp cones dry on a towel. A grown-up can bake cones at 200°F / 95°C for about 30 minutes to clear out any bugs.
- Kids weave twigs into the flexible grapevine, while an adult wires pinecones and berries into place.
Bliss Tip: Use faux berries if you have pets or curious toddlers, since many wild berries are toxic. This wreath looks striking above a fireplace, styled with layered greenery like the looks in these Christmas mantel decorating ideas.
13. Velvet and Linen Ribbon Scrap Tie Wreath
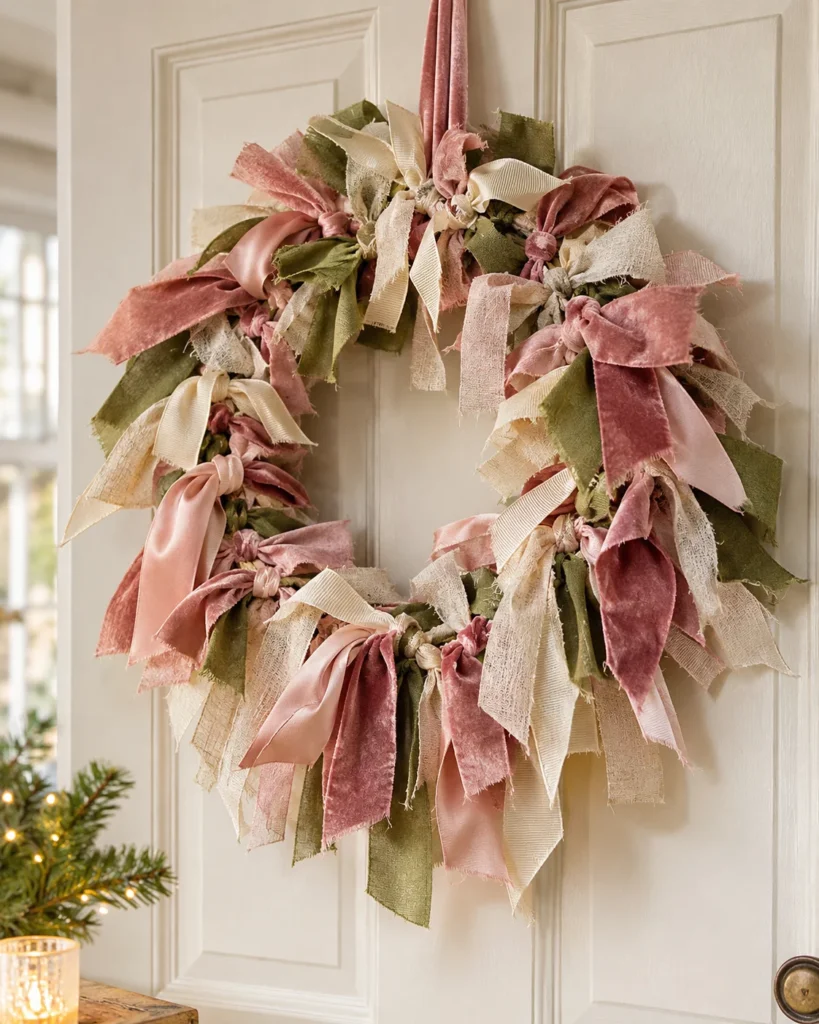
Feels like · an upscale boutique window
Aesthetic Snapshot: A fluttery ring of knotted ribbons in antique blush, moss and linen.
Materials:
- Wire wreath frame or a single embroidery hoop ring
- Ribbon remnants cut into 6 to 7 inch strips
- A mix of velvet, raw linen, cotton twill and satin ribbons
Steps:
- Pre-cut a basket full of mixed ribbon strips.
- Kids tie each strip around the ring with a double knot, sliding them snugly together.
- Keep going until the ring is completely covered, then trim any uneven ends.
Bliss Tip: No glue, no paint, zero cleanup. It’s perfect for chilly afternoons when you can’t face a craft mess, and it lies flat, which suits small apartment doors.
14. Fluted Cupcake Liner Rosette Wreath
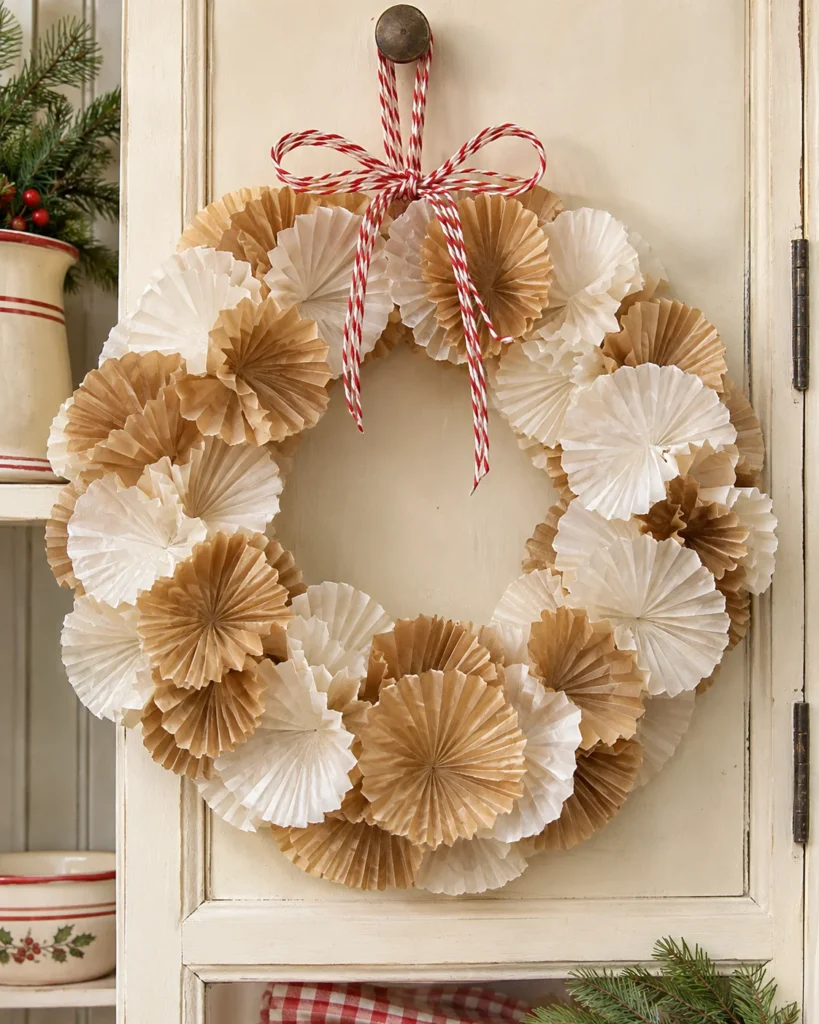
Feels like · a 1950s holiday kitchen
Aesthetic Snapshot: Pleated ruffles in kraft and white paper with sweet vintage charm.
Materials:
- Kraft and white paper cupcake liners
- Cardboard or paper plate ring
- Glue dots or a glue stick
- Red and white baker’s twine
Steps:
- Kids flatten each liner, then pinch the center to make a ruffled rosette.
- Press a glue dot onto the pinched center and stick rosettes around the ring, alternating colors.
- Tie a baker’s twine bow at the top for a pop of candy-cane contrast.
Bliss Tip: Use pre-cut glue dots instead of liquid glue. Kids just press and peel, and nothing drips or soaks through the thin paper.
15. Baked Cinnamon Dough Stars Wreath
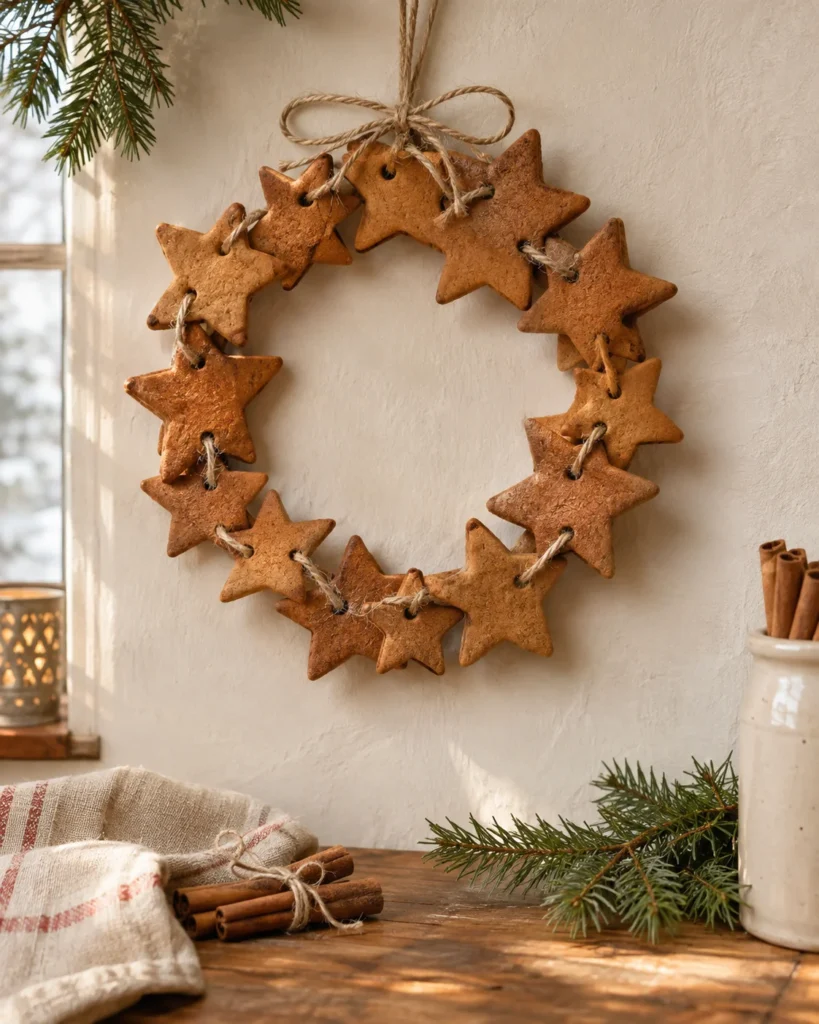
Feels like · an old-world kitchen full of spice
Aesthetic Snapshot: Warm, gingerbread-toned stars strung on twine that make the whole house smell like cinnamon.
Materials:
- 1 cup ground cinnamon
- ¾ cup smooth unsweetened applesauce
- 2 tablespoons school glue
- Mini star cookie cutter, a drinking straw and jute twine
Steps:
- Mix cinnamon, applesauce and glue into a smooth dough. Kids love kneading and rolling it flat.
- Cut out stars and poke a hanging hole with a straw. A grown-up bakes them at 200°F / 95°C for about 2 hours, or let them air-dry for about 48 hours.
- Thread the stars onto twine and tie the ends together into a fragrant wreath.
Bliss Tip: Roll the dough between two sheets of parchment paper. Your counters stay clean and the stars lift off easily. Remind little ones that even though they smell delicious, they are not edible.
16. Earthy Tonal Button Mosaic Wreath
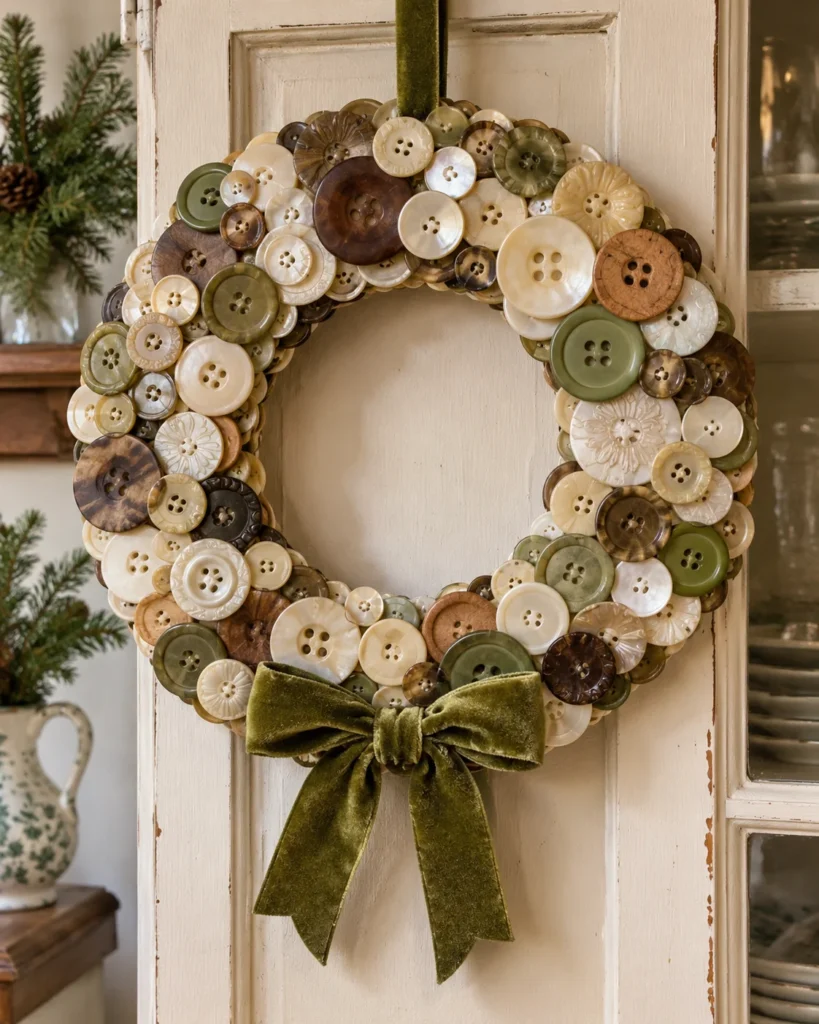
Feels like · grandma’s antique sewing box
Aesthetic Snapshot: A vintage-inspired mosaic of mother-of-pearl, olive and horn buttons that looks like an heirloom.
Materials:
- Cardboard ring base
- Mixed buttons in warm neutrals, greens and cream
- Tacky craft glue
- Mini velvet bow
Steps:
- Sort buttons by size and color into small bowls. Sorting is great fine motor practice for little fingers.
- Kids apply glue and puzzle buttons onto the ring, adding smaller buttons on top to cover gaps.
- Let it dry flat overnight and add a muted velvet bow at the bottom.
Bliss Tip: Keep this for kids 5 and up, since buttons are a choking risk. It looks stunning on a dining room cabinet, paired with one of these simple Christmas dinner table settings.
The 5-Minute Post-Craft Reset
Crafting with your kids shouldn’t mean spending your evening scraping dried paste off table legs. These three habits keep cleanup easy.
Tray First, Table Second
Give each child a rimmed baking tray as their craft station. When you’re done, tip the scraps straight into the bin before wiping the table.
Baby Wipes and a Lint Roller
Unscented wipes handle paint on hands and wood in seconds. A sticky lint roller picks up yarn fluff and paper dust from clothes.
One Holiday Craft Bin
Keep leftover ribbon, wire and pom-poms in one labeled tote, so you’re ready for the next snowy afternoon.
Frequently Asked Questions
How do we hang kid-made wreaths without damaging doors or walls?
Use clear removable adhesive hooks rated for light weights, or an over-the-door hanger. Loop a wide ribbon over the hook so the cardboard never rubs directly against painted surfaces.
What is the best mess-free glue for young kids?
Glue dots and glue tape rollers work brilliantly for ages 3 to 6. They stick right away with no spills, no sticky fingers and no puddles on the table.
Which of these crafts will survive until next Christmas?
The felt leaf wreath, ribbon tie wreath, clothespin card holder, button mosaic and chunky yarn wreath can be packed flat in tissue paper and reused for years. Dried oranges and dough stars are best enjoyed as one-season treasures.
What is the easiest Christmas wreath craft for toddlers?
The fingerprint holly wreath and the clothespin card wreath. Both work for kids as young as 2, take about 15 to 30 minutes and involve no small parts or scissors.
Your child’s finished wreath might be a little lopsided. There might be an accidental thumbprint where a neat berry was supposed to go. But honestly, that’s exactly the detail you’ll smile at when you unbox it years from now.
So pick one of these christmas wreath crafts for kids, clear a little space at the table and let them make it their way. The mess is temporary. The memory hangs on the door every December after.