18 Christmas Lights on House Ideas for Easy Curb Appeal
Good christmas lights on house ideas all come back to one feeling. You turn onto your street on a dark December evening, tired from work, and there it is. Your house, glowing warm against the cold. It’s a small thing, but it makes coming home feel like a gift.
Getting there is the hard part. A ball of tangled cords. Numb fingers on a cold ladder. A line that looked straight from the roof but droops in the middle from the street. Then a rainy night trips the outlet and everything goes dark.
Here’s what years of hanging lights teaches you. The houses that look best aren’t the ones with the most lights. They’re the ones with straight lines, the right bulb size and even spacing. Clean beats crowded every time.
Below are 18 ideas that hold up through rain and snow, each with the exact bulbs, clips and spacing to use. Start with the cheat sheet, because it’ll save you money, frustration and a few trips up the ladder.
The Pro Installer’s Cheat Sheet: Clips, Math and Safety
The Roofline Math Formula
Measure every gutter and eave you plan to light, add them up, then use this.
Total feet × 1.0
Total feet × 1.2
Measure outlet to start point
Example: 60 feet of roofline in icicles needs about 72 feet of lights, plus a lead cord to reach the outlet.
The Hardware Rule: Zero Nails, Zero Staples
- All-in-one plastic clips hook onto gutter lips and slide under shingle edges. They’re the workhorse for most houses.
- Shingle tab clips slip under shingles along peaks and rakes without lifting or cracking them.
- Magnetic clips stick to metal fascia and steel gutters with no holes at all.
- Parapet clips clamp onto the top edge of flat-roof walls.
Electrical Load and Breaker Safety
A standard 15-amp, 120-volt outlet can handle 1,800 watts. For lights left on for hours, stay at 80% of that, which is 1,440 watts per circuit. Outdoor outlets should be GFCI protected.
LEDs use a fraction of the power of old incandescent bulbs, so you can run far more lights on one circuit. Still, always follow the “connect no more than” limit printed on each strand’s tag. That rating is about the strand’s wire, not just your breaker.
Weatherproofing Connections
Most rainy-night outages come from water sitting in a plug connection, which trips the GFCI. Snap every connection into an outdoor twist-lock cord protector, or dab a little dielectric grease on the plug prongs before connecting. Keep connections off the ground, propped on a brick or clipped to a railing.
Ladder Safety Before You Climb
- Use the 4-to-1 rule: for every 4 feet of height, set the ladder base 1 foot away from the wall.
- Use a ladder stabilizer so the ladder rests on the wall or roof, not on the gutter.
- Keep three points of contact and never stand on the top two rungs.
- Have a helper hold the base, and never climb in rain, ice or strong wind.
Classic Rooflines and Architectural Highlights
The roofline is what people see from the street. Get this right and everything else is a bonus.
1. The Crisp C9 Warm White Roofline
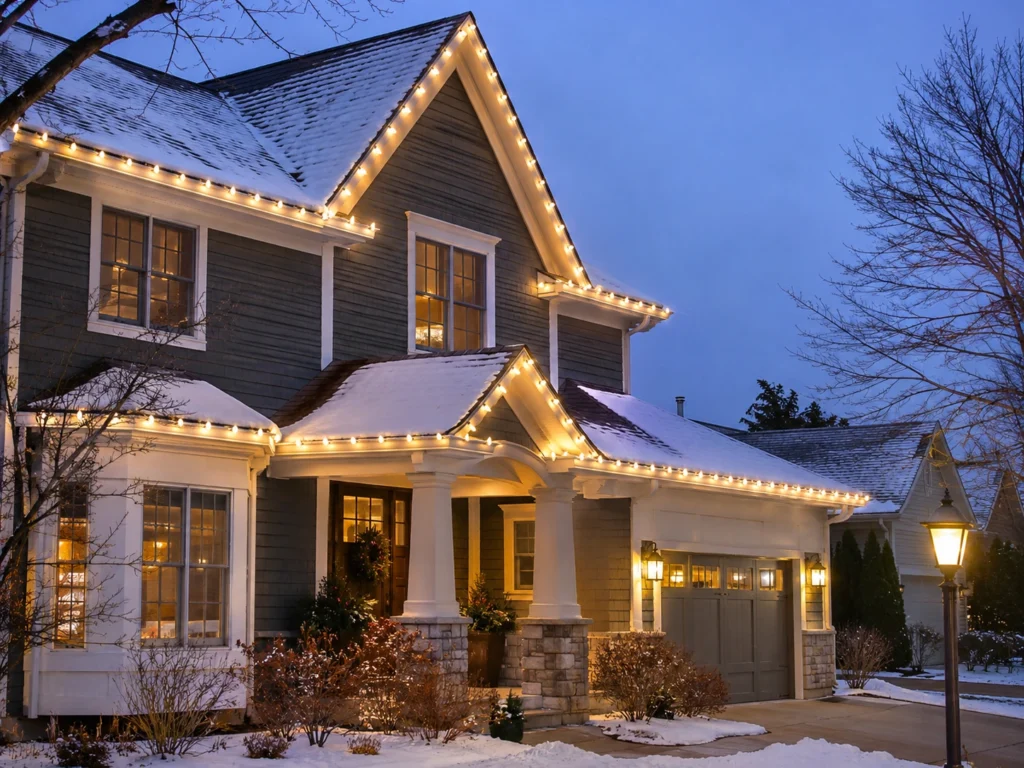
Feels like · a classic New England Christmas card
Concept: One clean row of big warm white bulbs tracing the roofline. It’s the gold standard because it outlines the house beautifully and never goes out of style.
Installation Mechanics:
- Use faceted C9 LED bulbs in warm white, on green wire for green trim or white wire for white trim.
- Space bulbs 12 inches apart.
- Clip every bulb socket so each bulb stands straight up, all facing the same way.
Pro Tip: Use custom-length spool wire and snap-on plugs to cut lines to the exact length of your roof. No extra wire bunched at the ends.
2. Cascading Warm Icicle Lights
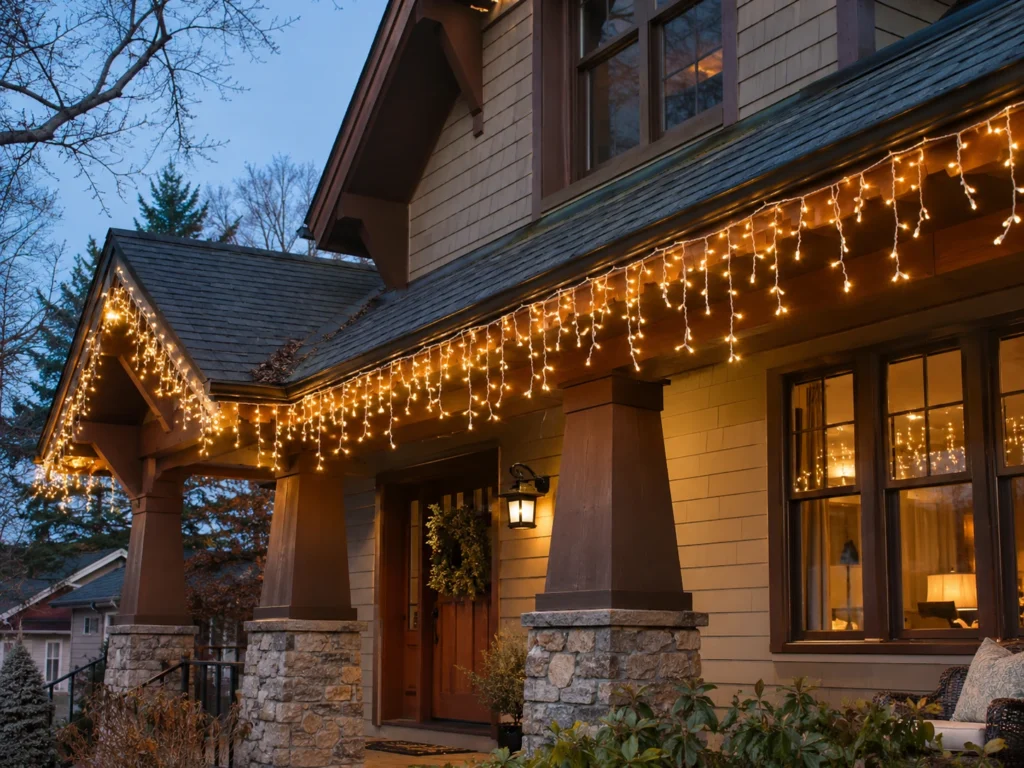
Feels like · fresh snow melting off the eaves
Concept: Strands with drops of different lengths hanging from the eaves. They look like soft, glowing icicles and add movement to a plain roofline.
Installation Mechanics:
- Use warm white mini LED icicle strands with drops of varied length.
- Clip the top wire to the gutter lip or fascia every 12 inches.
- Comb the drops straight down after hanging, so none tangle.
Pro Tip: Hang icicles below a line of C9s for a layered look. The C9s outline, the icicles soften.
3. Framed Dormers and Second-Story Windows
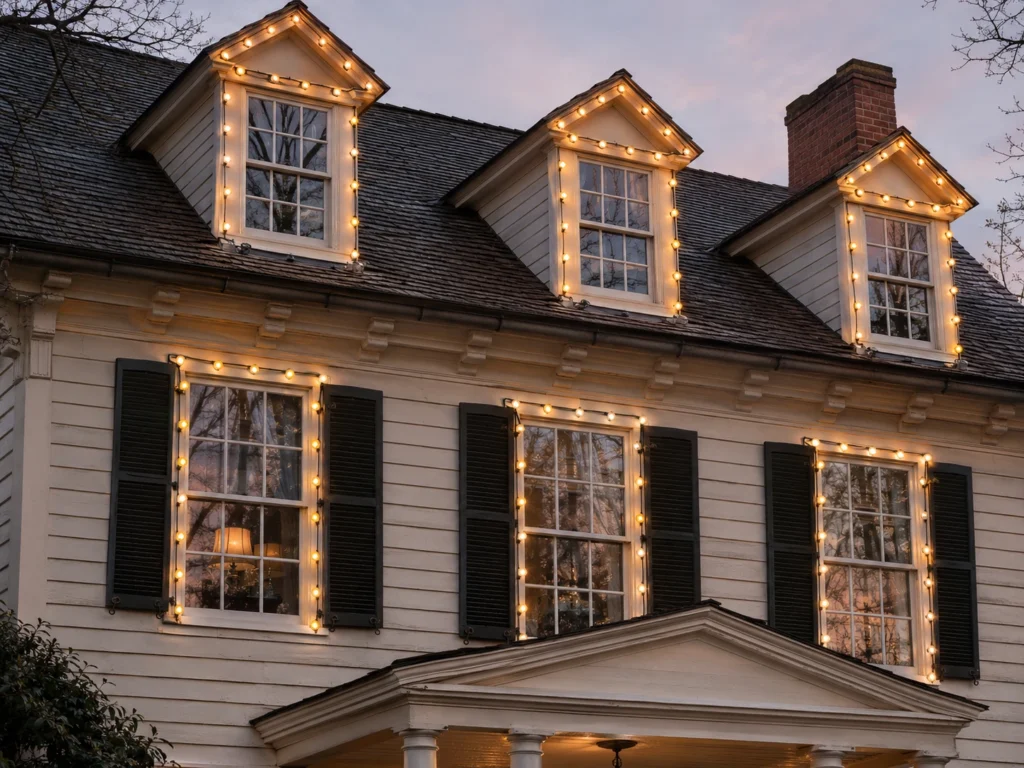
Feels like · a glowing dollhouse
Concept: Outlining dormers and upper windows highlights the shape and symmetry of the house. From the street, it looks like a storybook home.
Installation Mechanics:
- Use C7 LED bulbs, which are smaller and suit window frames better than C9s.
- Space bulbs 8 inches apart.
- Attach with adhesive light clips on vinyl or shingle tab clips along dormer roofs.
Pro Tip: If you can’t safely reach upper windows, light them from inside with window candles instead. Same glowing effect, no ladder.
4. The Two-Tone Nostalgic Roofline
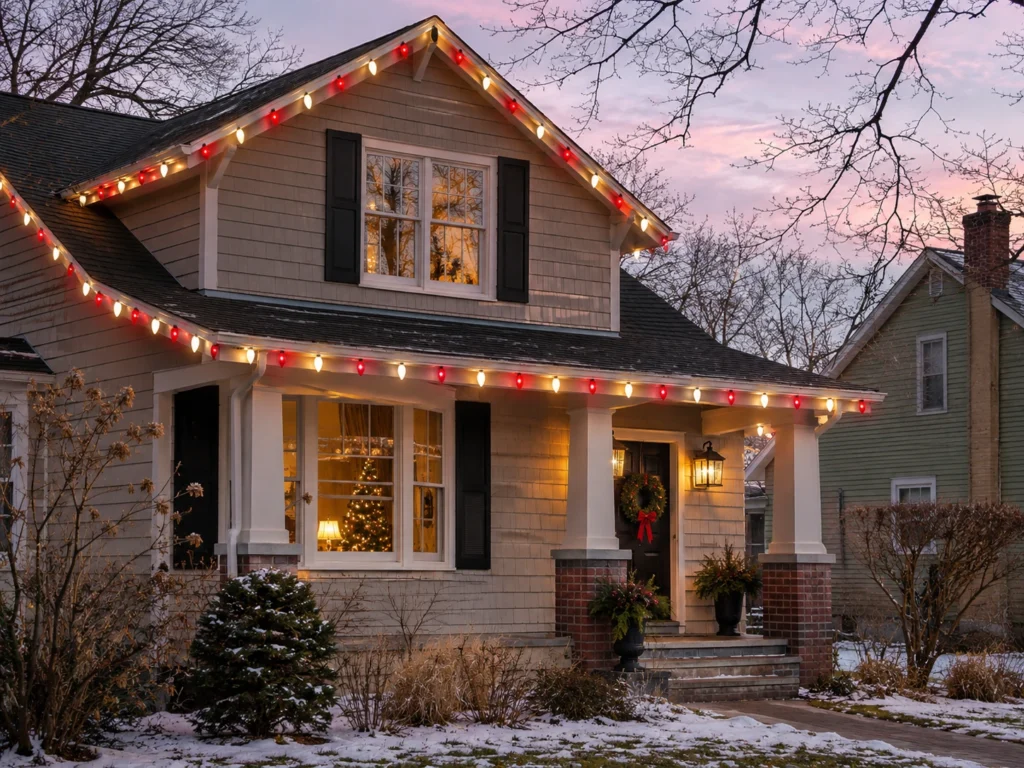
Feels like · a candy cane wrapped around the house
Concept: Warm white bulbs alternating with deep red along the roofline. It’s playful and nostalgic but still clean.
Installation Mechanics:
- Use C9 spool wire with 12-inch spacing.
- Screw in bulbs in a repeating pattern, one warm white, one red.
- Count and lay out bulbs on the ground before you climb.
Budget Hack: Buy bulbs and wire separately. Next year, swap the red bulbs for green or all white without buying new strands.
The Staples in the Gutter Disaster
A neighbor once stapled his lights straight into the fascia and gutters because it was faster. They looked great that year. The next spring, he noticed brown streaks running down the siding. The staple holes had rusted and let water seep behind the gutter, rotting a section of fascia board. The repair cost far more than a bag of plastic clips. He’s been a clip guy ever since.
Porch, Entryway and Column Framing
These are close to the front door, so they’re what guests see up close.
5. The Tight Column Spiral Wrap
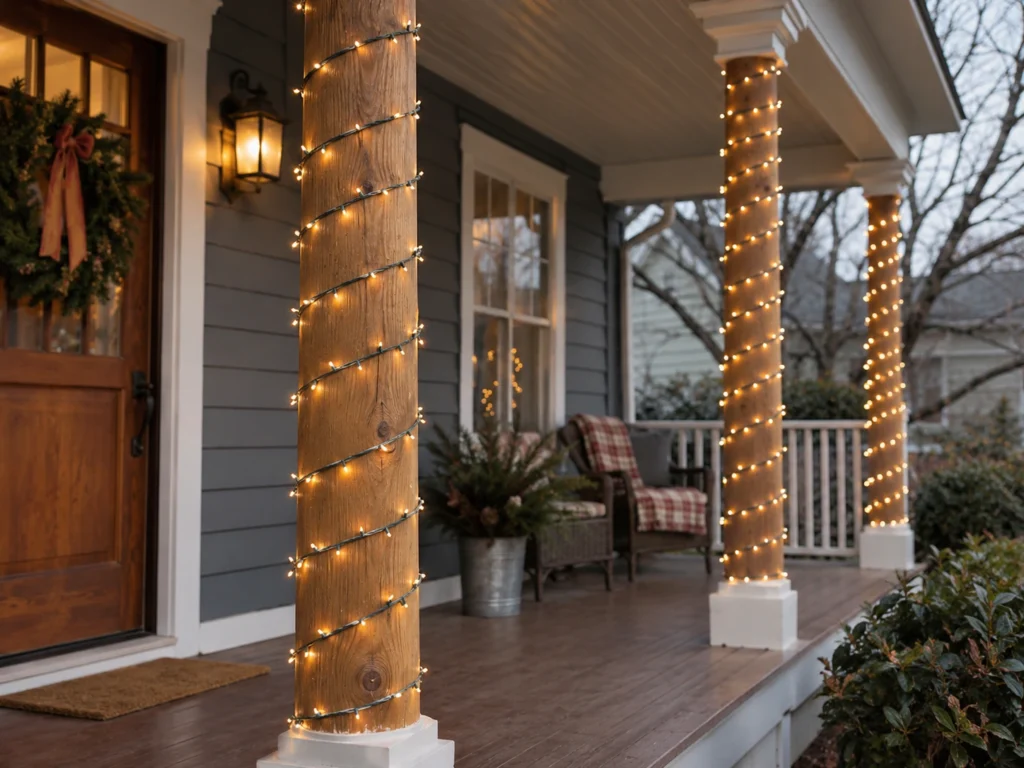
Feels like · glowing candy canes guarding the door
Concept: Mini lights wrapped tightly and evenly around porch columns. They frame the entry and look polished from the street.
Installation Mechanics:
- Use warm white mini LEDs on wire that matches the column color.
- Space each wrap 3 to 4 inches apart.
- Start at the bottom with the plug end, so the cord reaches the outlet.
Pro Tip: Mark the spacing with a strip of painter’s tape running straight down the column. Use it as a guide for every wrap, then peel it off.
6. Illuminated Cedar Garland Porch Railing Swags
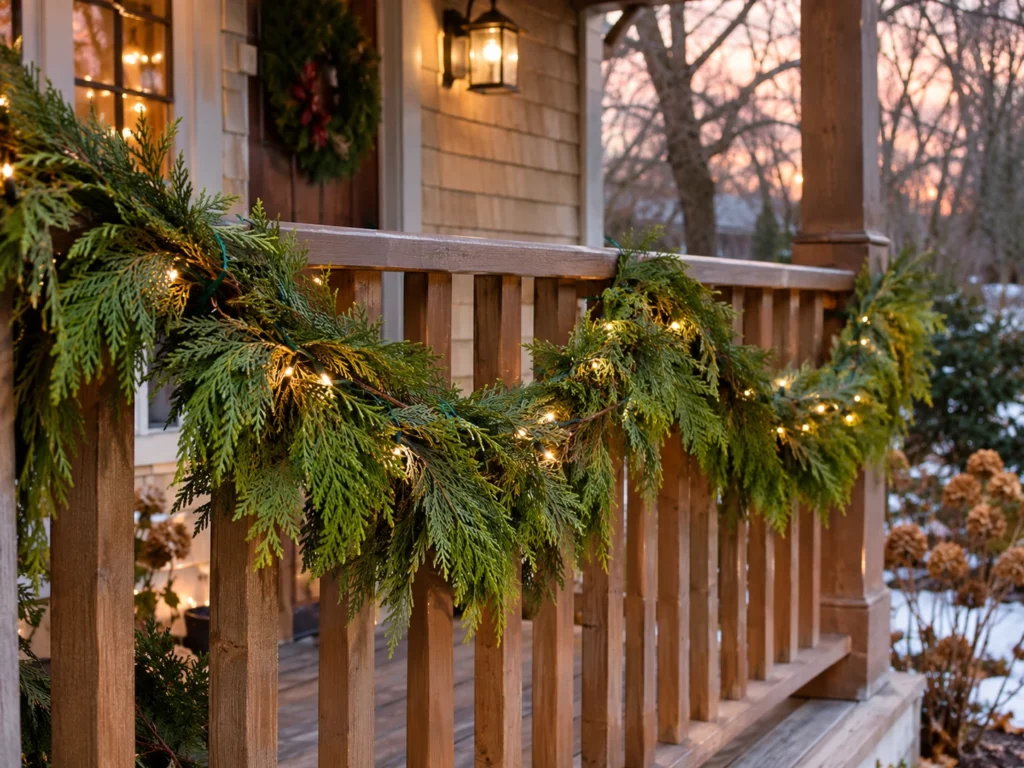
Feels like · a lodge porch on a snowy night
Concept: Thick cedar garland draped along the porch railing with warm fairy lights woven inside. The greenery glows from within.
Installation Mechanics:
- Use outdoor-rated faux cedar and outdoor mini or fairy lights.
- Weave lights deep into the garland before hanging.
- Secure to the railing with zip ties every 2 feet.
Budget Hack: Pre-lit garland saves a step, but separate lights last longer and can be replaced without throwing out the greenery.
7. Front Door Archway With a Lit 36-Inch Wreath
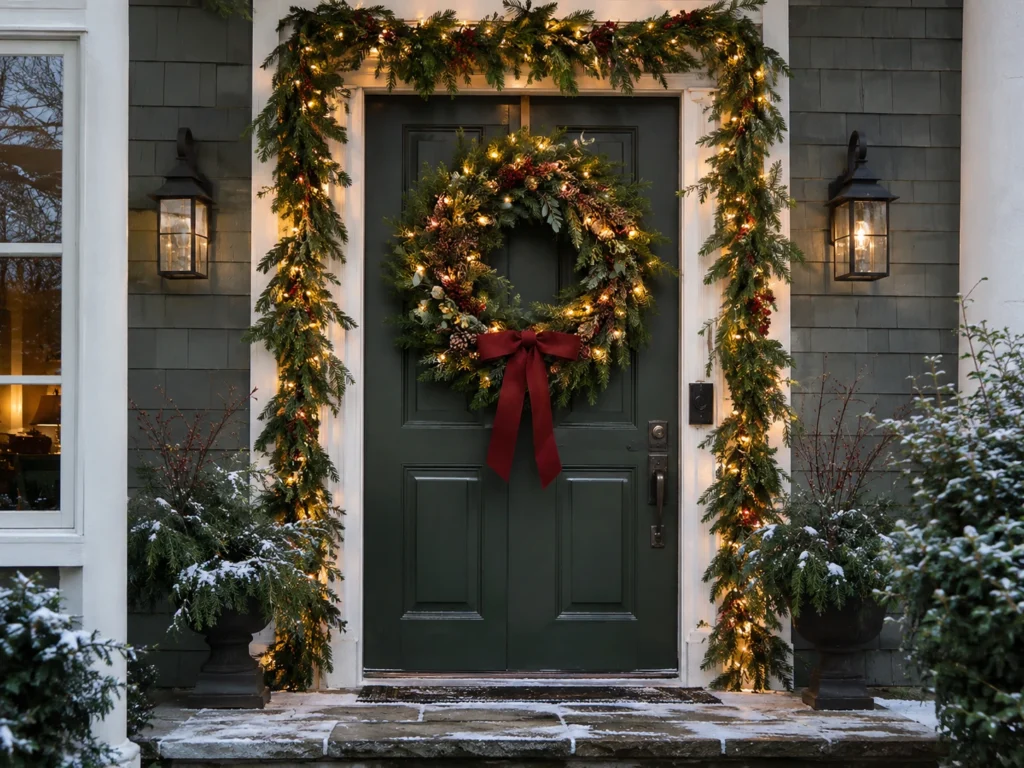
Feels like · a glowing portal home
Concept: Lit garland framing the front door, plus a big lit wreath above or on the door. It creates one bright, welcoming focal point.
Installation Mechanics:
- Hang garland with adhesive hooks around the door frame.
- Use a 36-inch lit wreath above the door, or a 24-inch one on the door itself.
- Choose battery-operated lights with a timer on the wreath to avoid cords.
Pro Tip: Keep the garland flat on the hinge side so the door still opens and closes cleanly.
8. Suspended Moravian Starlight Spheres
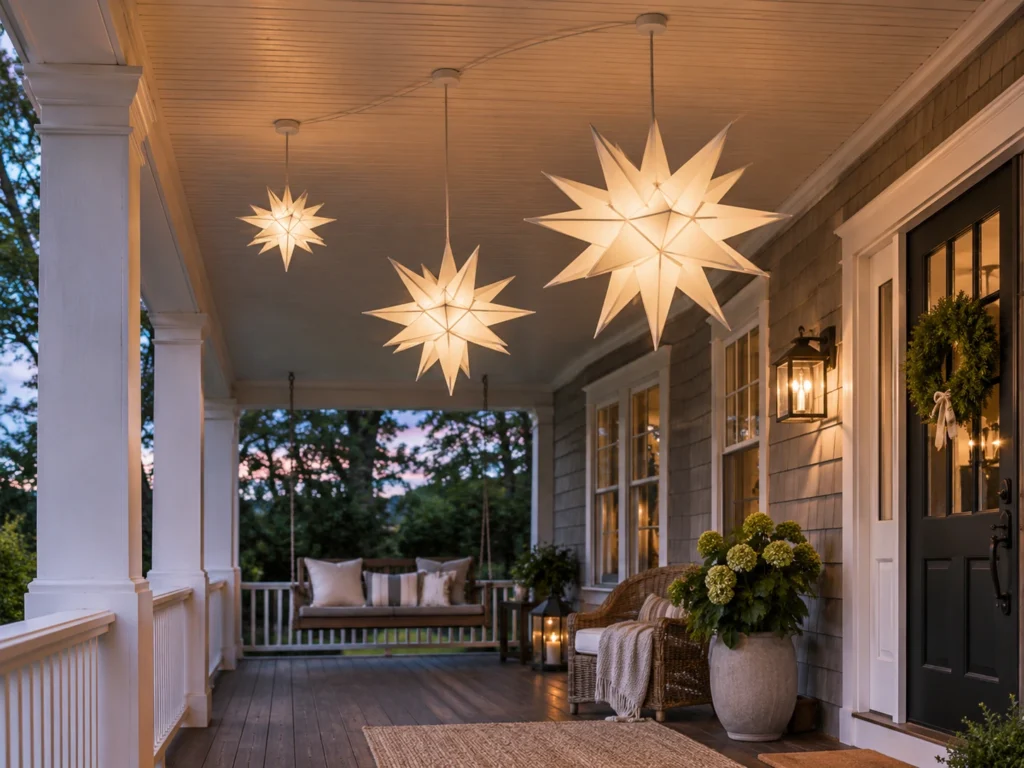
Feels like · stars hanging over the porch
Concept: Outdoor-rated 3D star lights hung at different heights from the porch ceiling. They look magical day and night.
Installation Mechanics:
- Use plastic outdoor-rated stars, not paper ones.
- Screw small cup hooks into the porch ceiling.
- Hang three stars at staggered drops of 12, 18 and 24 inches.
Pro Tip: Run cords along the ceiling edge with small clips, then down a corner post to the outlet, so nothing dangles across the porch.
Trees, Hedges and Ground Pathway Magic
The yard is where you can really play. For more outdoor ideas beyond lighting, these DIY outdoor Christmas decorations are full of yard inspiration.
9. The Commercial-Style Trunk and Branch Wrap
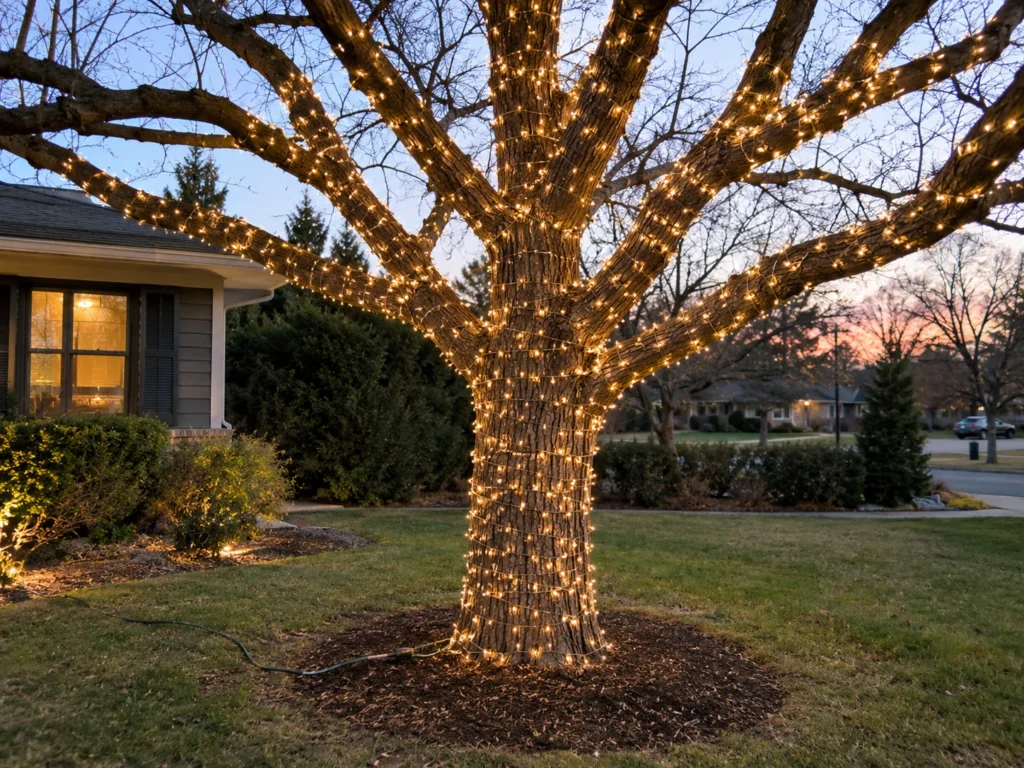
Feels like · a fancy downtown street in December
Concept: Wrapping the trunk and each major branch of a bare tree tightly in lights, like they do in city parks and hotels. It turns a winter tree into a glowing sculpture.
Installation Mechanics:
- Use warm white mini LEDs on brown wire, which blends with bark.
- Wrap tightly, about 2 to 4 inches between wraps.
- Wrap trunk first, then each main branch out to about 1 inch thick.
Pro Tip: This takes far more lights than you’d guess. Wrap a test section first, count how many strands it used, then buy enough for the rest of the tree. Unwrap in spring so wire doesn’t cut into growing branches.
10. Uniform Net Lighting on Front Hedges
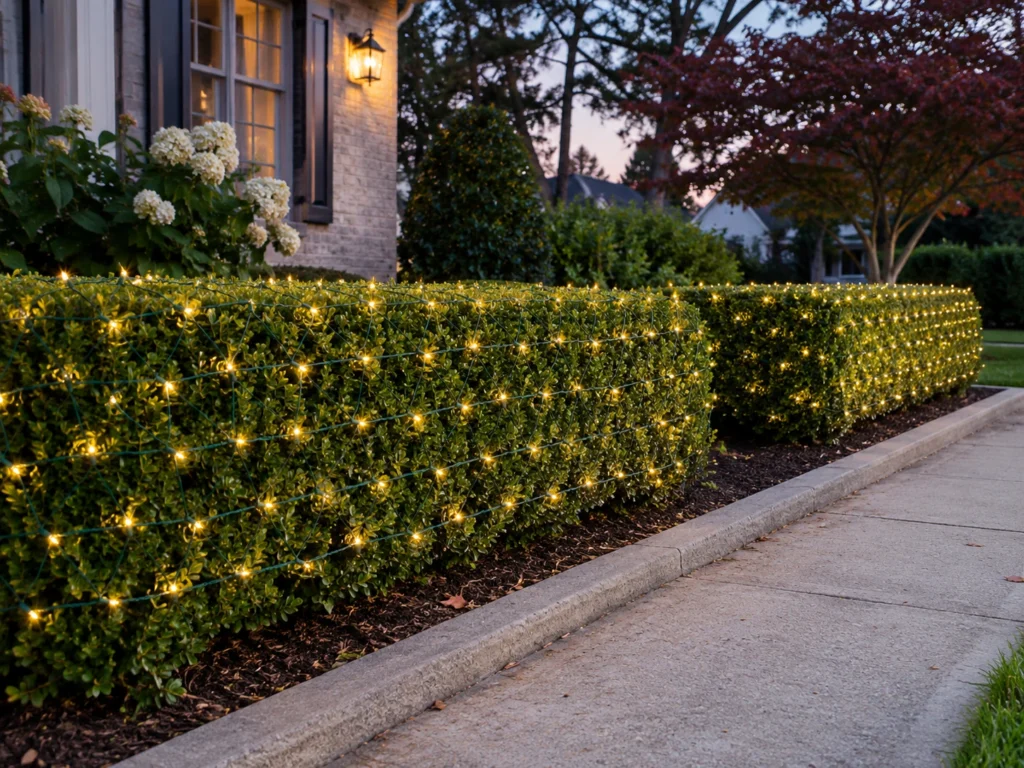
Feels like · a perfectly manicured estate
Concept: Net lights are pre-spaced in a grid. You toss them over a hedge and get an even glow with no tangles.
Installation Mechanics:
- Measure the top and front of each hedge.
- Choose green wire net lights in a size that covers both.
- Drape and tuck the edges into the hedge so no wire shows.
Pro Tip: Use the same size net on matching hedges on both sides of the walkway, so the front of the house looks balanced.
11. Ground-Staked Pathway Runway
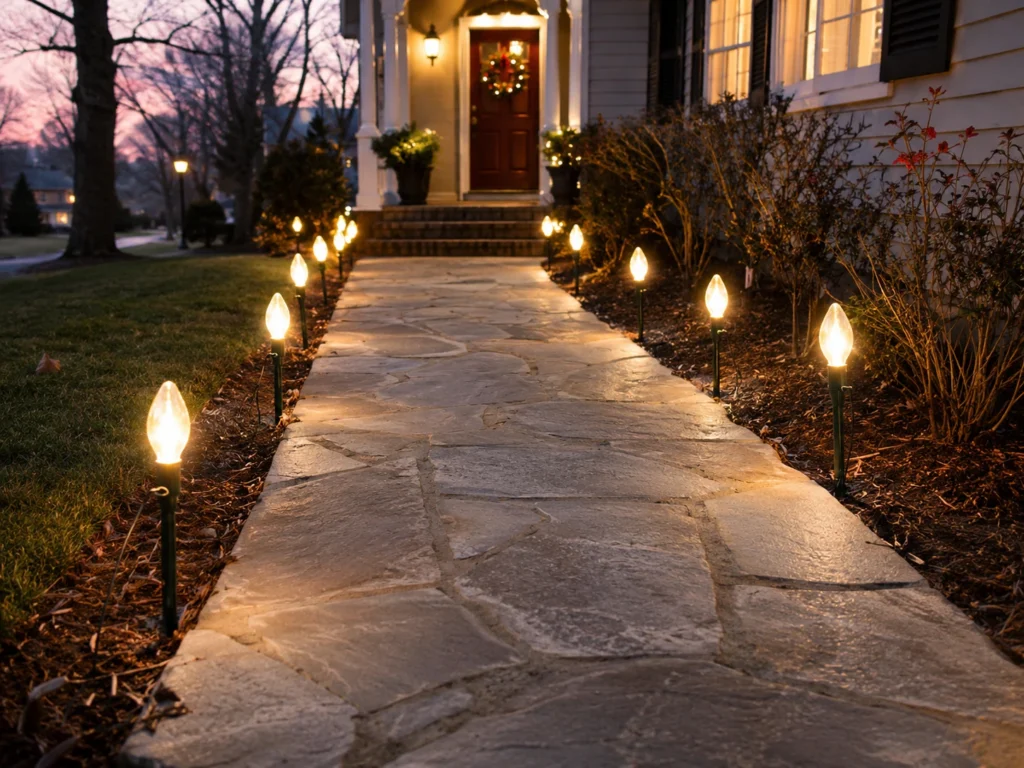
Feels like · a glowing welcome mat
Concept: C9 bulbs on short ground stakes lining the walkway or driveway. It guides guests and looks great from the street.
Installation Mechanics:
- Use 5-inch ground stakes that hold C9 sockets upright.
- Space stakes 12 to 18 inches apart along both sides of the path.
- Keep them a few inches back from the path edge, so nobody trips.
Pro Tip: Install before the ground freezes. Pre-poke holes with a screwdriver so the stakes slide in easily.
12. Conical Tomato-Cage Mini Tree Clusters
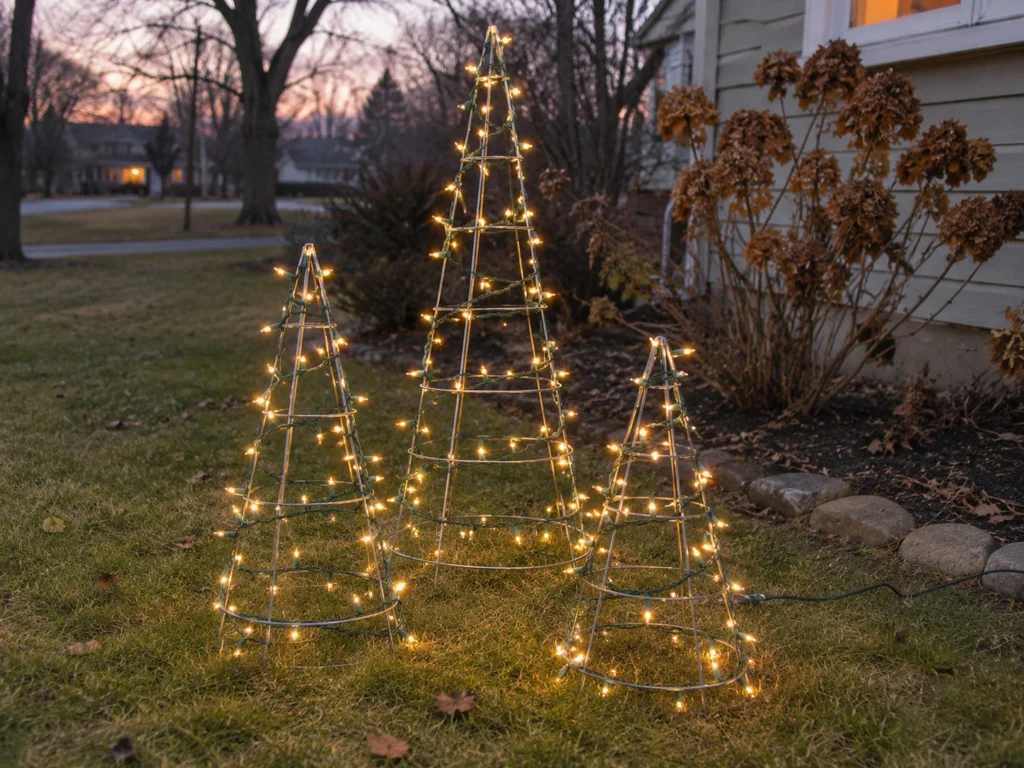
Feels like · a little glowing forest
Concept: Wire tomato cages flipped upside down and wrapped in lights become instant mini trees. Group three in different sizes for a charming yard cluster.
Installation Mechanics:
- Flip the cage upside down and zip-tie the legs together at the top.
- Wrap warm white outdoor mini lights from bottom to top.
- Push the wide ring into the ground or anchor it with landscape staples.
Budget Hack: Tomato cages cost a few dollars at garden centers, and you probably have one in the garage already.
The Blown Breaker at 6:00 PM
A homeowner once told me his whole living room went dark every evening right when the timer kicked on. He’d chained six strands of old incandescent C9s together on one outdoor outlet, and that outlet shared a circuit with the living room. The load was just too much. He switched to LED C9s, which use a small fraction of the power, and the breaker never tripped again. Same look, much less electricity.
Modern Textures, Color and Dramatic Accents
These are for houses with a little more personality or a modern edge.
13. Retro Opaque Ceramic Multi-Color Swag
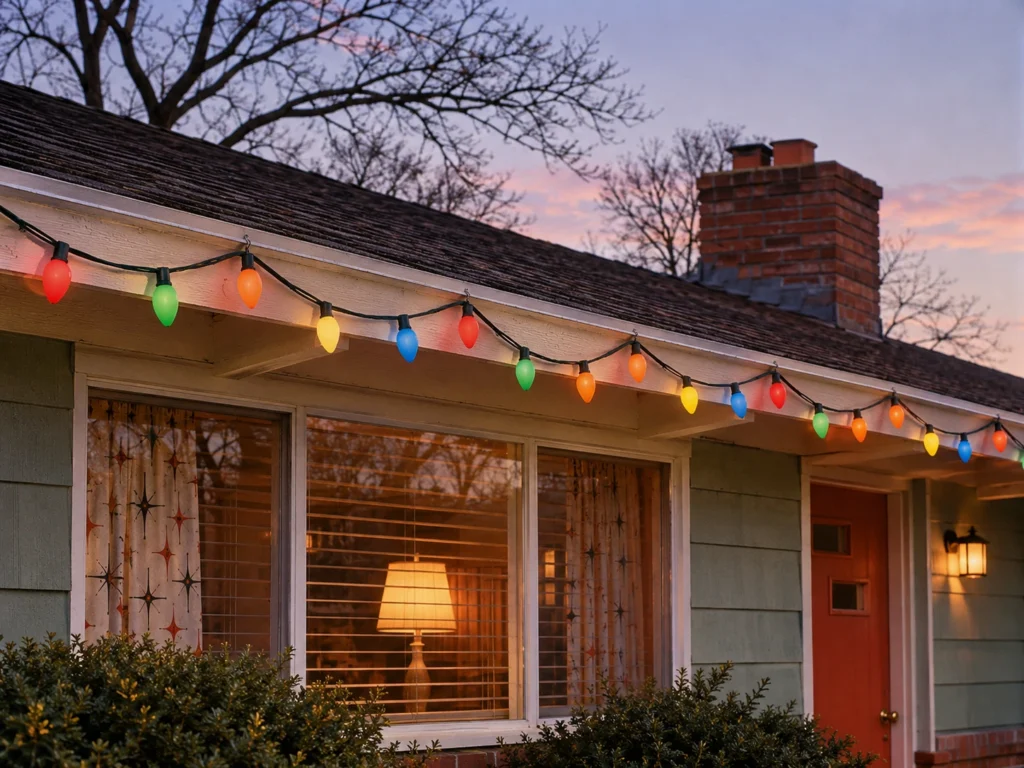
Feels like · Christmas on a 1960s street
Concept: Big opaque bulbs in red, green, blue, orange and yellow. They glow softly instead of sparkling, giving that warm vintage feel. If you love bold, playful color, these Grinch Christmas decorations are a fun match.
Installation Mechanics:
- Use ceramic-look opaque C9 LED bulbs.
- Hang along the roofline or porch in a repeating color order.
- Use 12-inch spacing for classic proportions.
Pro Tip: Stick to LED versions. Real vintage glass bulbs run hot and are fragile outdoors.
14. Modern Minimalist Vertical Peak Drops
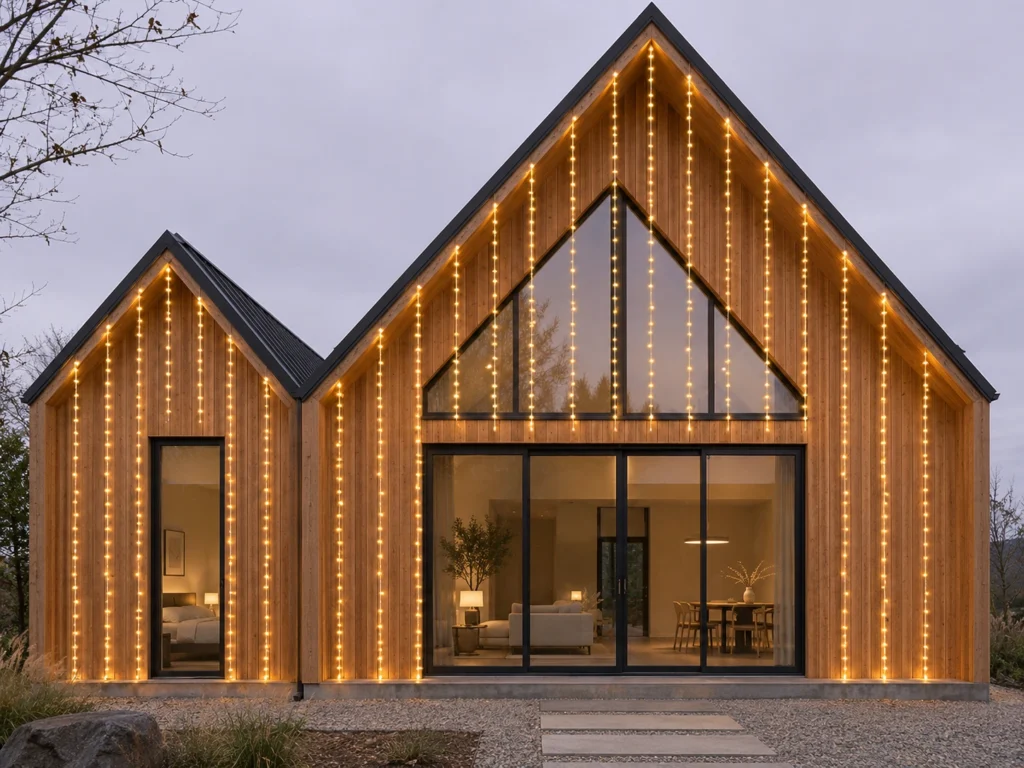
Feels like · a modern mountain cabin
Concept: Instead of outlining everything, run single vertical lines of light from the roof peaks down. It highlights the clean angles of modern and A-frame homes.
Installation Mechanics:
- Use warm white mini LEDs or C7s on black or matching wire.
- Anchor the top with a shingle tab clip at the peak.
- Secure lines down the wall with adhesive clips every 12 inches.
Pro Tip: Use a laser level or plumb line to keep each drop perfectly vertical. Crooked lines are obvious on a minimal design.
15. Architectural Facade Uplighting
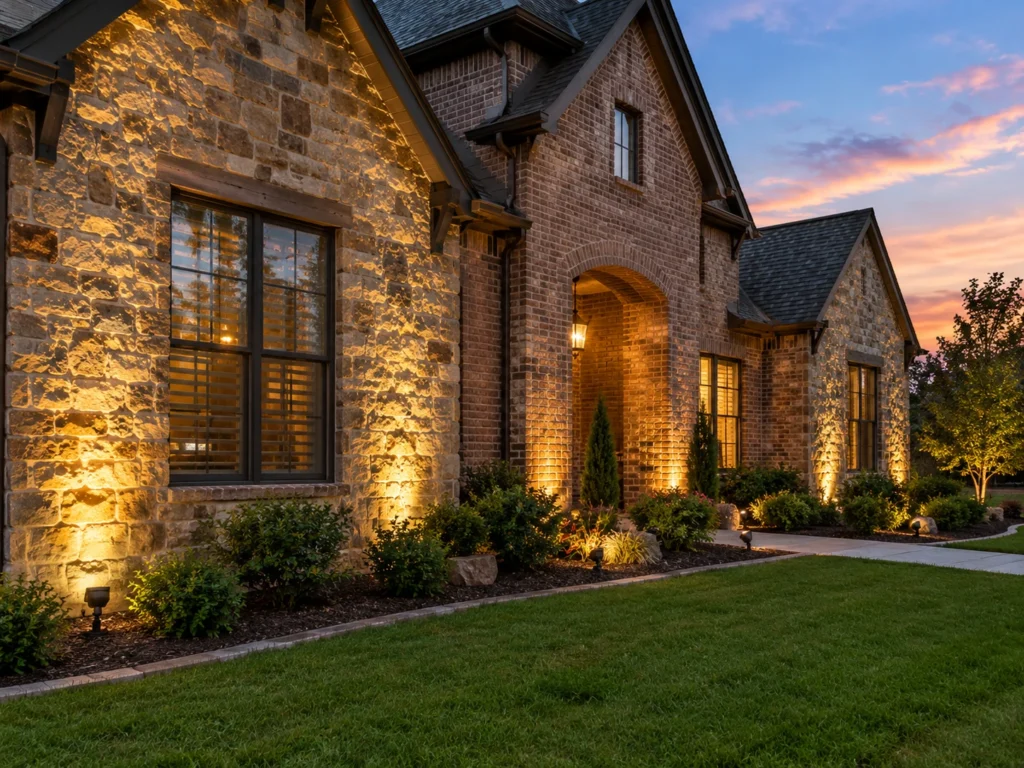
Feels like · a boutique hotel at night
Concept: Warm spotlights on the ground aimed up at the house. They graze brick, stone or siding, showing off the texture without a single string light.
Installation Mechanics:
- Use low-voltage warm white LED landscape spotlights.
- Place each light 12 to 18 inches from the wall.
- Aim straight up so the light grazes across the surface.
Pro Tip: Low-voltage systems are safer and you can leave them up all year. Add colored lens caps for the holidays, then switch back to warm white in January.
16. Falling Rain Meteor LED Tubes
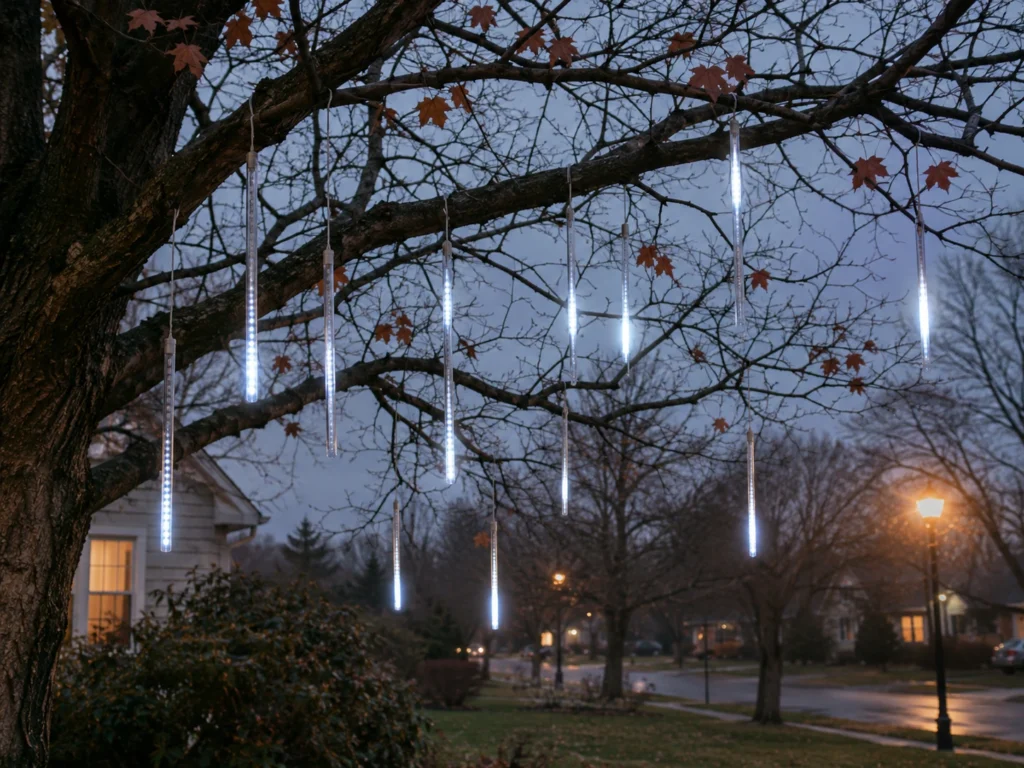
Feels like · snow falling through the trees
Concept: LED tubes with light that drips downward, hung inside tall trees. From the street, it looks like glowing snow or falling stars.
Installation Mechanics:
- Use outdoor-rated meteor tubes, usually 12 to 20 inches long.
- Hang them vertically from branches at different heights.
- Use six to ten tubes per tree.
Pro Tip: Keep this effect to one or two trees. On every tree, the motion becomes distracting.
17. Colonial Window-Sill Candle Silhouettes
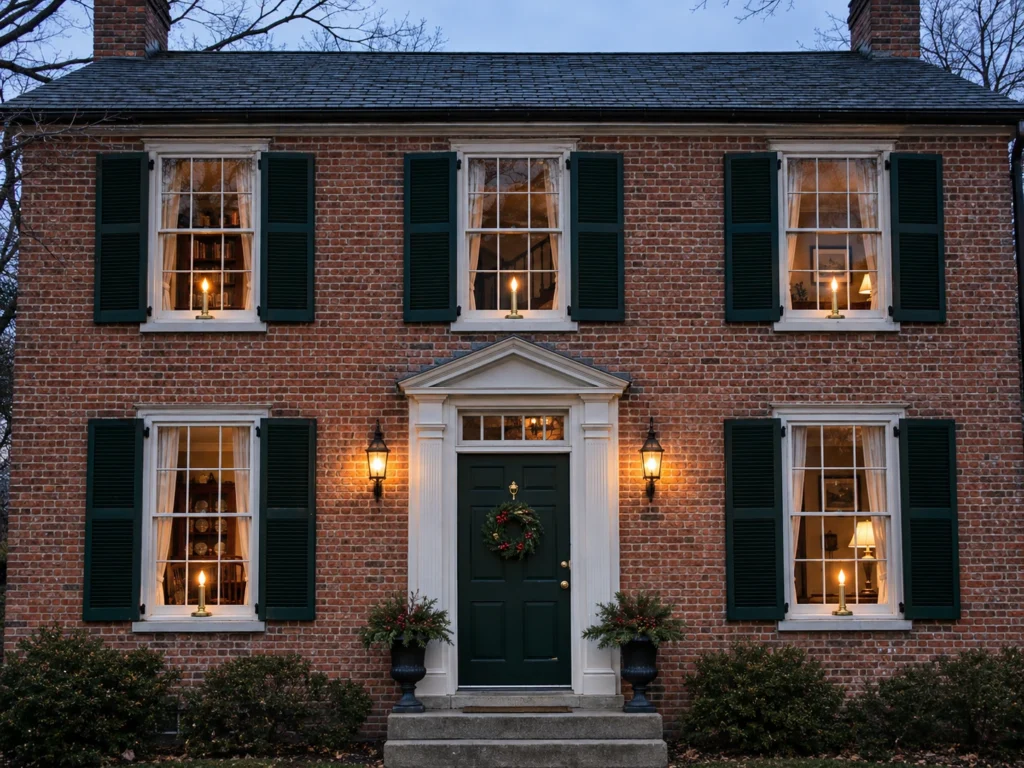
Feels like · a colonial home in Williamsburg
Concept: A single warm LED candle in every front-facing window. It’s elegant, simple and perfect for renters who can’t hang lights outside. Apartment dwellers can find more ideas in these small apartment Christmas decor ideas.
Installation Mechanics:
- Use battery LED window candles with a built-in timer or light sensor.
- Center one candle on each window sill.
- Choose a warm flicker bulb for a real candle look.
Budget Hack: Buy candles in bulk sets and use rechargeable batteries to save money over the season.
18. Monochromatic Ice Blue and Frost White Winterscape
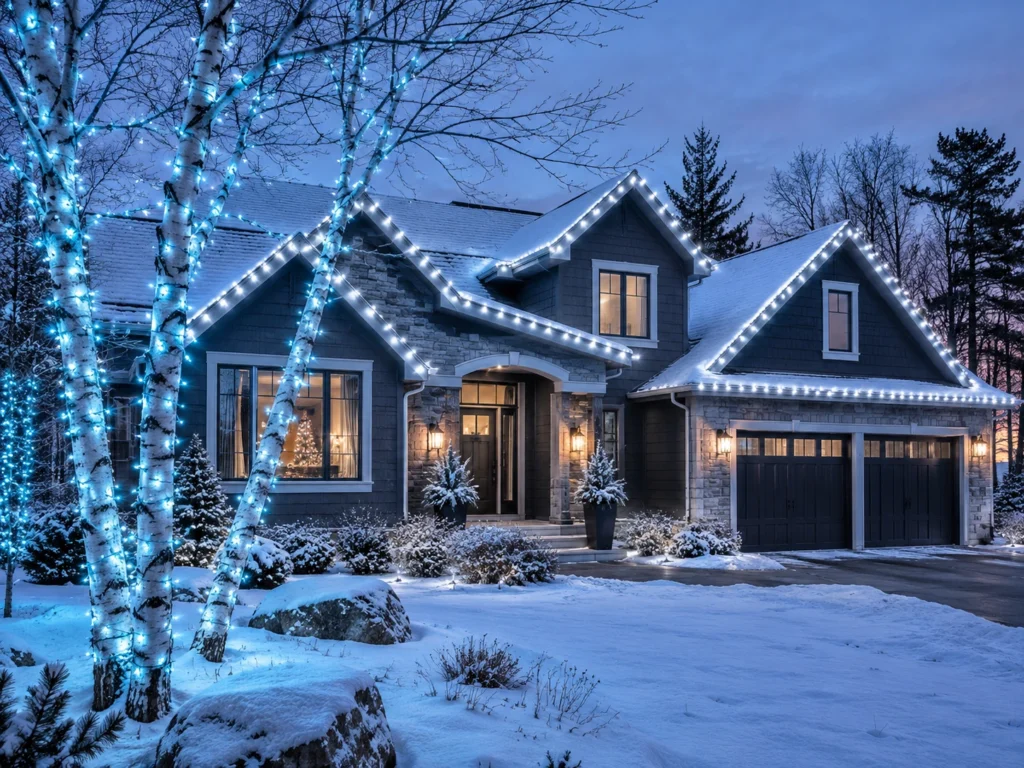
Feels like · a frozen lake under moonlight
Concept: Cool white and soft ice blue lights everywhere. On gray, slate or modern homes, it looks crisp and wintry.
Installation Mechanics:
- Use cool white C9s on the roofline.
- Add ice blue mini lights on trees and hedges.
- Keep it to these two tones only.
Pro Tip: Never mix warm white and cool white on the same house. The difference looks like a mistake from the street.
Frequently Asked Questions
How many lights do I need for the front of my house?
Measure your roofline in feet. For straight lines, buy that many feet of lights. For icicles or swags, multiply by 1.2. For C9s at 12-inch spacing, that’s one bulb per foot. Then add lead cord to reach the outlet.
What size Christmas bulbs look best on a roofline?
C9 bulbs are the classic choice for rooflines because they’re big enough to see clearly from the street. Use smaller C7s for windows and doors, and minis for trees, hedges and railings.
How do you hang Christmas lights on gutters without damaging them?
Use plastic all-in-one clips that hook onto the gutter lip, or magnetic clips for metal gutters. Never use staples or nails, which rust and cause leaks. Use a ladder stabilizer so the ladder never rests on the gutter itself.
What is the safest way to hang Christmas lights on high peaks?
Use a light-hanging pole with a clip attachment so you can reach from a lower, safer spot. Never walk on a steep, wet or icy roof. For very high or steep peaks, hiring a professional installer is worth every penny.
The best christmas lights on house setups aren’t about being the brightest house on the block. Straight lines, even spacing and one warm color will always look better than a thousand tangled lights thrown up in a hurry.
So take your time, stay safe on that ladder, and when it’s all done, walk to the end of the driveway, turn around and just look. That glow on a cold December night is the whole reason we do it.