15 Halloween DIY Decorations Nobody Believes You Made Yourself (Under $15 Each)
It’s the second week of October and my kitchen table has completely given up. Tangled fake spiderweb everywhere, half cut cardstock, hot glue strings on my coffee mug and somehow on my sleeve. There’s always one quiet second where I wonder if I should have just grabbed a plastic kit at the store and called it a night.
And honestly, half the blame goes to those 15 second videos. Everything looks effortless when it’s sped up. Nobody shows you the ninety dollars of specialty supplies, the three hours of drying time, or the moment the whole thing collapses because the glue was still warm.
Here’s what I’ve figured out after a lot of crooked ghosts. The best Halloween DIYs aren’t tests you pass or fail. They’re fast, forgiving, and they double as a Friday night activity with cider on the counter and a spooky movie playing in the background.
So here are 15 projects that have been saved millions of times online, with the honest details nobody posts. How long each one really takes, how big the mess gets, what it costs, and how to style it once you’re done.
The 3-Item Zero-Panic Craft Kit
Buy these three things once and almost every project below becomes easy. That’s the whole kit.
Low-Temp Mini Glue Gun
Safe enough for older kids to use with you, and the dried glue peels off skin and tables instead of welding itself on.
Blue Painter’s Tape
Stick blue tape on the wall first, then your mounting tape on top of it. Your paint survives November 1st and so does your deposit.
Flameless Tea Lights & Fairy Lights
Every project here involves paper, fabric or yarn at some point. Battery lights give the same glow with none of the panic.
Aesthetic & High-Impact Room Decor
These are the five that get the most compliments indoors. Big visual payoff, small amount of actual work.
1. Floating Cheesecloth Ghosts
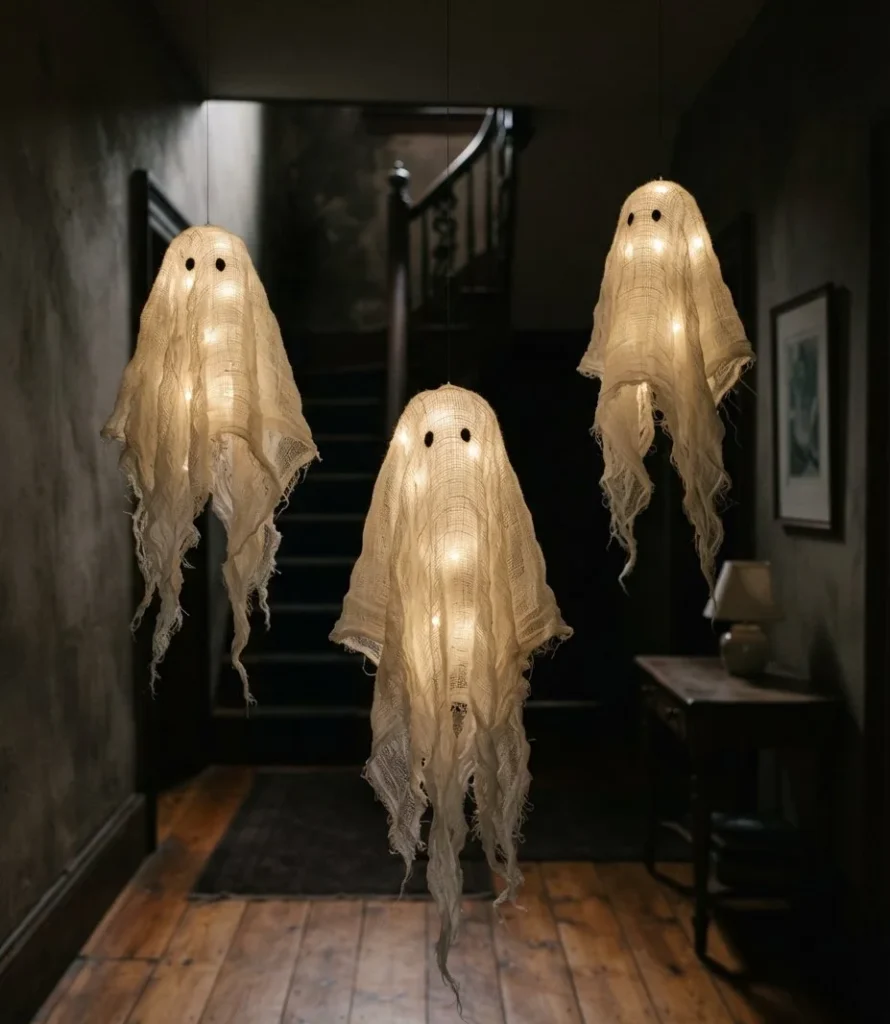
Feels like · A haunted hallway in the best way
You drape starched cheesecloth over a balloon and let it dry into a hollow, floaty little ghost.
The Activity & The Result: Kids blow up the balloons and drape the fabric while you handle the starch. Once it dries, you pop the balloon and you’re left with a ghost that holds its own shape and drifts when the door opens.
Quick Reality Check: Time: 20 mins plus overnight drying | Mess Level: 3/5 | Budget: Under $10
Materials You Actually Need: Cheesecloth, balloons, liquid fabric stiffener or a heavy spray starch, fishing line, and small felt circles for eyes.
Stylist / Safety Micro-Hack: Lay parchment paper under everything before you start. Dried starch peels straight off parchment and never off your table.
Where to Style It: Hanging from a hallway ceiling or a doorway frame.
2. The 3D Cardstock Bat Swarm
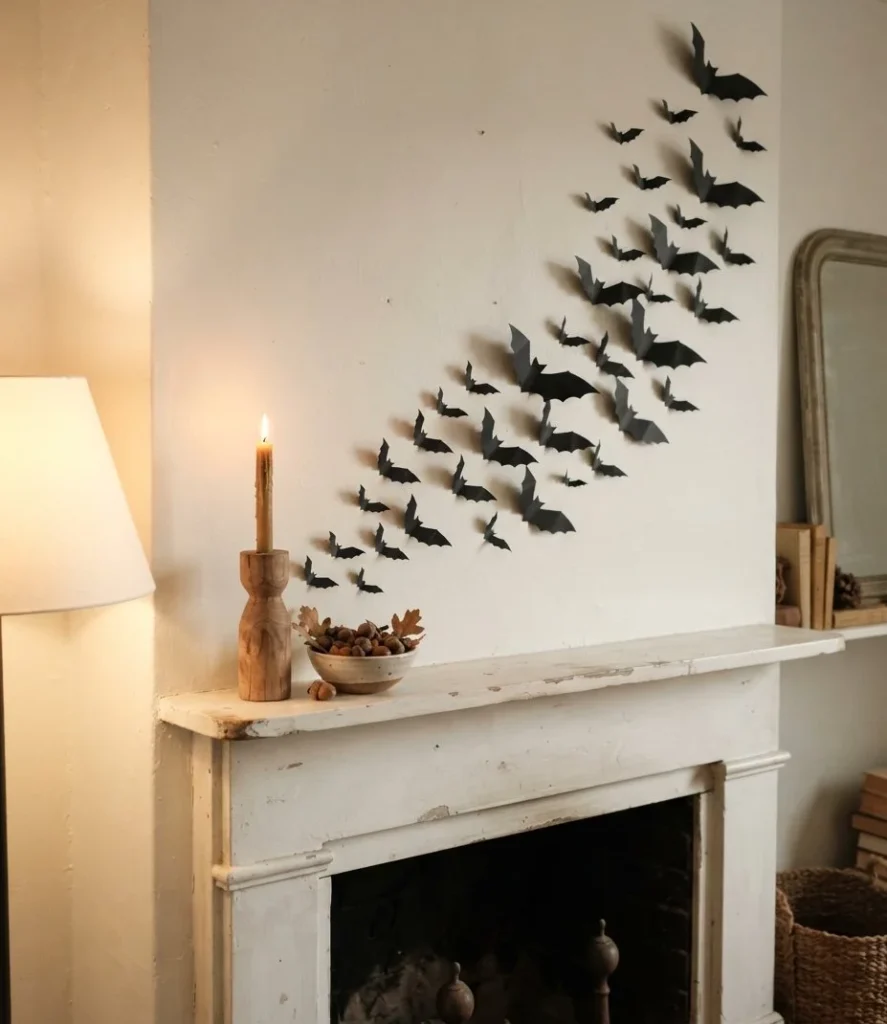
Feels like · Bats pouring out of the wall
Dozens of paper bats climb the wall in a curving swarm, small ones at the bottom growing bigger as they fly up.
The Activity & The Result: Print a template, put on a movie, and cut bats together for half an hour. Bend each wing upward and they cast real shadows on the wall instead of looking like flat stickers.
Quick Reality Check: Time: 45 mins | Mess Level: 1/5 | Budget: Under $6
Materials You Actually Need: Black cardstock, scissors, a bat template, and blue painter’s tape with small mounting squares.
Stylist / Safety Micro-Hack: Stack three sheets of cardstock and cut them at once. You get three bats per cut and your hand stops aching halfway through.
Where to Style It: Above the mantel or climbing the stairwell wall.
3. Bleeding Taper Candles
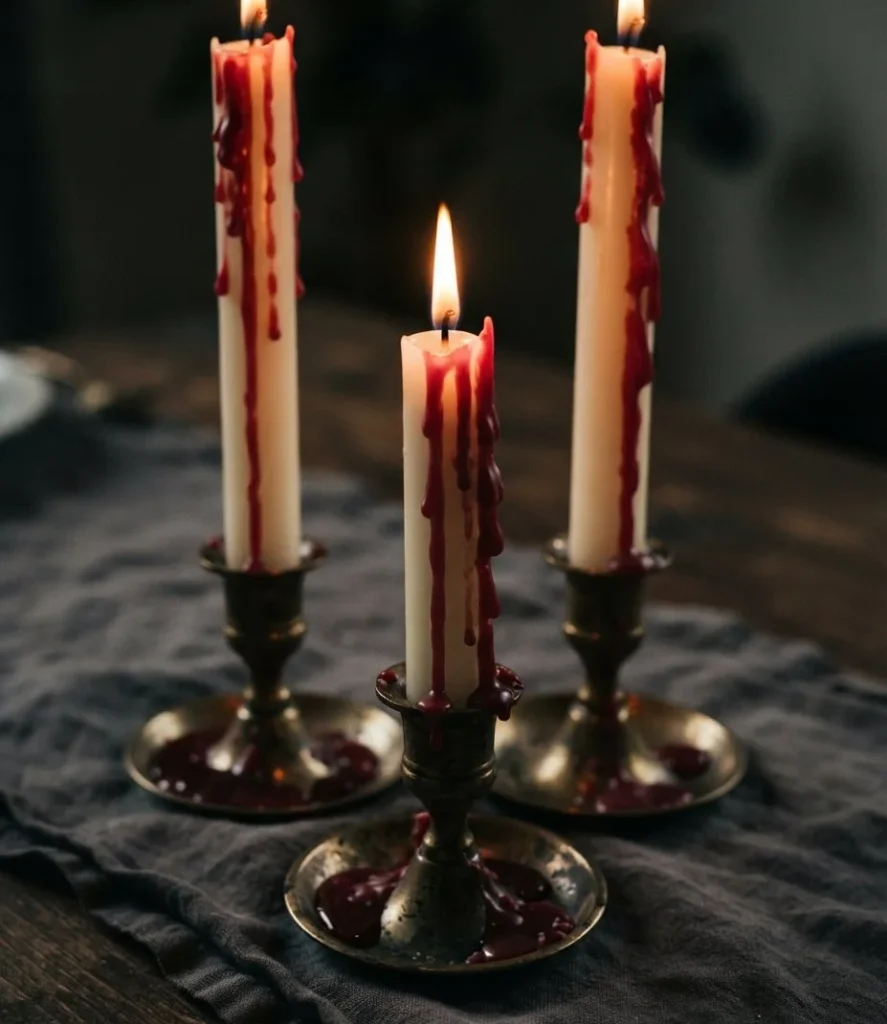
Feels like · A vampire’s dinner party
Red wax drips down white tapers so they look like they’ve been burning in a haunted dining room for years.
The Activity & The Result: You tilt a lit red candle over a white one and let the drips fall where they want. Kids love this part, though an adult should hold the dripping candle. The finished set looks straight out of a gothic film.
Quick Reality Check: Time: 15 mins | Mess Level: 2/5 | Budget: Under $8
Materials You Actually Need: White taper candles, one red taper, candlesticks, and newspaper for the table.
Stylist / Safety Micro-Hack: Want the look with zero flame? Drip the red wax onto flameless LED tapers instead. The wax sticks perfectly and you can leave them glowing all evening unattended.
Where to Style It: Dining table or a mantel with a dark backdrop.
4. The Potion Apothecary Bottle Shelf
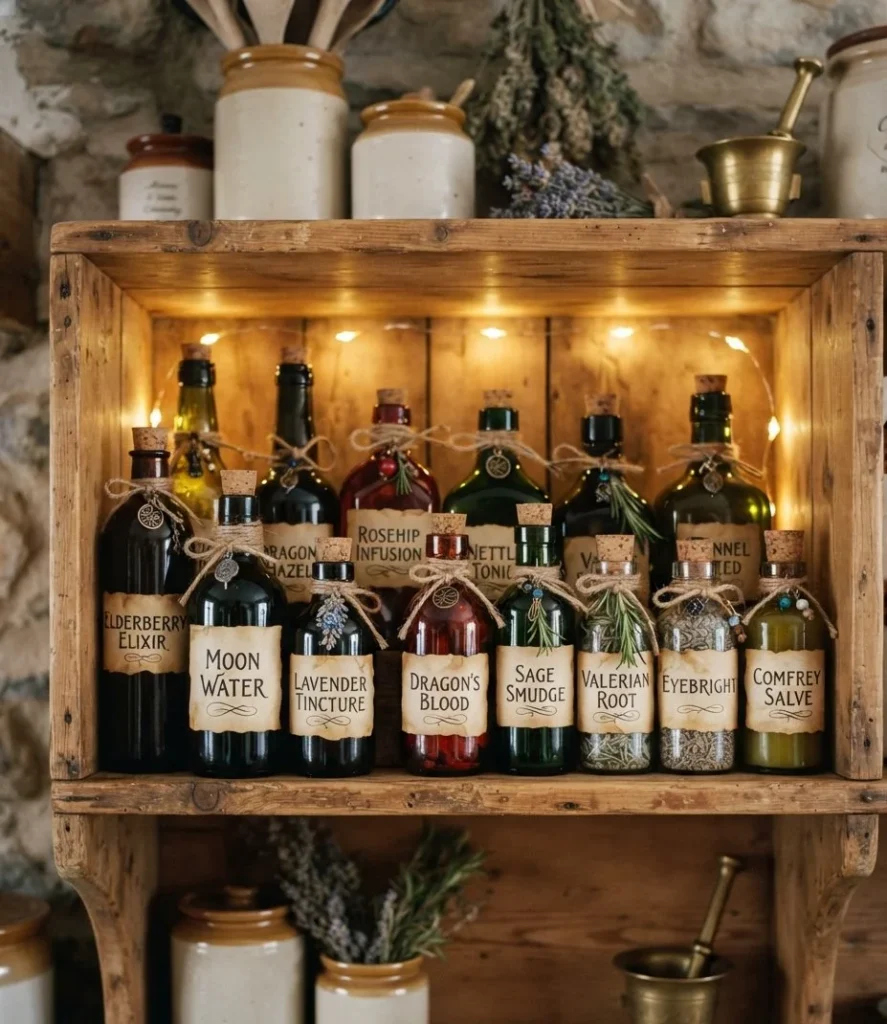
Feels like · A witch’s back room
Old sauce jars and bottles from your recycling become a shelf of dusty, labeled potions with fairy lights glowing behind them.
The Activity & The Result: Everyone invents ridiculous potion names and writes their own labels. Tea stain the paper, glue it on, and you end up with a shelf that looks like a film prop.
Quick Reality Check: Time: 40 mins | Mess Level: 2/5 | Budget: Under $5
Materials You Actually Need: Clean glass jars, printer paper, a used tea bag, black marker, twine, and battery fairy lights.
Stylist / Safety Micro-Hack: Tear the label edges instead of cutting them, and bake the tea stained paper on low heat for a few minutes to dry it fast and curl the edges. If you love this aged look, our primitive Halloween decor post is full of the same tea-stained charm.
Where to Style It: Open kitchen shelves, a bar cart, or a bookshelf.
5. The Cardboard Haunted Village
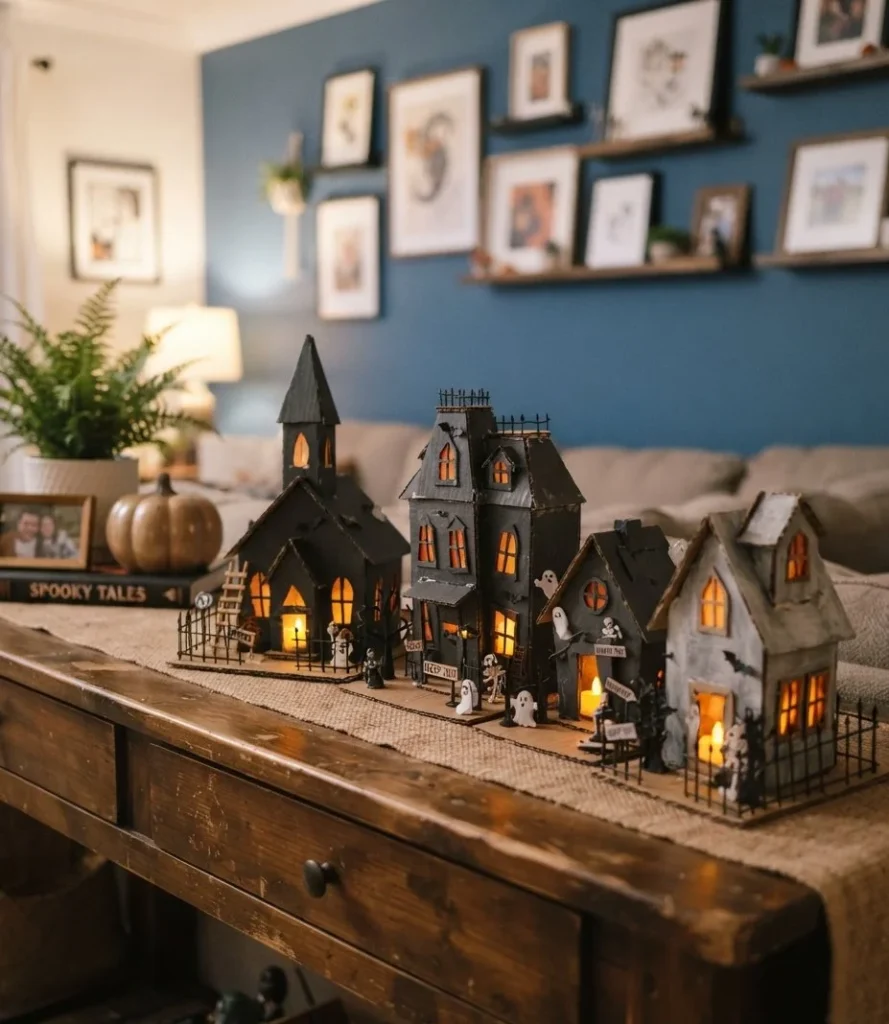
Feels like · A tiny spooky town on your mantel
Delivery boxes become a row of crooked little houses with glowing windows lined up along the mantel.
The Activity & The Result: Everyone builds their own house, crooked windows and all. Paint them black or grey, drop a tea light inside each, and the whole row glows like a little haunted street after dark.
Quick Reality Check: Time: 90 mins | Mess Level: 4/5 | Budget: Under $12
Materials You Actually Need: Cardboard boxes, a craft knife for adults only, black and grey acrylic paint, orange tissue paper, and LED tea lights.
Stylist / Safety Micro-Hack: Glue orange tissue paper behind the window cutouts. That one step is the difference between a cardboard box and something that looks genuinely atmospheric when lit.
Where to Style It: Mantel, console table, or a wide windowsill.
The Hot Glue Lesson
I heard about a mum who handed her eight year old a full size high-temp glue gun for a bat garland. One burnt fingertip, one puddle of glue welded to the dining table, and the craft afternoon ended in tears for everyone.
The fix: a low-temp mini gun and a sheet of parchment paper underneath. The glue still holds everything together, it peels right off skin and paper, and cleanup is basically folding up the parchment.
Big Porch & Yard Statements
Outside is where you go big and cheap. These five cost almost nothing and stop people on the sidewalk.
6. Pool Noodle Giant Spiders
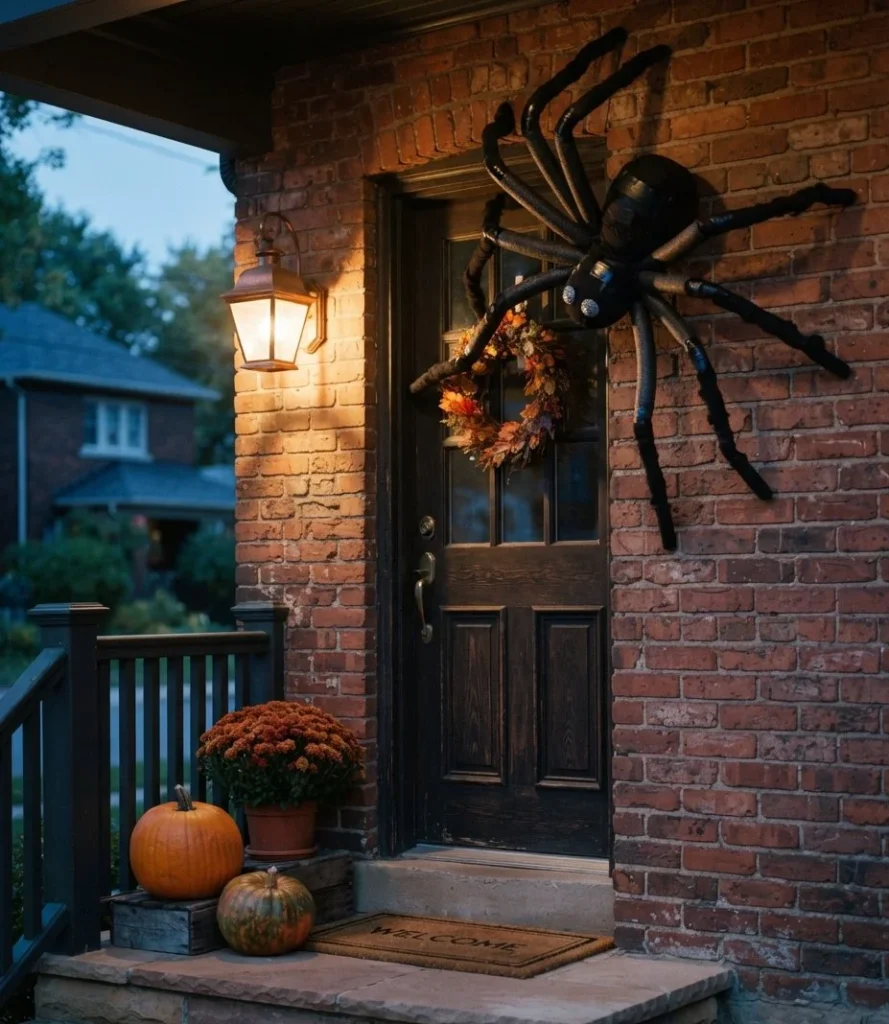
Feels like · Something huge just moved
Cheap pool noodles bend into eight enormous legs around a black beach ball body.
The Activity & The Result: Kids wrap the noodles in tape while you bend and attach the legs. The finished spider is taller than a toddler and looks incredible climbing the porch wall.
Quick Reality Check: Time: 60 mins | Mess Level: 2/5 | Budget: Under $15
Materials You Actually Need: Four pool noodles, black duct tape, a black beach ball or trash bag stuffed with newspaper, zip ties, and two foam eyes.
Stylist / Safety Micro-Hack: Push a length of wire coat hanger through each noodle so the legs hold their bend in the wind. More cheap tricks like this live in our pool noodle Halloween decor guide.
Where to Style It: Climbing the porch wall or the garage door.
7. Mason Jar Mummy Lanterns
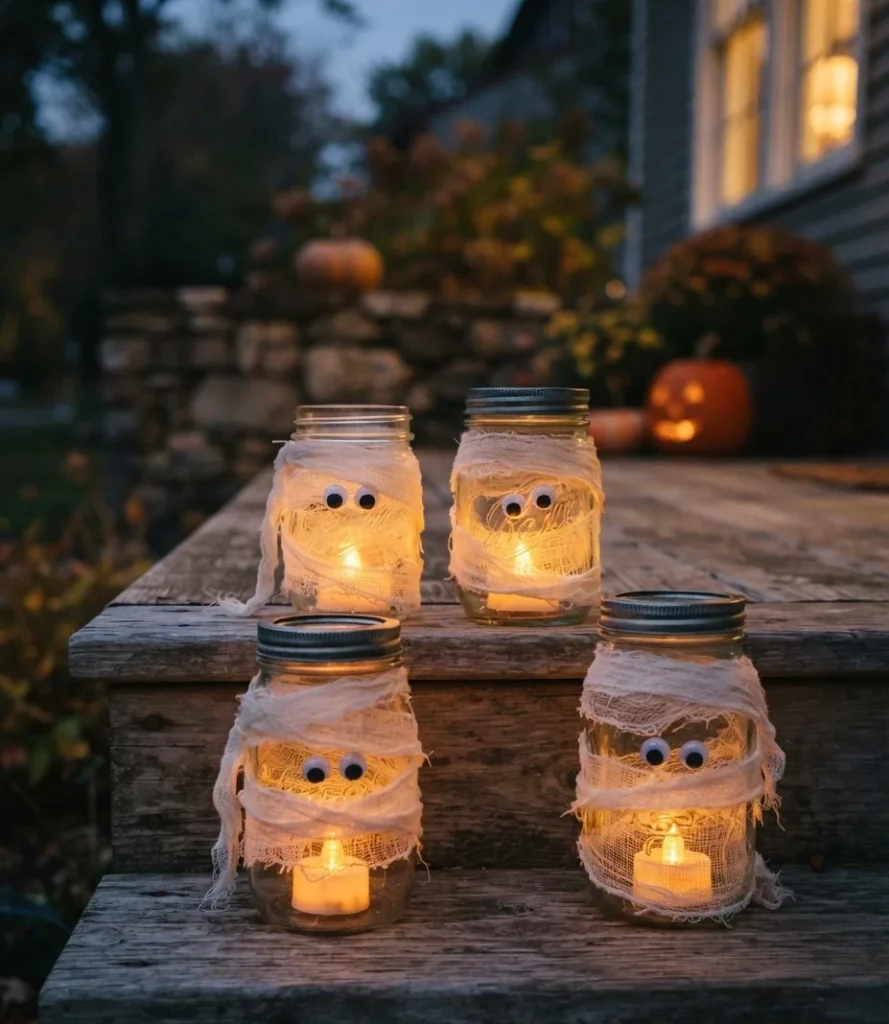
Feels like · Tiny mummies lighting the path
Old jars wrapped in gauze with googly eyes peeking out, glowing softly along the steps.
The Activity & The Result: This is the easiest one for little kids. They wrap, you glue the ends. Line five of them up the porch steps and the whole entry glows.
Quick Reality Check: Time: 25 mins | Mess Level: 1/5 | Budget: Under $7
Materials You Actually Need: Glass jars, gauze or torn white fabric strips, googly eyes, low-temp glue, and LED tea lights.
Stylist / Safety Micro-Hack: Wrap loosely and leave gaps so light escapes through the layers. A tightly wrapped jar just looks like a jar in a bandage. Battery lights only here, gauze catches fast.
Where to Style It: Porch steps or along the front walkway.
8. Hanging Floating Witch Hats
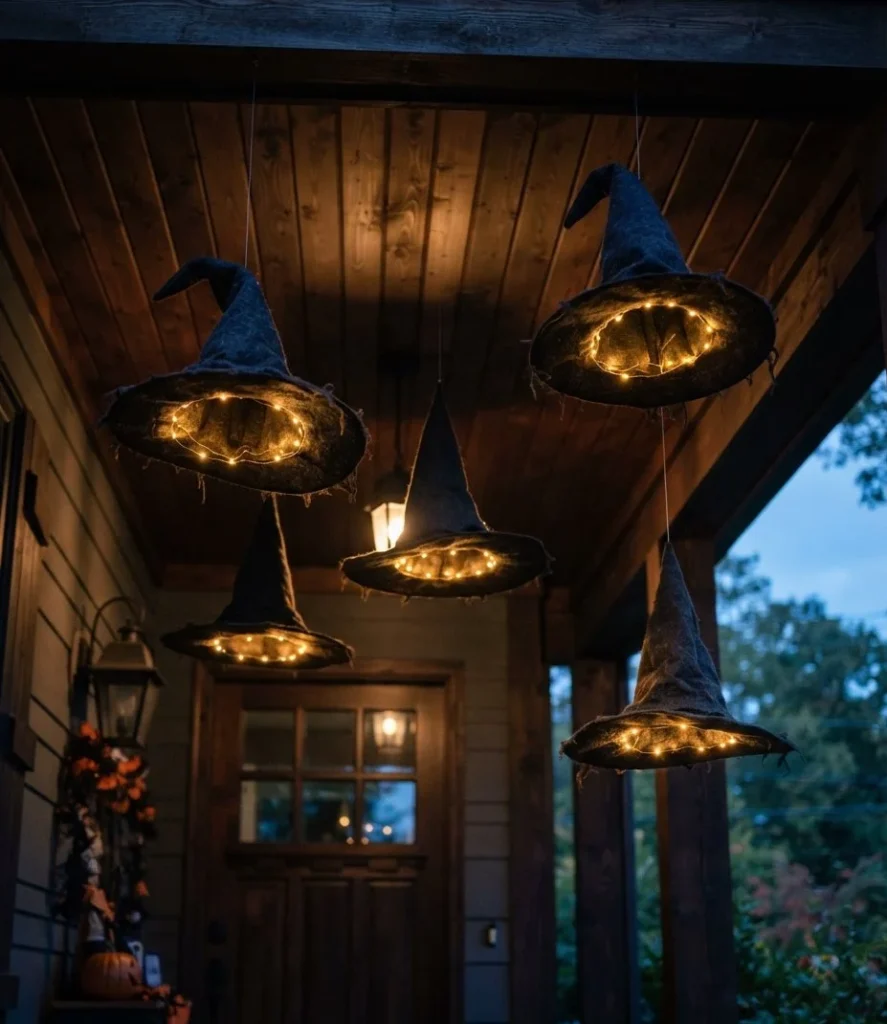
Feels like · A coven hovering overhead
A cluster of witch hats floats above the porch at different heights with a light glowing under each brim.
The Activity & The Result: Kids decorate each hat with ribbon or fake spiders, you handle the hanging. At night the fishing line vanishes and they genuinely look like they’re floating.
Quick Reality Check: Time: 30 mins | Mess Level: 1/5 | Budget: Under $14
Materials You Actually Need: Five dollar store witch hats, clear fishing line, LED tea lights, small metal washers, and adhesive hooks.
Stylist / Safety Micro-Hack: Glue a washer inside each brim. That bit of weight stops the hats from spinning and tangling every time the wind picks up.
Where to Style It: Covered porch ceiling or a recessed entry.
9. The Glow-in-the-Dark Bone Hunt
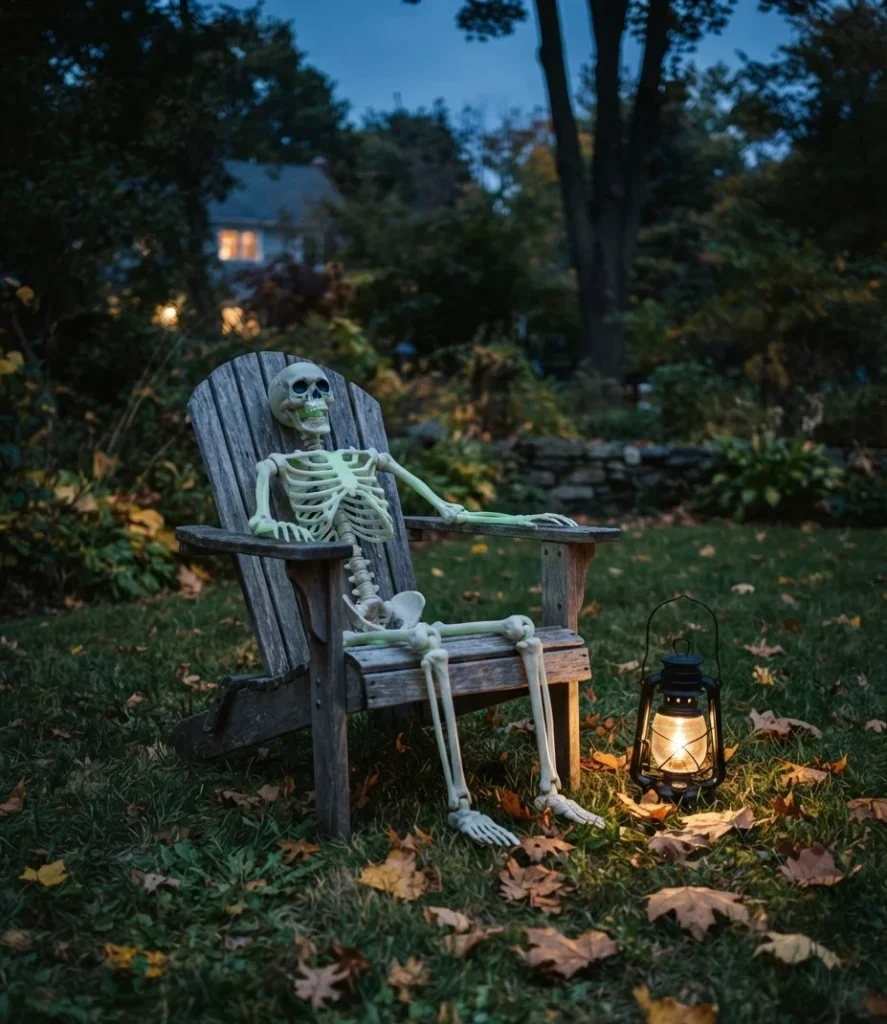
Feels like · A backyard treasure hunt at dusk
Plastic skeleton bones hide around the yard and glow faintly once the sun goes down.
The Activity & The Result: This one is pure activity. Kids hunt with torches and assemble the skeleton as they go. Once it’s built, prop it on a porch chair as decor for the rest of the month.
Quick Reality Check: Time: 20 mins prep, 30 mins play | Mess Level: 1/5 | Budget: Under $12
Materials You Actually Need: A cheap plastic skeleton, glow-in-the-dark spray paint, and a few small torches.
Stylist / Safety Micro-Hack: Charge the bones under a bright lamp for ten minutes right before you hide them. They glow far brighter and last much longer that way.
Where to Style It: Backyard for the hunt, front porch chair afterwards.
10. Tomato Cage Ghost Towers
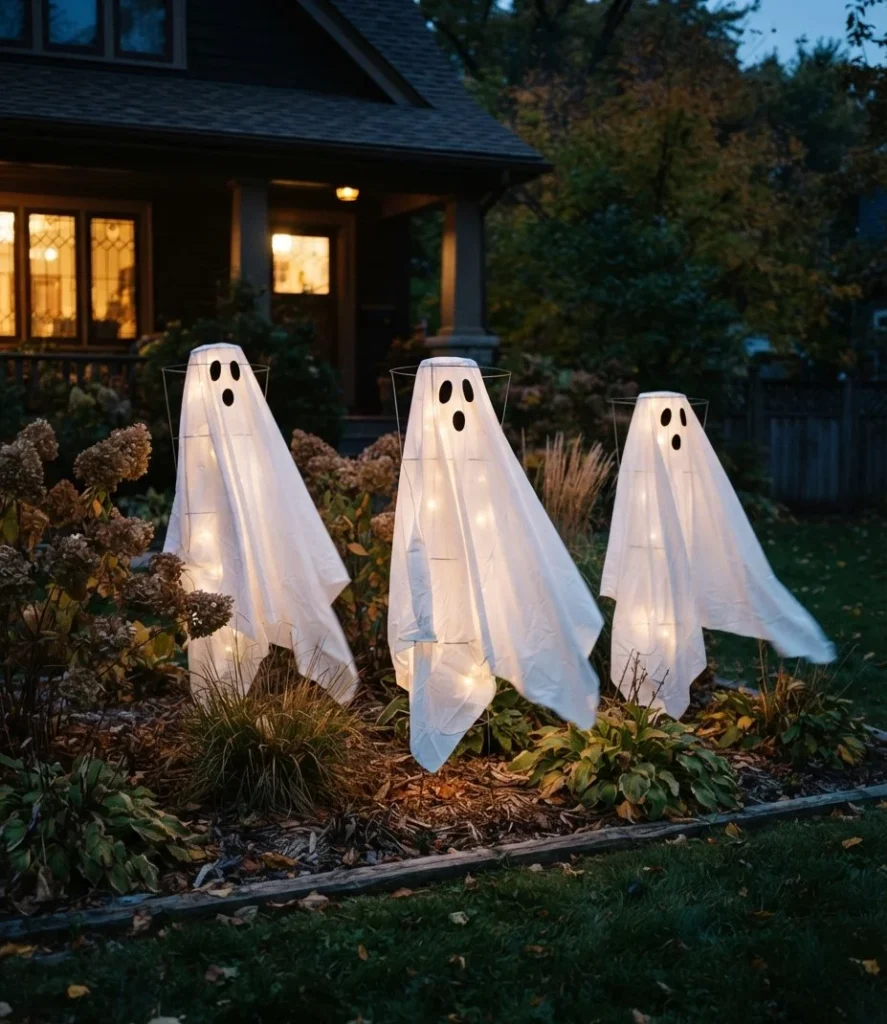
Feels like · Glowing figures in the front yard
An upside down tomato cage draped in white fabric becomes a tall glowing ghost on the lawn.
The Activity & The Result: Turn the cage upside down, bunch the top wires into a head shape, drape the sheet and cut felt eyes. Three of them in a row down the yard looks properly haunting after dark.
Quick Reality Check: Time: 35 mins | Mess Level: 2/5 | Budget: Under $10
Materials You Actually Need: Tomato cages, old white sheets, zip ties, black felt, and battery string lights.
Stylist / Safety Micro-Hack: Push a garden stake through the cage into the ground so it survives a windy night, and tuck the light battery pack into a zip bag at the base to keep it dry.
Where to Style It: Front lawn or either side of the driveway.
Cozy Food Crafts & Hands-On Party Fun
These are the ones for a rainy Saturday or a party table. Short, forgiving, and mostly edible.
11. Mini Ghost Pizzas
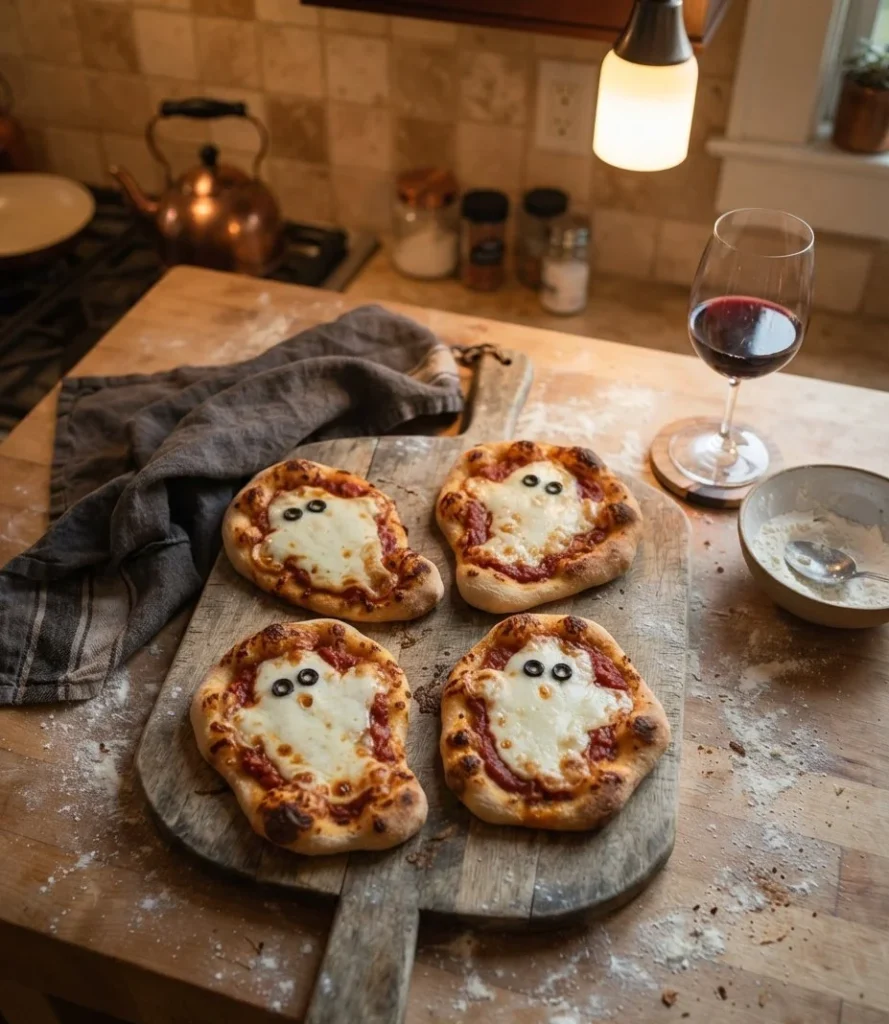
Feels like · Friday night dinner with a costume on
Cheese slices cut into little ghost shapes melt over mini pizzas with olive eyes.
The Activity & The Result: Everyone builds their own. The ghosts come out slightly melted and lopsided, which somehow makes them better. Dinner and craft time in one go.
Quick Reality Check: Time: 25 mins | Mess Level: 3/5 | Budget: Under $12
Materials You Actually Need: English muffins or naan, pizza sauce, sliced mozzarella, black olives, and a small ghost cookie cutter.
Stylist / Safety Micro-Hack: Add the cheese ghost in the last few minutes of baking. Put it on at the start and your ghost melts into a plain white blob.
Where to Style It: Kitchen island or the party snack table.
12. No-Carve Heirloom Pumpkin Painting
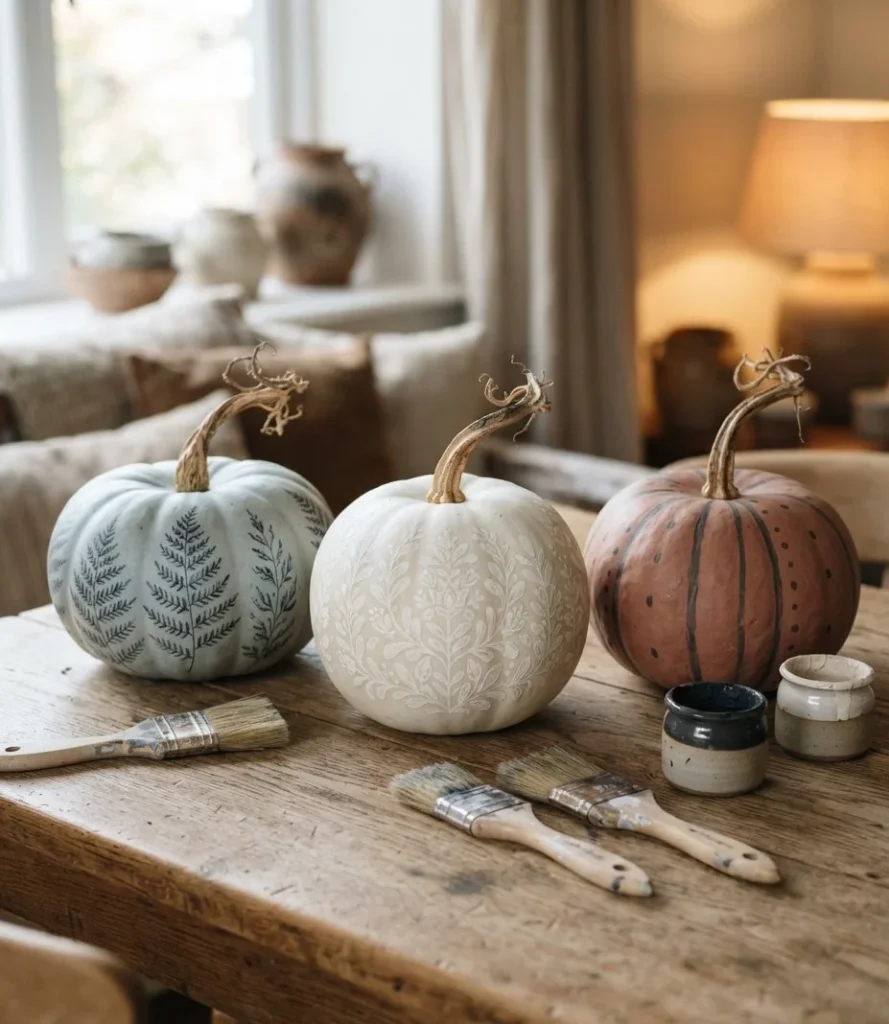
Feels like · Pumpkin carving without the slime
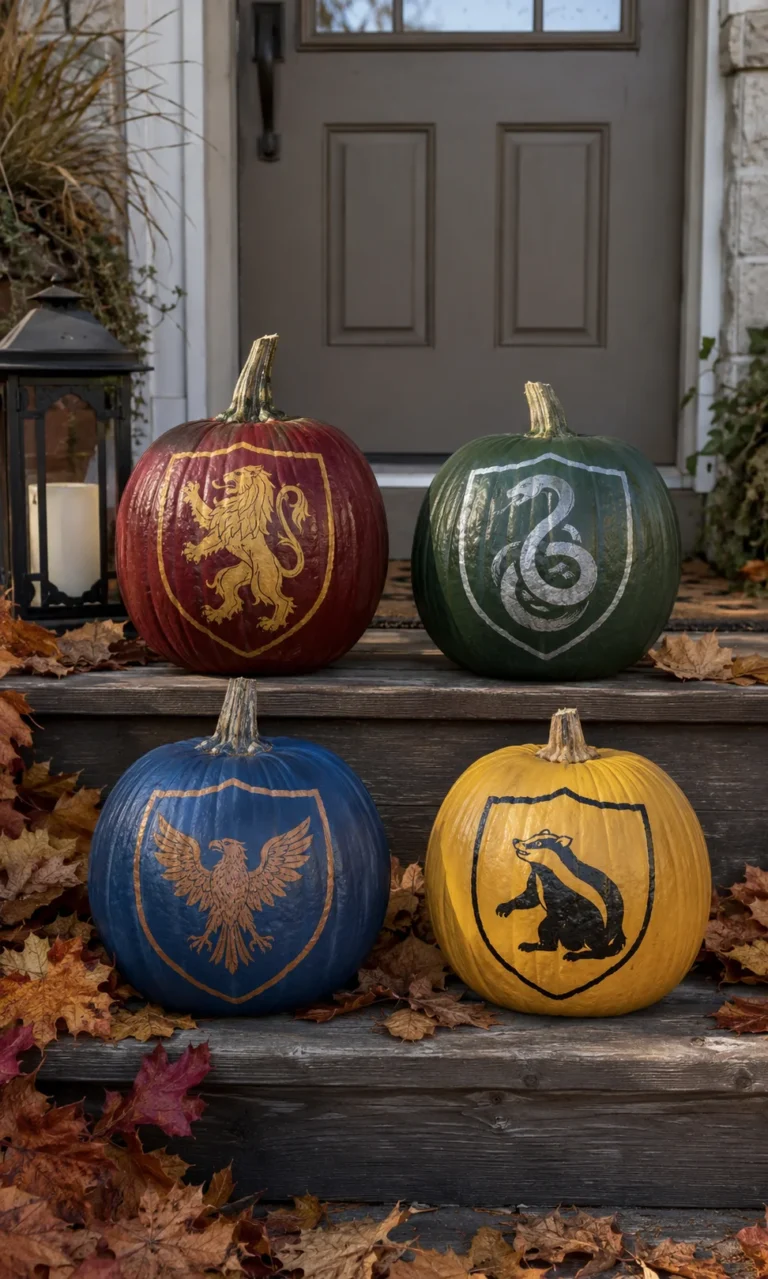
Pale heirloom pumpkins get painted in muted tones instead of carved, so they last the whole season.
The Activity & The Result: No knives, no stringy guts, no pumpkin rotting on the porch by the 20th. Everyone paints their own and you end up with a genuinely pretty grouping for the entry.
Quick Reality Check: Time: 40 mins | Mess Level: 3/5 | Budget: Under $15
Materials You Actually Need: White or green heirloom pumpkins, acrylic craft paint in muted shades, brushes, and a drop cloth.
Stylist / Safety Micro-Hack: Stick to three colors from the same family, like cream, rust and charcoal. Give everyone a full rainbow and the finished group looks like a craft fair rather than decor.
Where to Style It: Entry steps, console table, or a dough bowl on the table.
13. Mummy Juice Box Wrapping
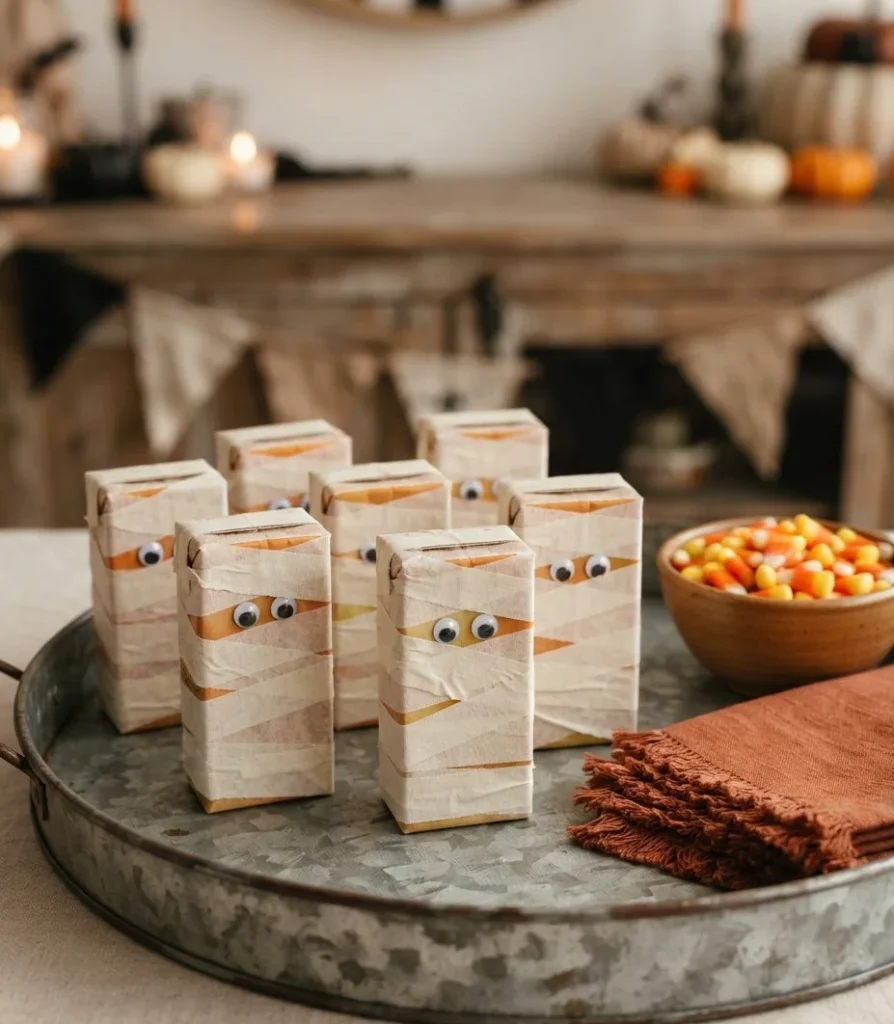
Feels like · The cutest party table trick
Juice boxes wrapped in white tape with two eyes stuck on become a tray of little mummies.
The Activity & The Result: Fast enough that even impatient kids finish happily. Fifteen minutes of wrapping gets you a party table that looks like you planned for weeks.
Quick Reality Check: Time: 15 mins | Mess Level: 1/5 | Budget: Under $10
Materials You Actually Need: Juice boxes, white washi or medical tape, and googly eyes.
Stylist / Safety Micro-Hack: Wrap at slight angles and let the strips overlap unevenly. Neat horizontal stripes look like a bandage, messy ones look like a mummy.
Where to Style It: Party drinks table or a galvanized tub of ice.
14. The Witches’ Brew Fizzing Cauldron
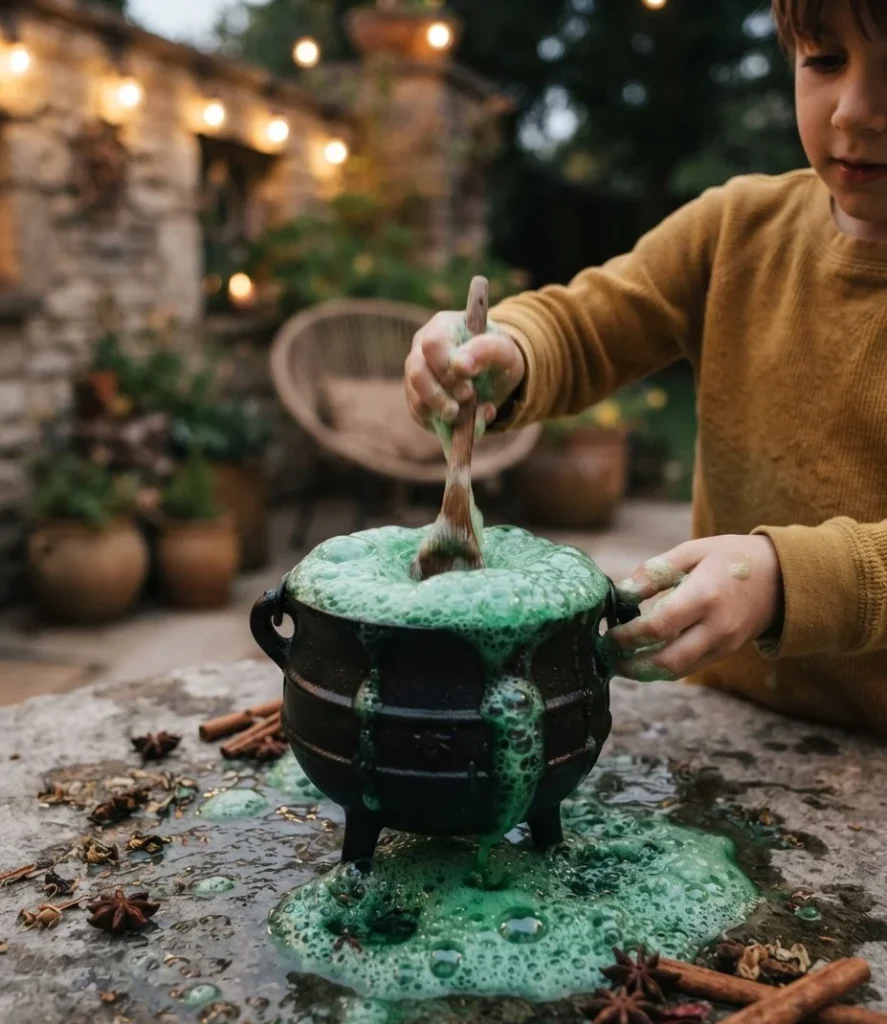
Feels like · A real potion bubbling over
A plastic cauldron of coloured liquid erupts into foam when the kids add the secret ingredient.
The Activity & The Result: Bicarbonate of soda, vinegar, a squirt of washing up liquid and green food colouring. It foams up and over the rim, kids scream, everyone wants to do it again immediately.
Quick Reality Check: Time: 10 mins | Mess Level: 5/5 | Budget: Under $6
Materials You Actually Need: A plastic cauldron or bucket, baking soda, white vinegar, dish soap, and green food coloring.
Stylist / Safety Micro-Hack: Do this one outside on the grass or in the bathtub. Food colouring stains grout and worktops, and this is the messiest project on the list by a mile.
Where to Style It: Back garden or porch steps, never the dining table.
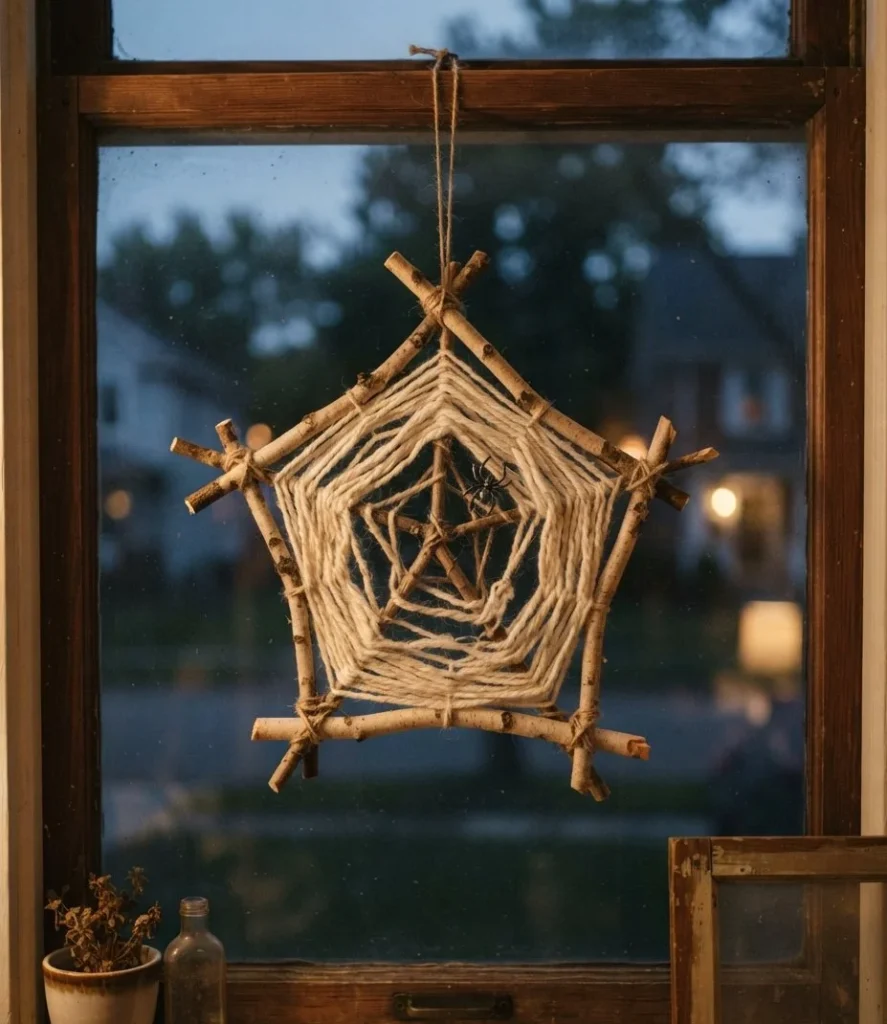
15. Yarn Spiderweb Weaving
Feels like · A quiet craft with a cup of cider
White yarn woven around a circle of sticks makes a rustic web to hang on the wall or a window.
The Activity & The Result: Weaving is oddly calming and there’s no wrong way to do it. Slightly uneven webs look more real than perfect ones, which takes all the pressure off.
Quick Reality Check: Time: 30 mins | Mess Level: 1/5 | Budget: Under $5
Materials You Actually Need: Four or five garden sticks, white or cream yarn, a small plastic spider, and scissors.
Stylist / Safety Micro-Hack: Tie the sticks into a star shape first, then work outward in circles. Cream yarn against a dark wall looks far more expensive than bright white. Our Halloween living room decor post shows where a piece like this sits best.
Where to Style It: Above the sofa, in a window, or leaning on the mantel.
Quick DIY Halloween Project Cheat Sheet
Short on time or patience? Here’s how the most popular ones compare at a glance.
Swipe the table sideways to see every column.
| Project / Activity | Best For | Time | Mess Level | Budget | Stylist / Safety Micro-Hack |
|---|---|---|---|---|---|
| Cheesecloth Ghosts | Biggest wow factor indoors | 20 mins + drying | 3/5 | Under $10 | Dry them over parchment paper |
| Cardstock Bat Swarm | Renters and blank walls | 45 mins | 1/5 | Under $6 | Blue tape under every mounting square |
| Pool Noodle Spiders | Big porch impact on a budget | 60 mins | 2/5 | Under $15 | Wire inside legs so they hold shape |
| Mason Jar Mummies | Toddlers and small helpers | 25 mins | 1/5 | Under $7 | LED tea lights only, never real flame |
| No-Carve Pumpkins | Decor that lasts all season | 40 mins | 3/5 | Under $15 | Limit everyone to three colors |
| Fizzing Cauldron | Pure entertainment, no decor | 10 mins | 5/5 | Under $6 | Outside only, food coloring stains |
4 Golden Rules for Stress-Free Holiday Crafting
Lay parchment paper over the table first. Paint, glue and starch all peel off it once dry. Cleanup becomes folding up a sheet and binning it, which is the whole point.
Go flameless around paper, fabric and yarn. Cheesecloth, gauze and cardstock catch fast. Battery tea lights and fairy lights give you the same glow and you can leave them on unattended.
Choose low-temp glue every time. It holds cardstock, felt and fabric just as well, it peels off skin instead of burning, and kids can actually help instead of watching.
Let the crooked bits stay crooked. Wonky ghost eyes and uneven webs look more haunted, not less. This is the one holiday where imperfect is the actual goal.
Don’t look at this list and plan all fifteen. Pick one, put a Halloween playlist on, and clear the table for an hour this weekend.
Even if the ghost comes out a bit lopsided, it’ll be the thing your kids point at every time someone walks in. That’s worth more than anything you could buy in a box.