How to Add Ribbon to a Christmas Tree Like a Pro (Without It Looking Messy)
It always starts with so much hope. You’ve got a gorgeous spool of velvet ribbon, the lights look perfect, and you start walking around the tree, wrapping as you go. Three laps later you step back, and the tree looks like it’s been tightly bandaged after an accident.
That’s the trap of one long, continuous strand wound around the outside. It squashes the branches flat, chokes the shape and burns through spool after spool, all without adding any real depth. Somewhere around the middle of the tree, you usually run out too.
Professional tree dressers do it differently. They cut the ribbon into short working strips, pinch and puff each one into soft waves, and tuck the ends deep into the tree. The ribbon looks like it’s flowing in and out of the branches instead of being wrapped around them.
So here’s exactly how to add ribbon on a Christmas tree like a pro, starting with how much you really need, then four methods you can pick from depending on the look you want.
The Ribbon Yardage and Width Calculator
These are working estimates for a full, designer look with the cut-and-tuck method. A lighter touch uses less, and long cascading streamers use more, so buy one extra spool if you’re between sizes.
Swipe sideways on mobile to see the full table.
| Tree Height | Single Ribbon | Double Layered / Two Ribbons | Ideal Ribbon Width | Best Ribbon Texture / Fabric |
|---|---|---|---|---|
| 6-Foot Tree | About 20 to 25 yards | About 40 to 50 yards total | 2.5 inches | Wired velvet or linen |
| 7.5-Foot Tree | About 25 to 35 yards | About 50 to 70 yards total | 2.5 to 4 inches | Wired velvet, linen or plaid |
| 9-Foot Tree | About 35 to 45 yards | About 70 to 90 yards total | 4 inches | Wired velvet or heavy linen |
| 12-Foot Tree | About 50 to 60 yards | About 100 to 120 yards total | 4 to 6 inches | Heavy wired velvet or brocade |
The 4 Golden Rules Before You Touch Your Tree
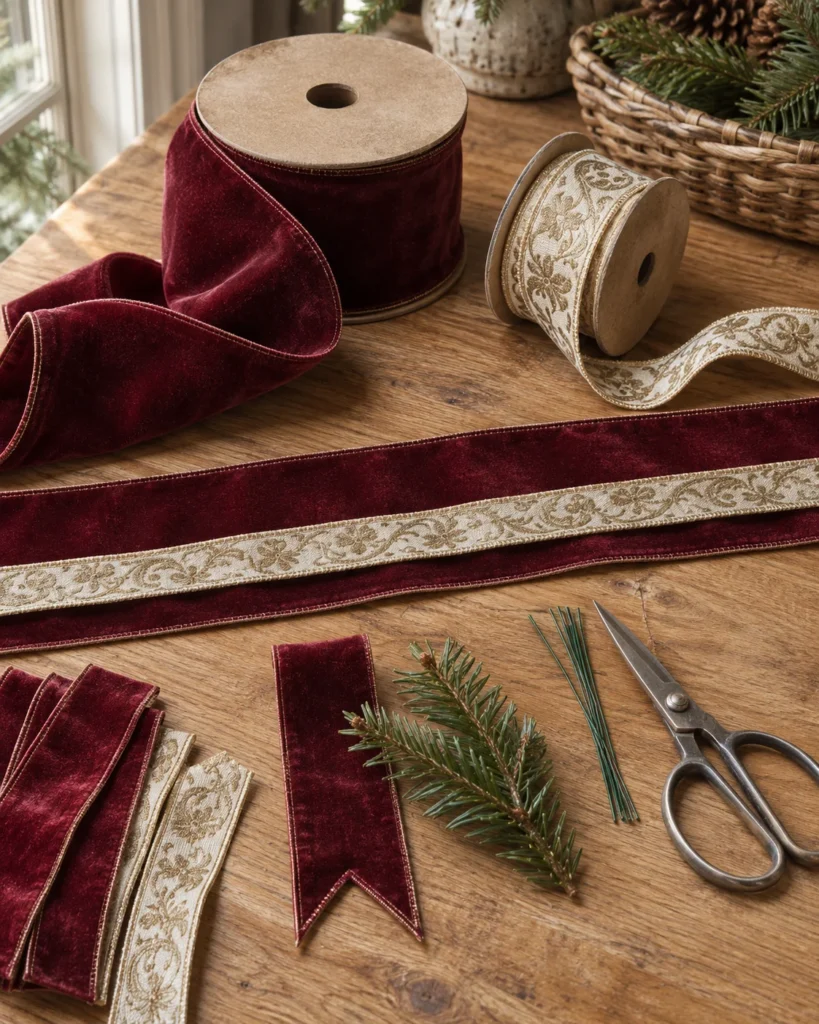
1. Wired Ribbon Only
Wired edges let you shape loops that hold. Unwired satin and grosgrain sag and go limp within a day or two, especially near warm lights.
2. Lights, Then Ribbon, Then Ornaments
Ribbon goes on after the lights are tested and set, but before a single bauble. Ornaments hang around the ribbon, not the other way around.
3. Pair Two Widths
A 4 inch base ribbon with a 2.5 inch accent on top adds instant luxury. The difference in width creates natural layers and shadows.
4. Finish With a Dovetail Cut
Fold each tail in half lengthwise and cut at an angle from the folded edge toward the outer edge. Unfold, and you get a clean inverted V that looks professional and resists fraying.
Since lights always go first, it’s worth getting them right. Warm, layered tree lighting makes ribbon glow in the evening, and my warm cozy home lighting ideas explain why warm light makes velvet and linen look so rich.
A friend once hung every ornament first, then tried to add ribbon afterward. Every time she tucked a loop, two baubles fell off. By the end she had ribbon caught on hooks, three broken ornaments and a tree that looked half undressed.
The fix: Lights first, ribbon second, ornaments last. It’s the one order of operations every pro sticks to.
4 Pro Stylist Ribbon Techniques
Pick the look you like best. You can also mix two methods, like billow waves plus a few loop clusters.
Method 1: The Cut, Pinch and Tuck Billow Waves
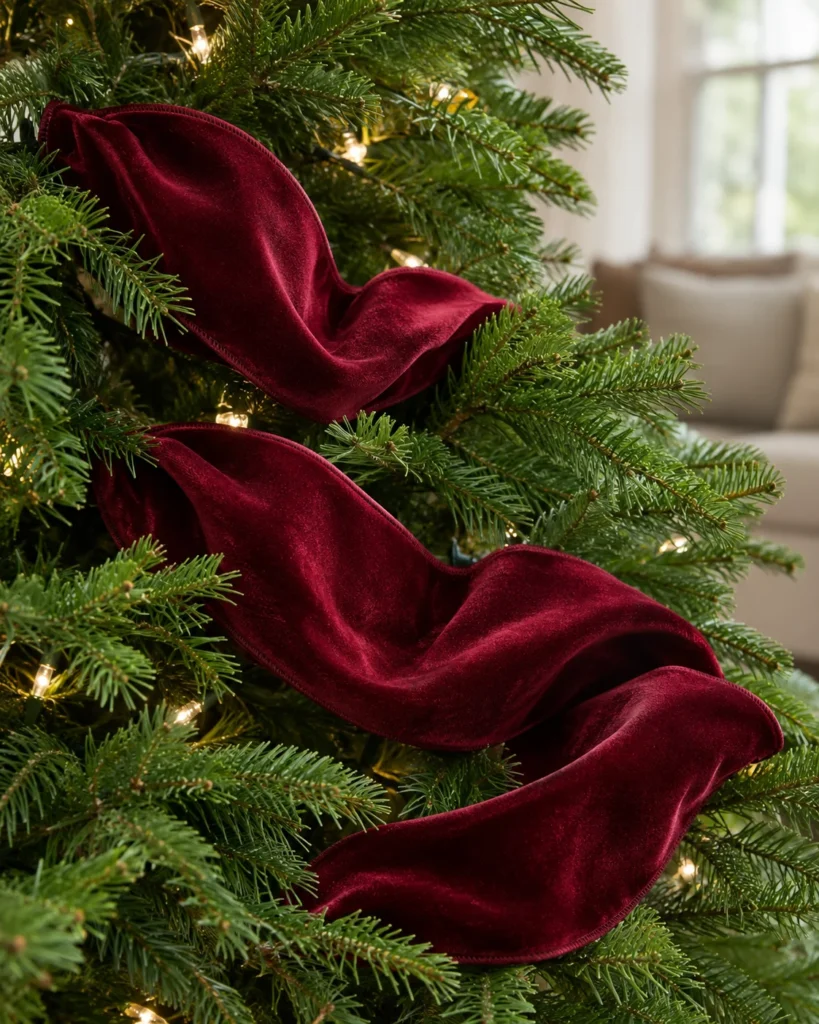
Best for · the most popular, natural look
This is the method most designer trees use. Pre-cutting the ribbon into short sections gives it room to bounce instead of strangling the branches.
Step by step:
- Cut the ribbon into 3 to 4 foot strips.
- Pinch one end and tuck it about 6 inches deep into an inner branch.
- Curve the ribbon forward into a soft, puffy loop that sits out over the branches.
- Pinch the other end and tuck it deep into a branch about 12 to 18 inches away.
- Start the next strip where the last one ended, so the waves seem to flow from one to the next.
Lock it in place: On artificial trees, twist the branch needles around each pinch like a little twist tie. On real trees or slippery branches, use a short piece of green floral wire around the pinch and branch. Either way, the hold is invisible.
Method 2: The Cascading Waterfall Streamers
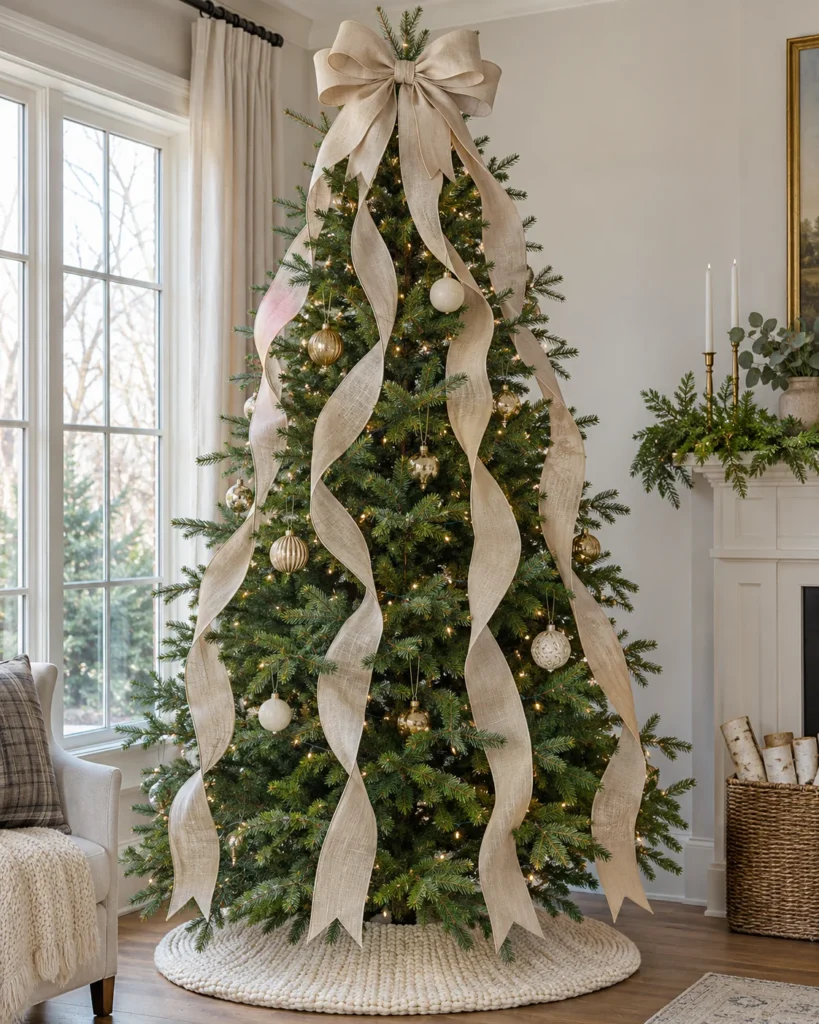
Best for · vertical drama
Long ribbons flow straight down from the top like a waterfall. It’s dramatic, makes the tree look taller and works beautifully with a big topper or bow.
Step by step:
- Cut 4 to 6 long strands, each about 1.5 times the height of your tree.
- Anchor them at the crown, just behind the tree topper, with floral wire.
- Space them evenly around the tree and weave each one down in soft, loose S curves across the outer branch tips.
- Tuck the ribbon lightly into the branches every 12 to 18 inches to keep the curves in place.
- Let the tails drape out at the bottom near the skirt and finish with a dovetail cut.
Pro tip: Keep every streamer roughly the same distance apart so the tree looks balanced from all sides. Step back after each one.
Method 3: The Double-Ribbon Layered Stack
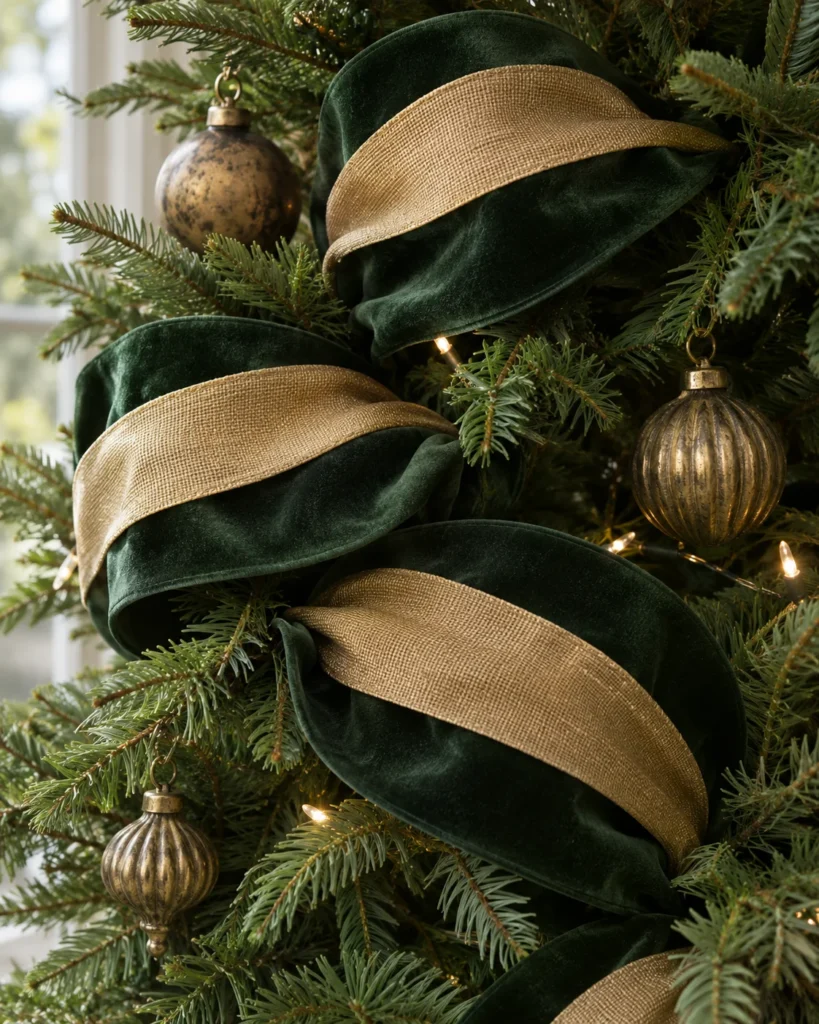
Best for · textured high-end luxury
Two ribbons layered together look far richer than one. A wide solid base with a narrower patterned or metallic ribbon on top is the secret behind many hotel and boutique trees.
Step by step:
- Cut a 4 inch solid velvet or linen ribbon and a 2.5 inch patterned or metallic ribbon to the same length.
- Lay the narrow ribbon centered on top of the wide one.
- Pinch both ribbons together at each end and treat them as one piece.
- Use the cut, pinch and tuck method to shape them into waves on the tree.
Why it works: Matte velvet soaks up light, while shimmering metallic reflects it. Together they create depth that shows up beautifully at night. The same velvet and plaid textures make a living room feel layered too, like in my cozy Thanksgiving living room ideas.
Method 4: The 18-Inch Loop and Tail Cluster
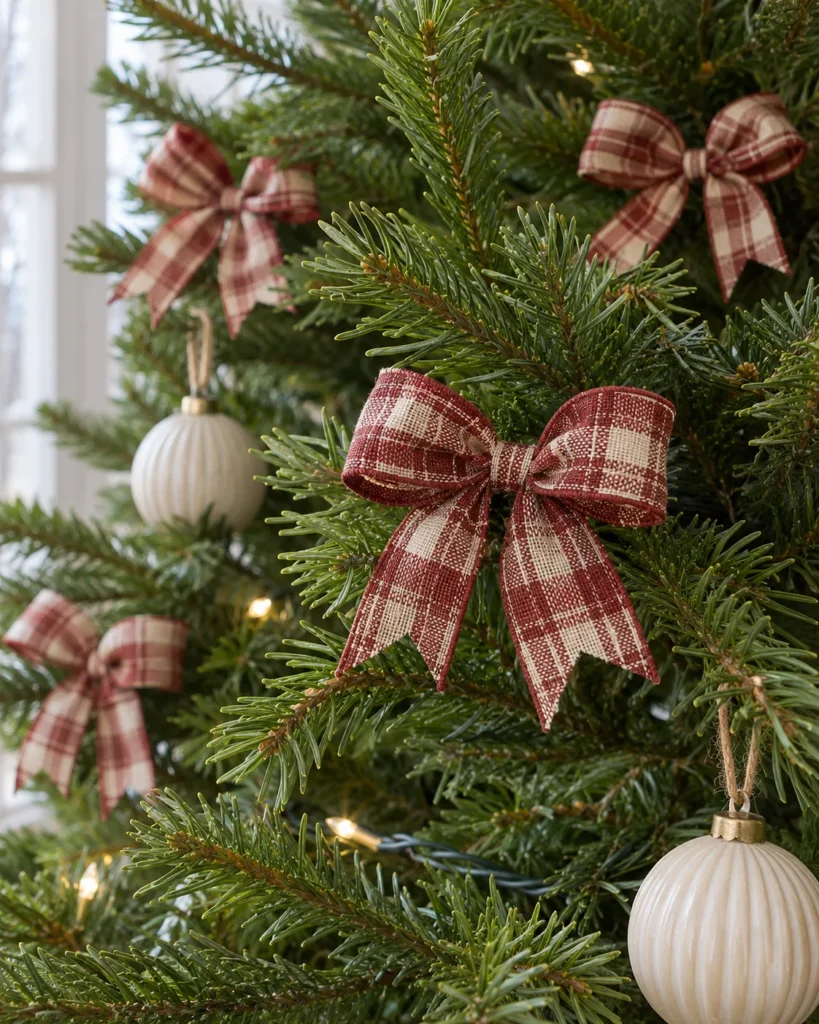
Best for · beginners and filling gaps
If long ribbons feel intimidating, start here. Short loop clusters are easy to make, easy to place and perfect for filling empty spots between ornaments.
Step by step:
- Cut ribbon into 18 to 24 inch strips.
- Fold each strip into two small loops with two tails hanging down, like a simple bow.
- Pinch the center and wrap it tightly with floral wire, leaving a few inches of wire free.
- Use the extra wire to attach each cluster directly to a branch tip.
- Space them evenly, then fill in around them with ornaments.
Pro tip: Make a few extra clusters for around the house. They look lovely on wrapped trays, tied to chair backs or tucked into a mantel garland.
A reader bought two spools of beautiful satin ribbon for her 7.5 foot tree, wrapped it in one long spiral and ran out at the halfway mark. The ribbon she did use slowly drooped flat against the branches by the next morning, because it had no wire in it.
The fix: Buy wired ribbon, check the yardage calculator before you shop and cut strips instead of wrapping. You’ll use less ribbon and get far more volume.
4 Common Ribbon Mistakes and How to Avoid Them
- The barber pole spiral. Steep diagonal stripes around the tree look busy and can make it lean visually. Stick to vertical cascades or gentle, shallow waves, and keep the angle consistent all the way around.
- Pulling the ribbon too tight. Tight ribbon flattens branches and looks wrapped instead of styled. Leave plenty of slack between tuck points and push the pinches deeper into the tree, so the ribbon puffs outward.
- Leaving it all on the surface. Ribbon that sits only on the outer tips looks flat. Always tuck the ends and pinch points deep into the tree, so each wave has a valley and a peak. That in-and-out movement is what creates shadows and depth.
- Skipping the finished ends. Raw, straight-cut tails fray and look unfinished. Dovetail cut every visible tail, and tuck any short, messy ends out of sight inside the branches.
Use Your Leftover Ribbon Around the House
There’s almost always a little ribbon left over, and it’s the easiest way to make the whole room feel finished. Weave a few billows through the mantel garland so the tree and fireplace match, the way I style it in my Thanksgiving mantel decor ideas.
Tie loop clusters onto chair backs or napkins for dinner, then keep the centerpiece low and simple, like in my neutral dining room centerpiece styling guide.
A small bow on the handle of a tray with candles and greenery pulls the coffee table into the theme too. My fall tray decor ideas show how to layer a tray so it looks styled, not cluttered. It’s all part of the cozy, lived-in style we share at Living Style Bliss.
Frequently Asked Questions
How much ribbon do you need for a 7.5-foot Christmas tree?
Plan on about 25 to 35 yards of one ribbon for a full look, or around 50 to 70 yards total if you’re layering two ribbons. Long cascading streamers can use more, so an extra spool is a smart backup.
Should ribbon go on a Christmas tree before or after ornaments?
Ribbon goes on after the lights and before the ornaments. That way you can tuck it deep into the branches without knocking baubles off.
How do you keep ribbon from sliding or sagging on a tree?
Use wired ribbon and secure each pinch point by twisting branch needles around it or using small pieces of floral wire. Tucking the ends 6 inches deep gives them a firm hold.
Ribbon is what turns a nicely lit tree into one that looks like it came straight out of a magazine. Now that you know how to add ribbon to a Christmas tree like a pro, with soft waves, deep tucks and clean dovetail tails, you can skip the bandaged look for good. Pin this guide to Pinterest so it’s ready when the decorating starts.