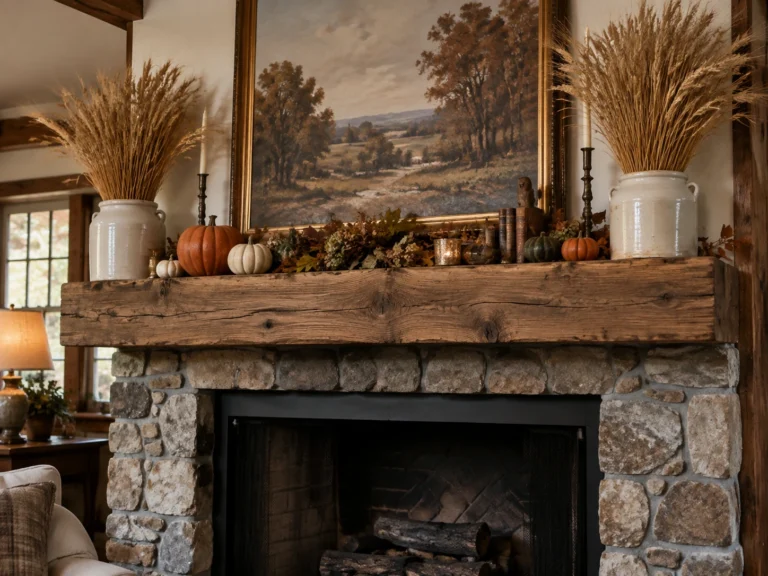
12 Cozy Christmas Dough Bowl Decorating Ideas That Elevate Any Table
If I could keep only one decor piece for the holidays, it would be my dough bowl. That long, worn wooden trough works on the dining table, the kitchen island and the coffee table, and the grain alone brings a kind of warmth no store-bought centerpiece can copy. Drop in some greens and it already looks like Christmas.
Here’s the catch nobody warns you about. Most dough bowls are far deeper than they look. You pile in your prettiest ornaments and stems, and they all slide to the bottom and disappear. What should look lush ends up looking flat, messy or swallowed whole.
The fix is a hidden foundation. Fill the bottom with crumpled craft paper, a block of dry foam or a cushion of moss, so everything sits up near the rim. Then let textured greenery spill over the carved edges, and the bowl looks full, intentional and twice as abundant.
So here are 12 Christmas dough bowl decorating ideas, each built from the bottom up with exact ingredients and a wood-care trick to protect your bowl.
The 3-Tier Dough Bowl Anatomy Matrix
Swipe sideways on mobile to see the full table.
| Bowl Layer | Secret Material / Base | Styling Purpose | Pro Stylist Rule |
|---|---|---|---|
| Hidden Foundation · The Riser | Crumpled kraft paper, dry floral foam or sheet moss over a liner | Lifts everything up to the rim | Fill to about 1 inch below the edge |
| Foliage Apron · The Spill | Cedar, eucalyptus, boxwood or magnolia | Softens the hard edges and hides the base | Let it hang 3 to 5 inches over the sides |
| Focal Showstoppers · The Height | Candles, birch logs, ornaments or fruit | Gives the eye somewhere to land | Group in odd numbers and keep under 12 inches |
| Ambient Glow · The Mood | Battery micro lights or flameless candles | Adds warmth after dark | Hide battery boxes in the foundation layer |
Build in this order, from the bottom up, every single time.
12 Christmas Dough Bowl Decorating Ideas
1. Aspen Birch Log Trio With Bleached Pinecones and Micro Lights
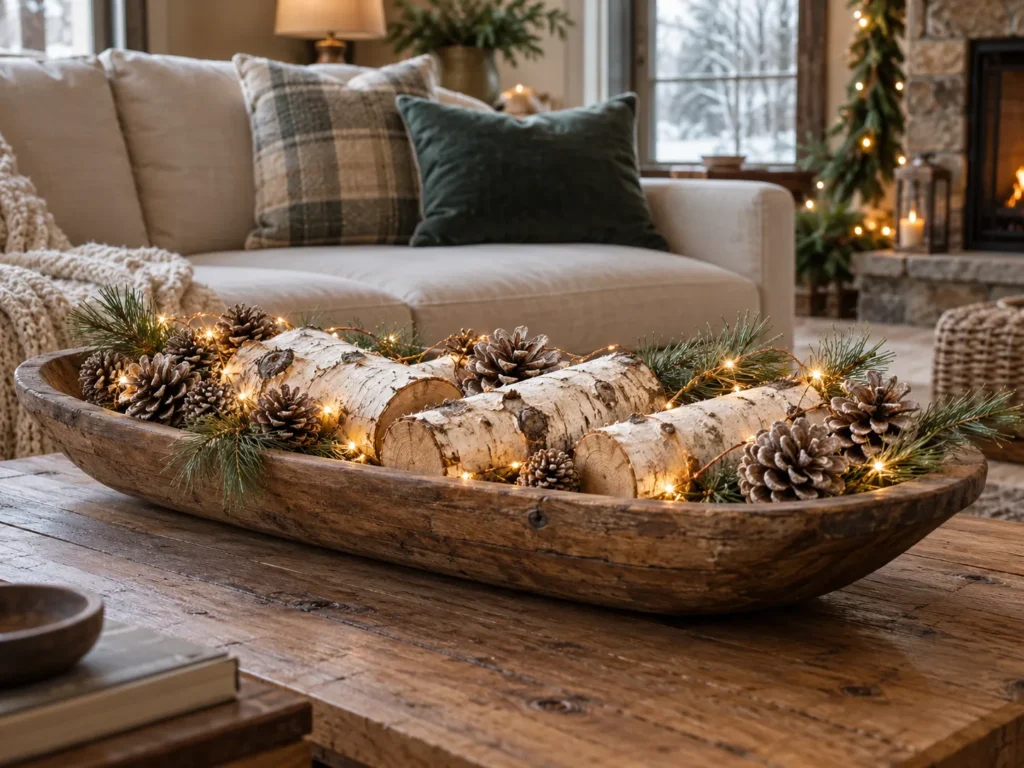
Feels like · snowy woodland cabin
The Look and Placement Mood: Three short birch logs lie side by side down the bowl, nestled in pale pinecones and twinkling with tiny warm lights. It’s the perfect coffee table anchor, soft and wintry without any fuss.
The Ingredient Recipe:
- Three aspen or birch logs, about 2 to 3 inches thick and 6 to 8 inches long
- 8 to 10 bleached or white-washed pinecones
- A 10 foot strand of battery copper wire micro lights
- Short white pine sprigs
The Foundation and Layering Secret:
- Line the bowl, then fill it with crumpled kraft paper to 2 inches below the rim.
- Tuck the battery box into the paper at one end and lay the lights loosely across the top.
- Set the logs on the paper, then fill gaps with pinecones and pine so the lights peek through.
Wood Care and Table Safety Hack: Foraged birch can carry bugs, so bake the logs in a low oven around 200°F for an hour before bringing them to the table. Birch rounds also look lovely stacked near the fireplace, like in my fall living room decor ideas.
2. Staggered Flameless Pillars in Balsam Fir and Cranberry Picks
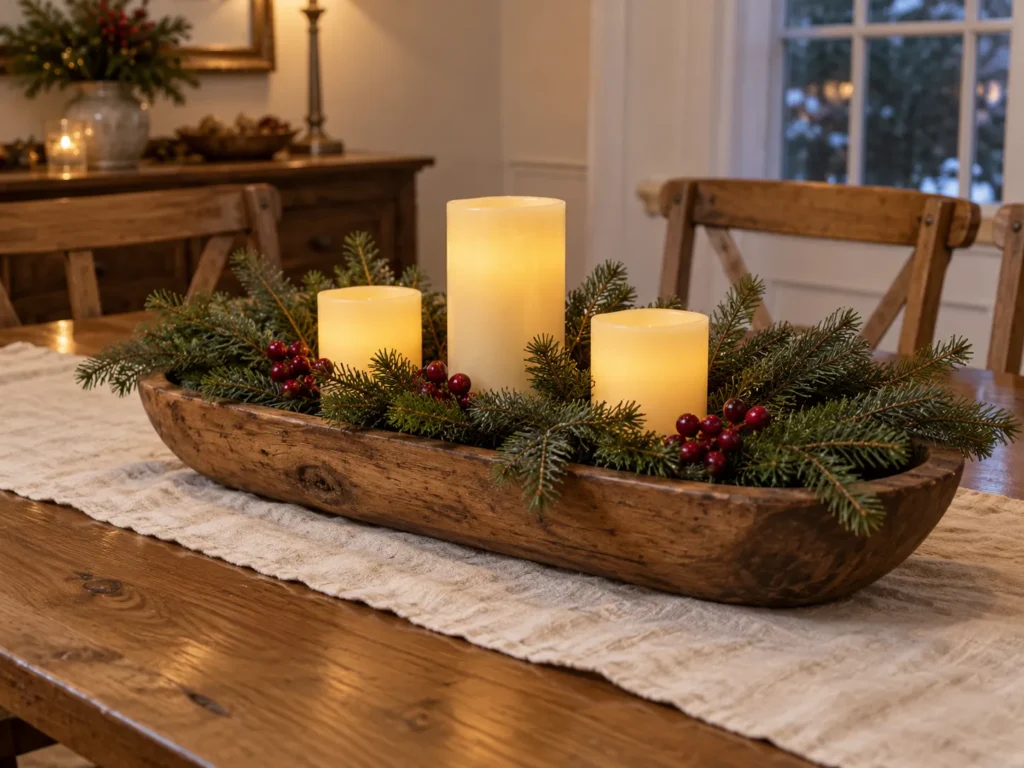
Feels like · candlelit country supper
The Look and Placement Mood: Three ivory pillars in different heights glow down the center of the bowl, surrounded by fragrant balsam and bright red cranberry picks. On a dining table, it gives that classic candlelit Christmas look without a single real flame.
The Ingredient Recipe:
- Three flameless ivory pillars in 4, 6 and 8 inch heights
- Fresh or faux balsam fir
- 6 to 8 faux cranberry picks
- A dry floral foam block
The Foundation and Layering Secret:
- Cut the foam to fit the bowl snugly, 1 inch below the rim.
- Set the pillars on top of the foam, tallest in the center, and press them in slightly so they don’t wobble.
- Push balsam stems into the foam around each candle, then add cranberry picks in small clusters.
Wood Care and Table Safety Hack: Choose remote-controlled flameless pillars with real wax shells for the most realistic look. My warm cozy home lighting ideas explain how to pair them with lamps so the whole room glows.
3. Champagne and Tarnished Mercury Glass Kugels in Frosted Eucalyptus
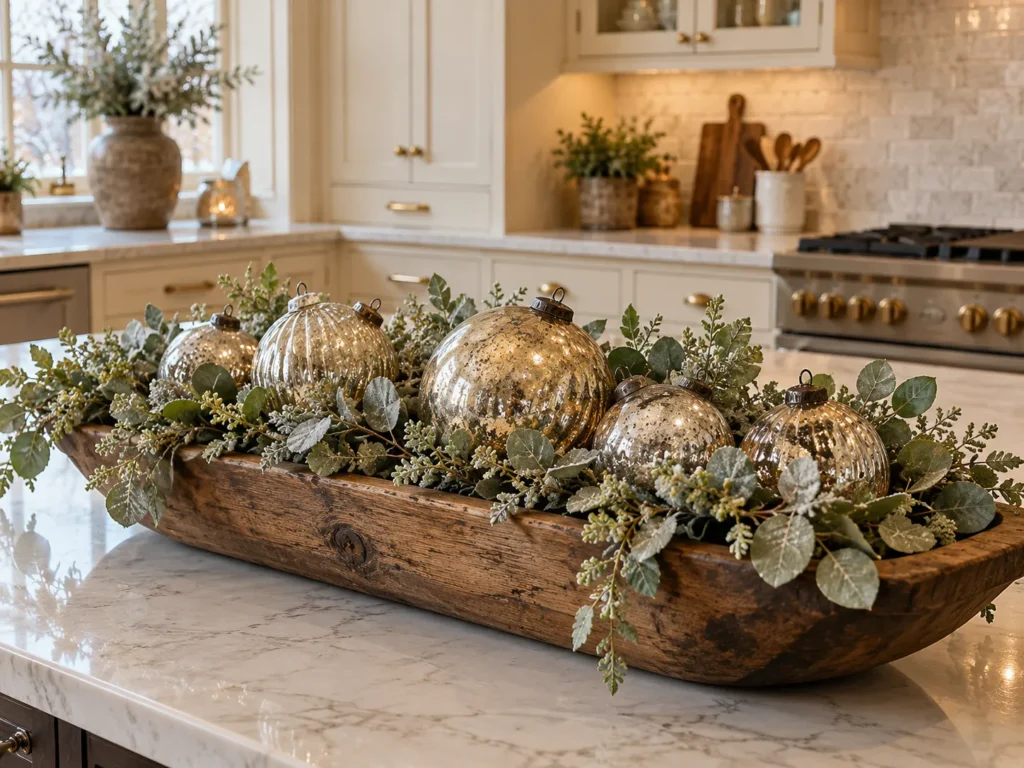
Feels like · vintage European Christmas
The Look and Placement Mood: Soft champagne and smoky mercury glass baubles rest in a bed of silvery frosted eucalyptus, catching the light like old heirlooms. On a kitchen island, it looks elegant and a little old-world.
The Ingredient Recipe:
- 5 to 7 champagne and mercury glass kugel-style baubles in 60 to 100mm
- Frosted faux eucalyptus or seeded eucalyptus
- Sheet moss for the base
- A few small ornament hooks
The Foundation and Layering Secret:
- Fill the bowl with crumpled paper and top it with a smooth layer of moss.
- Lay eucalyptus so it spills over both long edges.
- Nestle the baubles in clusters of three, with the largest ones in the middle and smaller ones near the ends.
Wood Care and Table Safety Hack: Real glass kugels are heavy and fragile. Bend an ornament hook into a small loop and push it into the moss beside each bauble so it can’t roll off when someone bumps the table.
4. Simmer-Pot Cottagecore Display With Blood Oranges and Star Anise
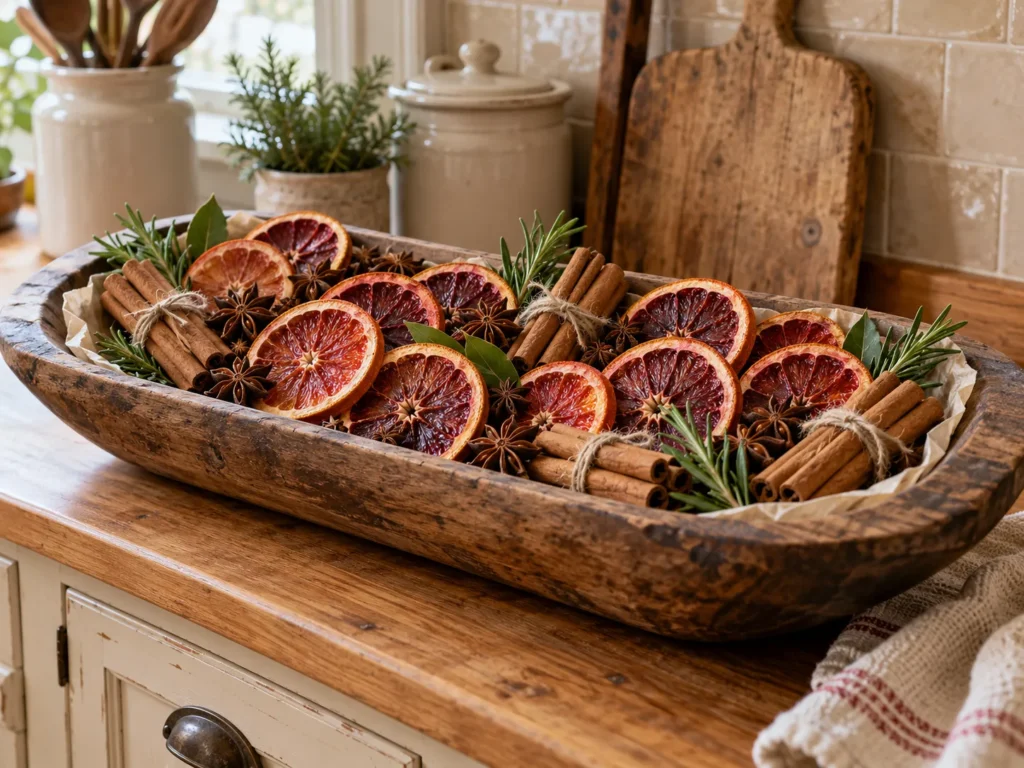
Feels like · spiced cottage kitchen
The Look and Placement Mood: Deep red dried blood orange slices, star anise and bundles of cinnamon sticks fill the bowl like a stovetop simmer pot waiting to be made. It’s warm, rustic and smells wonderful on a kitchen counter.
The Ingredient Recipe:
- 15 to 20 dehydrated blood orange slices
- A handful of whole star anise
- 4 to 5 raw cinnamon stick bundles tied with twine
- Short rosemary or bay sprigs
The Foundation and Layering Secret:
- Fill the bowl with crumpled parchment paper to just below the rim.
- Lay orange slices in overlapping rows, tilted up so their color shows.
- Tuck cinnamon bundles at intervals and scatter star anise in the gaps, finishing with herbs.
Wood Care and Table Safety Hack: Dried citrus can still release a little sticky juice. Parchment underneath keeps it off the wood. Dry slices in a 200°F oven for 3 to 4 hours, flipping halfway, and store extras in a jar for a real simmer pot later.
A friend once filled her deep dough bowl straight up with twenty ornaments, no base underneath. From across the room it looked like four ornaments and a shadow. Everything had rolled into the bottom curve, and she ended up buying twenty more trying to fill it.
The fix: Fill the bottom first with paper, foam or moss. You’ll use half the ornaments and it will look twice as full.
5. Neutral Sisal Bottle Brush Forest in Cream and Sage
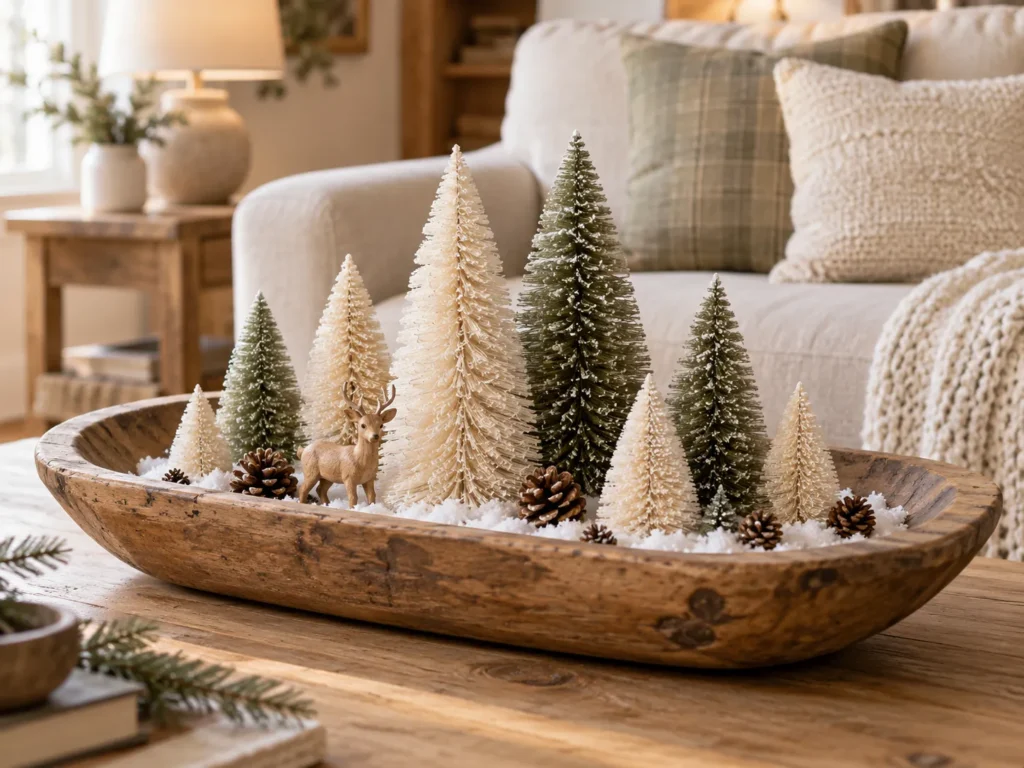
Feels like · tiny snowy village
The Look and Placement Mood: A little forest of cream and sage sisal trees stands in a drift of faux snow, like a miniature winter scene. It’s soft and Scandinavian on a coffee table or console.
The Ingredient Recipe:
- 7 to 9 sisal bottle brush trees in 3 to 8 inch sizes, cream and sage
- Faux flocked snow or a snow blanket
- A dry floral foam block
- Tiny wooden deer or a small cottage, optional
The Foundation and Layering Secret:
- Set foam in the bowl so the top sits level with the rim.
- Push each tree’s base wire into the foam, placing tall ones in the middle and short ones toward the ends.
- Cover the foam with a snow blanket, then sprinkle flocked snow lightly on the trees.
Wood Care and Table Safety Hack: Flocked snow powder sheds into wood grain and is hard to vacuum out. Use a snow blanket underneath and keep loose flocking to the trees only.
6. Distressed Brass Cowbells on Jute Draped Over Weeping Incense Cedar
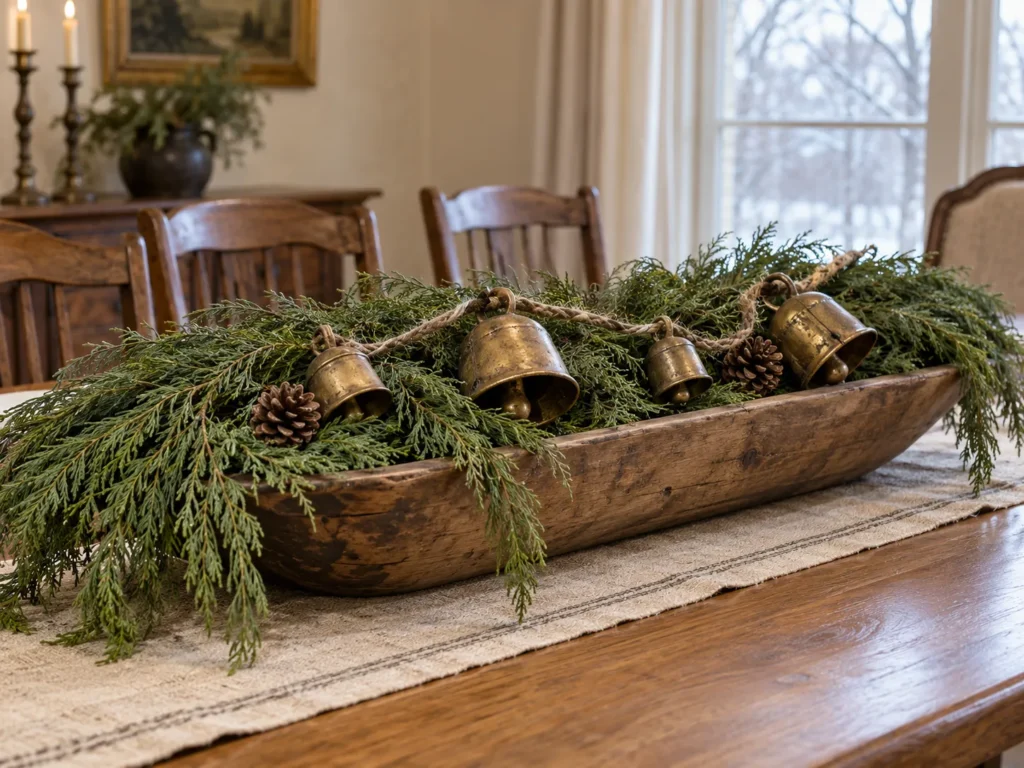
Feels like · Alpine farmhouse table
The Look and Placement Mood: Soft, weeping incense cedar fills the bowl and spills over the sides, with a string of aged brass cowbells on rough jute draped across it. It’s warm and textured, a great dining table runner.
The Ingredient Recipe:
- Fresh or faux incense cedar
- 3 to 5 distressed brass cowbells
- Raw jute twine
- A few small pinecones
The Foundation and Layering Secret:
- Add a moss base over a liner.
- Lay cedar from the center out so it cascades over both ends.
- Knot the bells along jute every 6 inches and drape it in a loose wave across the greens.
Wood Care and Table Safety Hack: Metal bells can scratch the bowl’s rim. Rest them on the greenery rather than the wood. This same cedar and bell pairing works on a mantel too, like in my Thanksgiving mantel decor ideas.
7. Iced Juniper With Frosted Sugar Pinecones and Duck-Egg Blue Glass
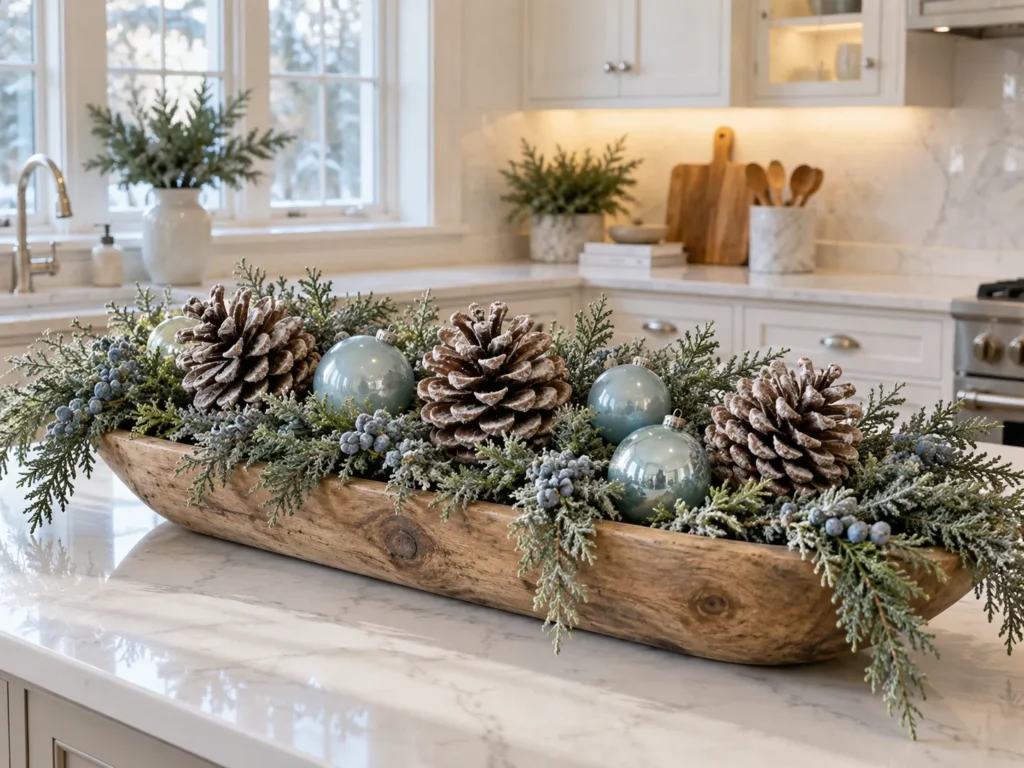
Feels like · frosted winter morning
The Look and Placement Mood: Frosty juniper sprigs with dusty blue berries, giant frosted pinecones and soft duck-egg blue glass ornaments. It’s cool, calm and lovely on a white kitchen island.
The Ingredient Recipe:
- Iced or frosted faux juniper sprigs
- 3 giant frosted sugar pinecones
- 5 pale duck-egg blue glass ornaments
- Crumpled kraft paper for the base
The Foundation and Layering Secret:
- Fill with paper and lay juniper so it covers the base fully.
- Set the three big pinecones in a staggered line down the center.
- Tuck the blue ornaments into the spaces between the cones.
Wood Care and Table Safety Hack: Big pinecones are top-heavy and can tip over. Wire a small floral pick into the base of each cone and push it into the paper to anchor it.
8. Glossy Magnolia Leaves With Deep Ruby Pomegranates
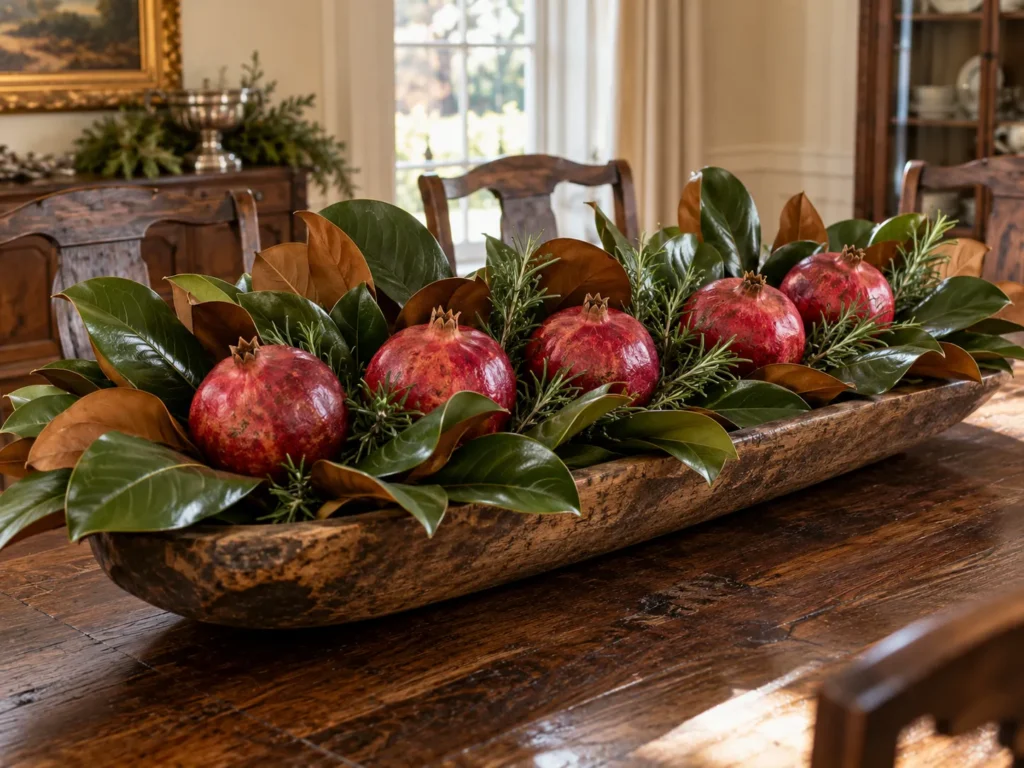
Feels like · Southern holiday dinner
The Look and Placement Mood: Big magnolia leaves fan out across the bowl with their velvety brown undersides showing, holding a row of deep red pomegranates. It’s rich and dramatic on a long dining table.
The Ingredient Recipe:
- 15 to 20 fresh or faux magnolia leaves
- 5 whole pomegranates
- A few sprigs of rosemary
- Wax paper liner and moss
The Foundation and Layering Secret:
- Line the bowl with wax paper and add a moss base.
- Arrange magnolia leaves overlapping around the rim, flipping every third leaf to show the brown underside.
- Nestle pomegranates in a row down the center and tuck rosemary between them.
Wood Care and Table Safety Hack: Keep pomegranates whole. Once cut, their juice stains wood almost permanently. Check them every few days and swap any that get soft.
9. Yarn Ball Baubles, Mini Knit Mittens and Wood Bead Garland
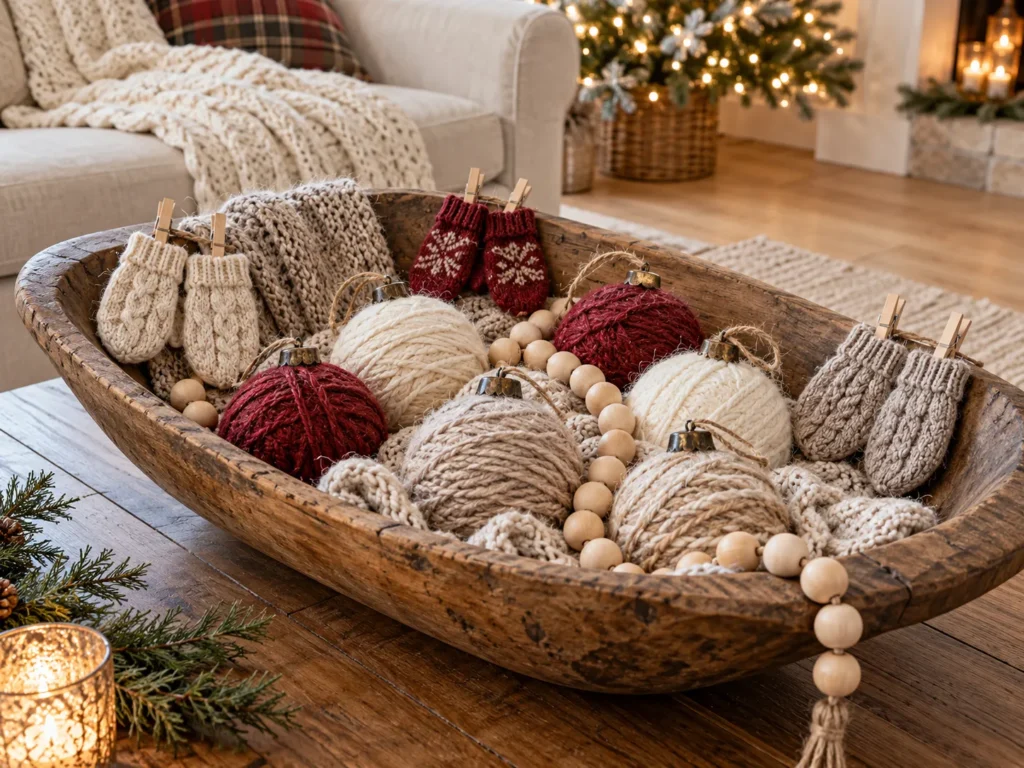
Feels like · cozy sweater weather
The Look and Placement Mood: Soft yarn-wrapped balls, tiny knitted mittens and swags of raw wood bead garland fill the bowl with texture. It’s the coziest coffee table display, and the one kids love to touch.
The Ingredient Recipe:
- 6 to 8 yarn ball ornaments in cream, oatmeal and red
- 3 or 4 pairs of miniature knit mittens
- A raw wood bead garland, about 6 feet
- A soft knit scarf or sweater scrap for the base
The Foundation and Layering Secret:
- Fill the bowl with crumpled paper and drape a knit scarf over it so it hangs over one side.
- Pile yarn balls in a loose group in the center.
- Clip mittens to the rim with mini clothespins and swag the wood bead garland across the top.
Wood Care and Table Safety Hack: This one has no glass and nothing sharp, which makes it the best choice for homes with toddlers. It pairs perfectly with soft throws, like the ones in my cozy Thanksgiving living room ideas.
A reader lit three real pillar candles in her antique dough bowl on Christmas Eve. One burned low enough that a sprig of dried pine caught. She got it out quickly, but the inside of her grandmother’s bowl still has a dark scorch mark.
The fix: Never burn real flames in a wooden bowl full of dry greens. Flameless candles give the same glow with zero risk.
10. Fluted Frosted Tea Light Holders in Preserved Boxwood
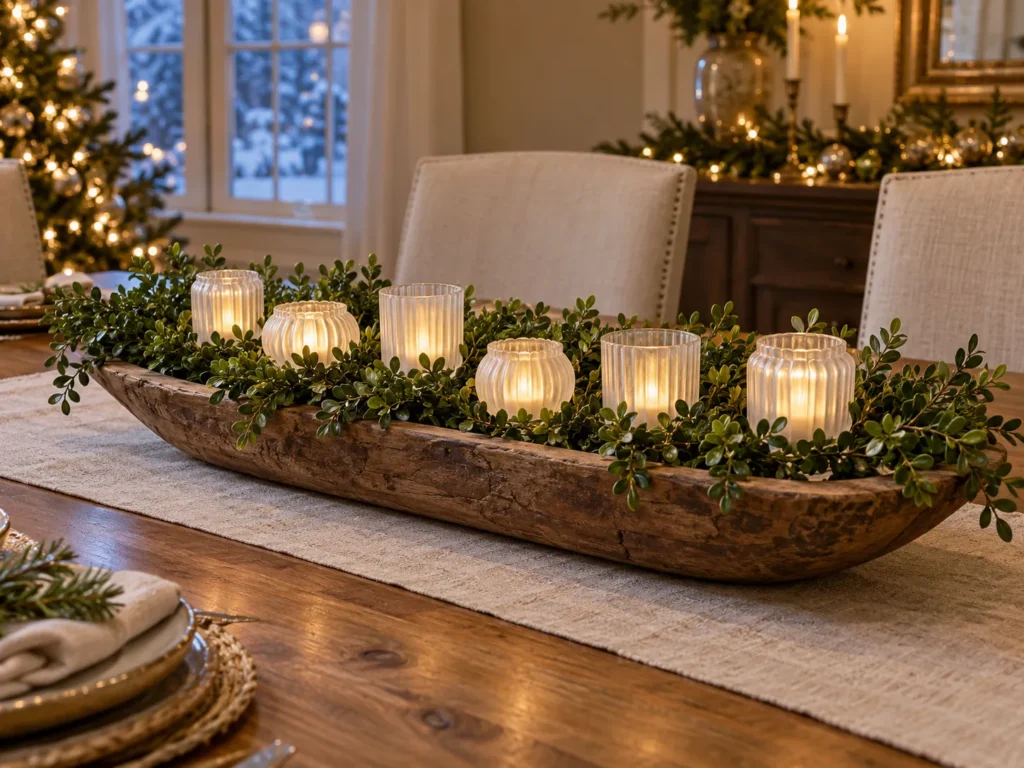
Feels like · soft glowing garden
The Look and Placement Mood: A cluster of frosted, fluted glass tea light holders tucked into dense green boxwood, each softly glowing. It’s elegant and low, ideal down the middle of a dining table.
The Ingredient Recipe:
- 5 to 7 fluted frosted glass tea light holders
- Battery flicker tea lights with timers
- Preserved boxwood cuttings
- A dry floral foam block
The Foundation and Layering Secret:
- Set foam in the bowl level with the rim.
- Press each glass holder slightly into the foam so it sits flat and steady.
- Push boxwood stems in densely around every holder until no foam shows.
Wood Care and Table Safety Hack: Preserved boxwood stays soft and green for months without water, so there’s no moisture near the wood. Keep it out of direct sun so it doesn’t fade.
11. Matte Pale Gold Bulbs With Cascading Forest Green Velvet Bows
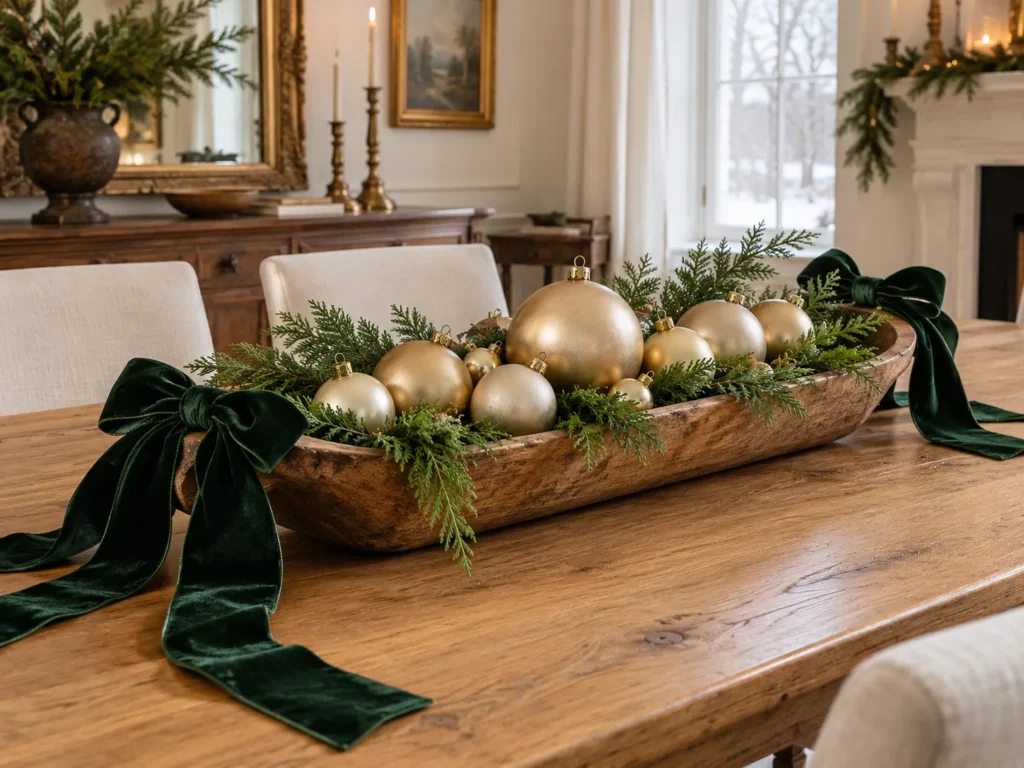
Feels like · quiet holiday luxury
The Look and Placement Mood: Soft matte gold ornaments fill the bowl, with deep green velvet bows tied at each end and long tails spilling onto the table. It looks refined and expensive with very few pieces.
The Ingredient Recipe:
- 9 to 12 matte pale gold shatterproof ornaments in mixed sizes
- Forest green velvet ribbon, 2.5 inches wide
- Short cedar sprigs
- Crumpled kraft paper
The Foundation and Layering Secret:
- Fill with paper and lay a thin layer of cedar across the top.
- Mound the gold ornaments slightly higher in the center.
- Tie big velvet bows around each handle end and let the tails trail 8 to 10 inches onto the table.
Wood Care and Table Safety Hack: Shatterproof ornaments are the smart pick for a busy dining table. Keep the mound under 12 inches so guests can see each other, the same rule I follow in my neutral dining room centerpiece styling guide.
12. Aged Sheet Music Scrolls With Wooden Stars and Baby’s Breath
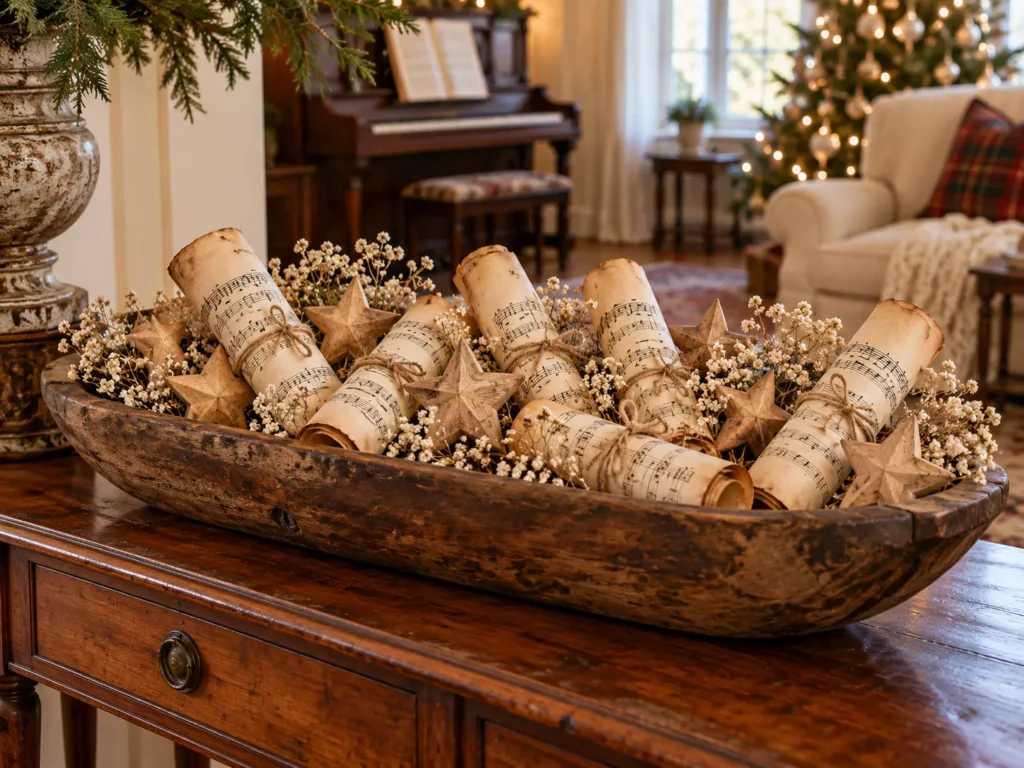
Feels like · old carol book
The Look and Placement Mood: Rolled scrolls of tea-stained sheet music stand in the bowl, mixed with raw wooden stars and puffs of dried baby’s breath. It’s nostalgic and soft, perfect on a piano, console or entry table.
The Ingredient Recipe:
- 8 to 10 sheets of printed vintage or public domain sheet music
- Natural twine
- 5 to 7 raw wooden cutout stars
- Dried baby’s breath
The Foundation and Layering Secret:
- Brush the sheets with cooled black tea and let them dry flat overnight.
- Roll each one loosely and tie with twine.
- Fill the bowl with foam, stand the scrolls in it at slight angles, then add stars and baby’s breath in the gaps.
Wood Care and Table Safety Hack: Paper and dried flowers are very flammable, so keep this display far from candles and fireplaces. Make sure tea-stained paper is completely dry before it touches the wood. Arranging layered pieces in a container like this follows the same steps as my fall tray decor ideas.
3 Critical Rules for Styling Raw Wooden Bowls
- Always use a liner with fresh greens. Freshly cut boughs release moisture and sap as they sit. On raw, unsealed wood, that can cause water rings, sticky resin stains and even warping. A sheet of wax paper or a thin plastic liner tucked under the foundation stops it completely, and nobody ever sees it.
- Skip real flames entirely. Dry wood, dry greens and paper are a fire waiting to happen. Choose flameless LED candles with real wax shells and a flicker setting. They look convincing, and many come with remotes and timers.
- Follow the 12-inch conversational rule. Dough bowls are naturally low and long, which is exactly why they make great dining centerpieces. Keep the tallest point under 12 inches and everyone can see each other across the table.
Frequently Asked Questions
What do you put in the bottom of a deep dough bowl so decorations don’t sink?
Fill the bottom with crumpled kraft paper, a block of dry floral foam or a cushion of moss. It raises everything to about an inch below the rim so your decor sits up where it can be seen.
Can you put real evergreen branches in a wooden dough bowl without ruining the finish?
Yes, as long as you line the bowl first with wax paper or a thin plastic liner. That keeps sap and moisture off the wood.
How long will fresh Christmas greens last in an indoor dough bowl display?
Most fresh greens like fir, cedar and boxwood look good for about one to two weeks indoors. Keep the bowl away from heat vents and mist the greens every few days to stretch that time.
There’s something special about decorating a piece of wood that’s been carved by hand. The knots, the worn edges and the uneven grain make every arrangement feel grounded and a little bit personal. Pick one of these Christmas dough bowl decorating ideas, build it from the bottom up and let it become part of your family’s holiday tradition. Then pin your favorite bowl recipe to Pinterest so you can recreate it next year.