15 Magical Hanging Christmas Ornaments from Ceiling Ideas for a Dreamy Floating Glow
There’s a moment when people walk into a room and look up, and you can see the delight hit them. A cloud of gold baubles floats over the dining table, or tiny snowflakes seem to drift above the bed with nothing holding them up. It feels like a little bit of magic.
Most people love the idea and then talk themselves out of it. Will sticky hooks pull chunks of paint off the ceiling? Do I have to drill holes? And what happens if a glass ornament lets go halfway through dinner and lands in someone’s mashed potatoes?
The way installers handle it is simple. Use clear rigging that disappears, damage-free fasteners on the right surfaces, lightweight shatterproof ornaments and a bit of clearance math so nothing ever hangs in someone’s way. Done properly, a floating display is safe all season and comes down without a mark.
So here are 15 ideas for hanging Christmas ornaments from the ceiling, each with rigging supplies, a suspension blueprint and a headroom check for real homes.
The Clearance and Suspension Rigging Matrix
Swipe sideways on mobile to see the full table.
| Hanging Zone | Minimum Clearance Required | Recommended Line Material | Best Damage-Free Fastener | Shatterproof vs Glass |
|---|---|---|---|---|
| Open Walkway / Hallway | Lowest ornament at 7 feet or higher | Clear monofilament, 8 to 20 lb test | Removable ceiling-rated adhesive hooks | Shatterproof only |
| Dining Table Center | At least 30 inches above the tabletop | Clear monofilament or thin ribbon | The light fixture canopy or a hidden ceiling hook | Shatterproof only |
| Window Frame Alcove | Clear of opening sashes and blinds | Velvet ribbon or monofilament | Existing curtain rod or tension rod | Glass is fine out of reach |
| Staircase Void | Out of reach from every step and railing | 20 to 30 lb test monofilament | Upper banister or a tied-off support line | Shatterproof only |
15 Ideas for Hanging Christmas Ornaments From the Ceiling
1. The Floating Bauble Cloud Chandelier in Gold and Champagne
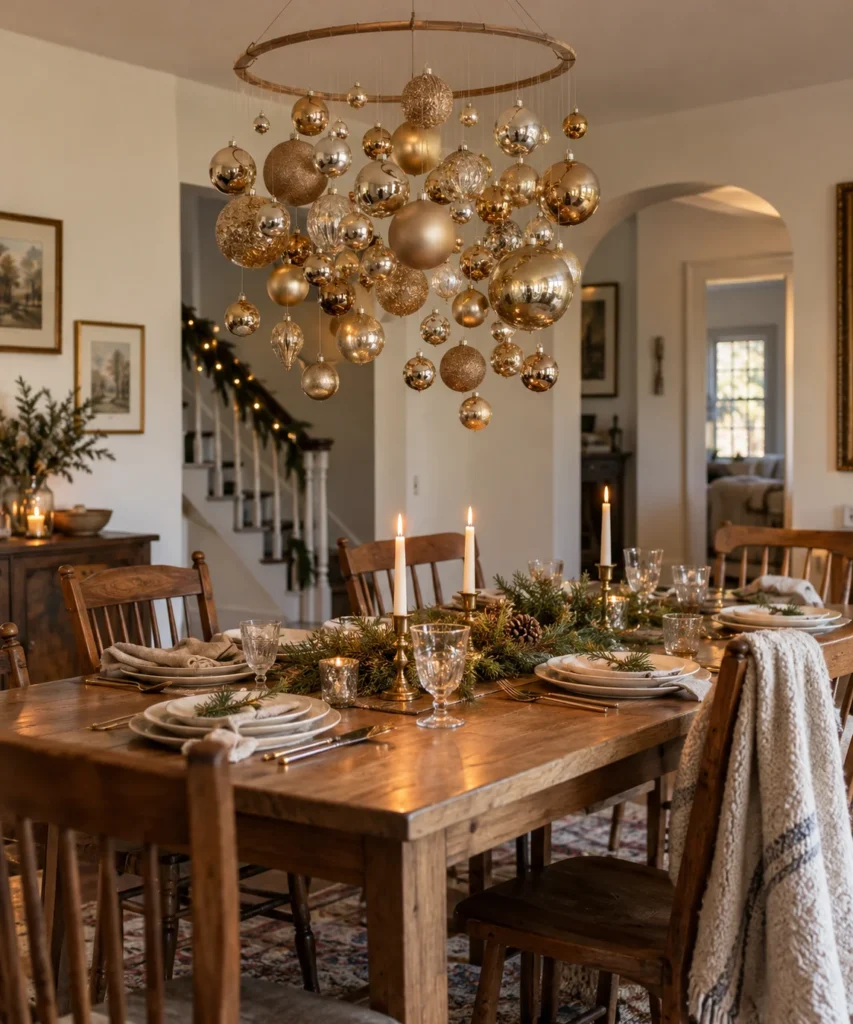
Feels like · a champagne toast in midair
The Look and Floating Illusion: A dense cloud of gold and champagne baubles hangs over the dining table at staggered heights, catching the light from every angle. From your seat, it looks like a sparkling chandelier made of nothing but ornaments.
Hardware and Rigging Supplies:
- 40 to 60 shatterproof baubles in 60mm, 80mm and 100mm
- 8 lb clear monofilament line
- A lightweight embroidery hoop or wire wreath ring, 16 to 20 inches
- Sharp embroidery scissors and clear craft glue
Step-by-Step Suspension Blueprint:
- Tie three equal lines to the ring and gather them at a single point above it so the ring hangs level.
- Hang that point from the light fixture canopy, a ceiling hook or the fixture chain if it’s rated for extra weight.
- Cut lines in lengths that step down in 2 inch increments, tie a bauble to each with a triple knot and add a dab of glue.
- Tie the lines around the ring, longest ones in the center so the cloud is fuller in the middle.
Headroom and Safety Check: Keep the lowest bauble at least 30 inches above the tabletop so guests can see each other and serve food. If you hang from a light fixture, swap to LED bulbs and keep ornaments a few inches from the bulbs. Keep the table below simple and low, like the ideas in my neutral dining room centerpiece styling guide.
2. Horizontal Birch Log on Twin Wires With Cedar and Mercury Orbs

Feels like · woodland lodge ceiling
The Look and Floating Illusion: A white birch log floats sideways in the air, wrapped in cedar with silvery mercury glass orbs hanging below. It’s rustic and elegant, and it reads beautifully above a long table or kitchen island.
Hardware and Rigging Supplies:
- A lightweight birch log or faux birch branch, 3 to 4 feet
- Two lengths of 20 lb test monofilament or thin steel picture wire
- Faux cedar garland
- Shatterproof mercury-look ornaments
Step-by-Step Suspension Blueprint:
- Weigh the log on a bathroom scale and choose ceiling anchors rated well above that weight.
- Tie a line around each end of the log, about 6 inches in, and hang both from two ceiling points so the log stays level.
- Wrap cedar along the log and hang ornaments at staggered lengths along the underside.
Headroom and Safety Check: Real logs can be heavy. Use a faux branch or a hollow log, and if you own the home, screw hooks into a ceiling joist rather than relying on adhesives. Birch looks lovely all winter, like the textures in my fall living room decor ideas.
3. Staircase Void Spiral Cascade of Oversized Matte Baubles
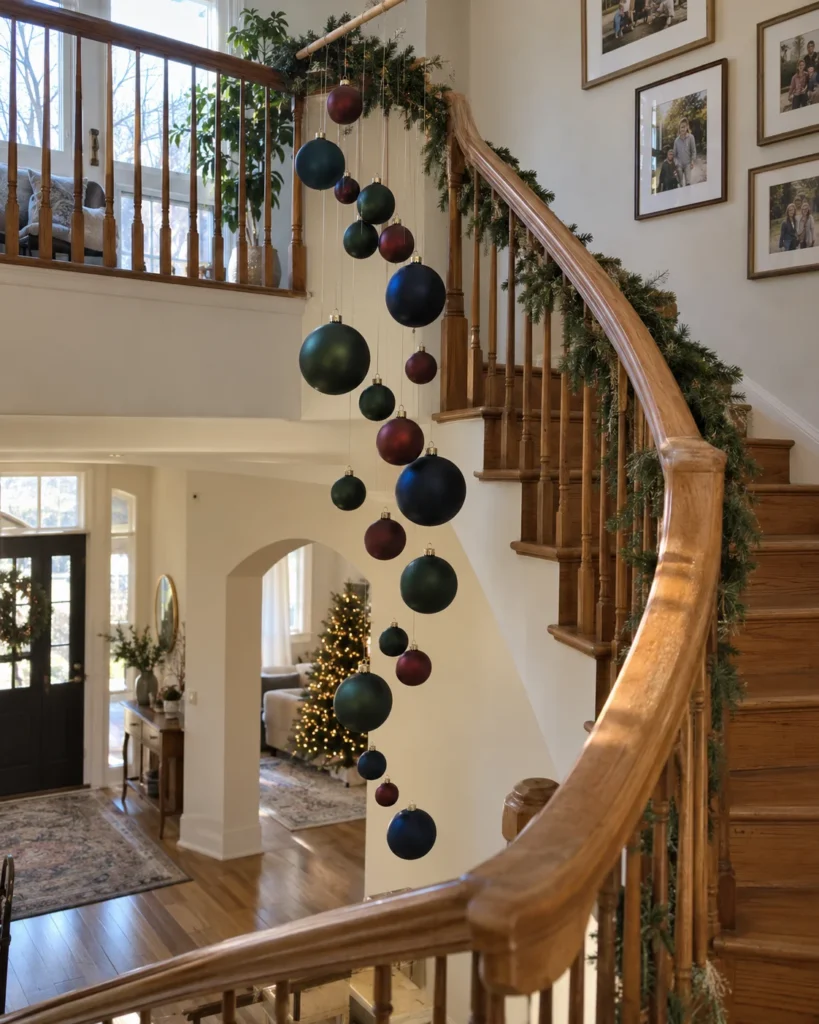
Feels like · a two-story ornament waterfall
The Look and Floating Illusion: Big matte baubles spiral down through the open space beside the stairs, from the top floor almost to the bottom. Walking up or down, it feels like moving through a falling stream of ornaments.
Hardware and Rigging Supplies:
- 15 to 25 shatterproof matte baubles, 100mm and 150mm
- 20 to 30 lb test clear monofilament
- A slim wooden dowel or metal rod to lay across the upper banister
- Clear zip ties
Step-by-Step Suspension Blueprint:
- Zip-tie the dowel across the upper banister so it sticks out over the stairwell void.
- Tie ornaments to lines of different lengths, from 2 feet to the full drop.
- Tie them along the dowel in a loose spiral so the lengths step down in a curve.
Headroom and Safety Check: Make sure no ornament can be reached from any step or the railing, and that none sways into the path of someone walking the stairs. Glass never belongs here.
4. Window Alcove Floating Display on Curtain Rods and Velvet Ribbon
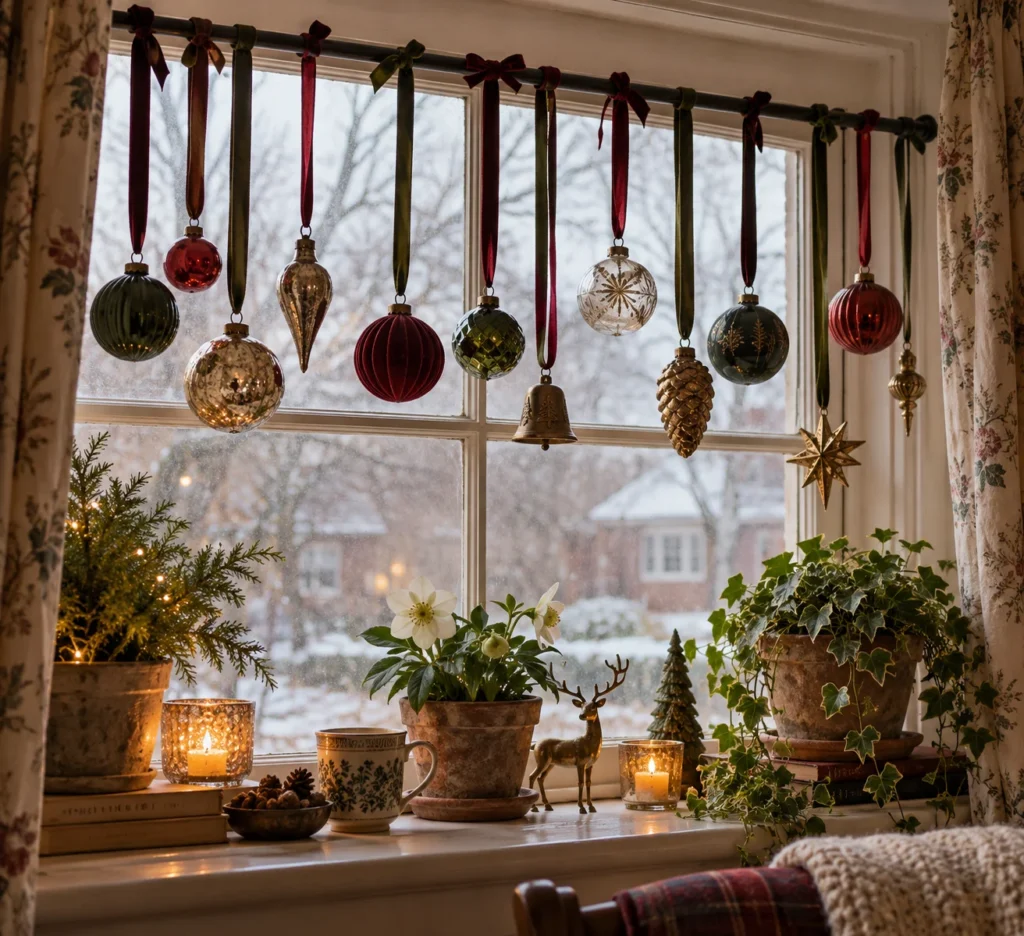
Feels like · a jewelry box window
The Look and Floating Illusion: Ornaments hang inside a deep window on thin velvet ribbons tied to the curtain rod, glowing against the glass. It’s one of the easiest ceiling-style looks because there’s no ceiling involved at all.
Hardware and Rigging Supplies:
- An existing curtain rod or a tension rod inside the frame
- 1/4 inch velvet ribbon
- 10 to 15 ornaments
- Small clear clips
Step-by-Step Suspension Blueprint:
- Cut ribbons in different lengths between 8 and 30 inches.
- Tie an ornament to each ribbon end with a double knot.
- Loop ribbons over the rod and tie small bows on top, spacing them evenly.
Headroom and Safety Check: Keep ornaments clear of blinds and window cranks so they don’t get caught when you open or close anything. Glass ornaments are fine here as long as they’re out of reach of kids and pets.
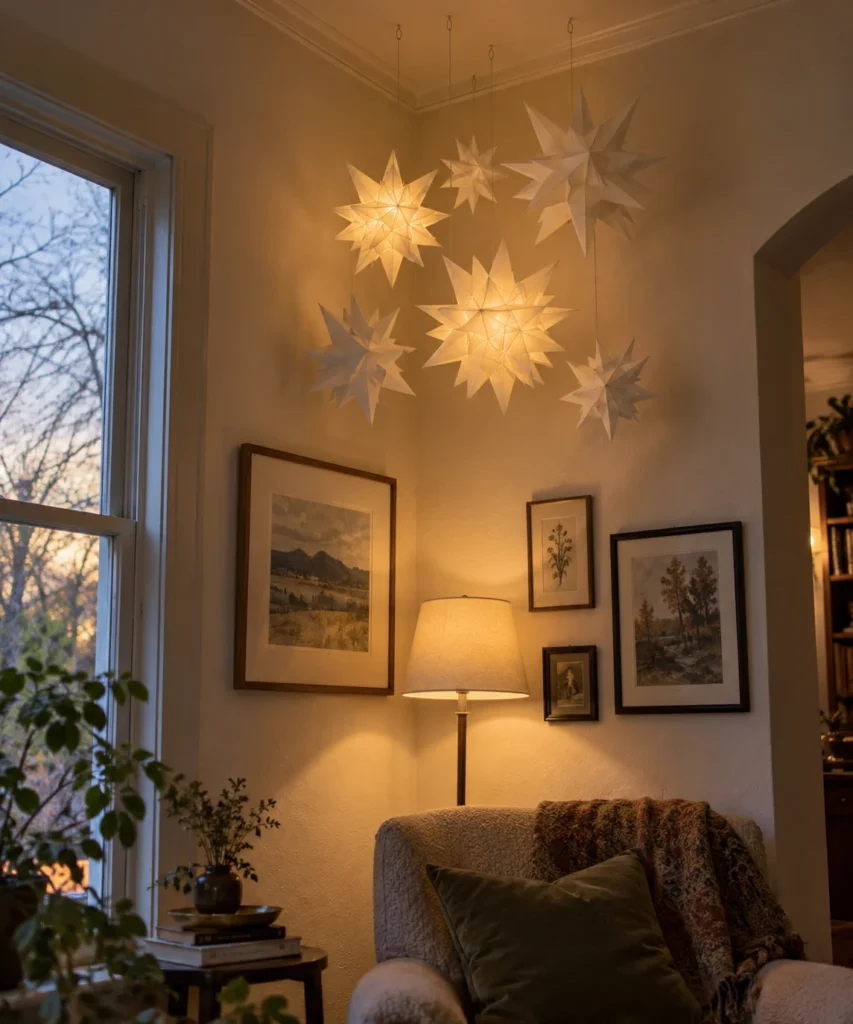
5. Paper Moravian Star Constellation in a High Living Room Corner
Feels like · a Nordic winter sky
The Look and Floating Illusion: A cluster of white paper stars hangs at different heights in an empty corner, a few glowing softly from inside. It fills dead space up high and pulls the eye upward, making the room feel taller.
Hardware and Rigging Supplies:
- 5 to 7 folding 3D paper Moravian stars
- Battery LED puck lights for two or three stars
- Lightweight removable ceiling hooks
- Clear monofilament
Step-by-Step Suspension Blueprint:
- Pop the stars open and slip puck lights into a few of them.
- Place hooks in a loose triangle near the corner.
- Hang stars at three or four different heights so they cluster without bumping.
Headroom and Safety Check: Paper is light, so it’s perfect for adhesive hooks. Only use cool LEDs inside, never a hot bulb. A corner like this pairs beautifully with a cozy reading nook, like the ones in my cozy Thanksgiving living room ideas.
A friend hung a cluster of real glass ornaments over her dining table with a single knot each on slippery fishing line. Halfway through dessert, one knot gave way, and a glass bauble shattered right next to the pie. Nobody was hurt, but dinner ended early.
The fix: Use only shatterproof ornaments overhead, tie triple knots on monofilament and seal each knot with a tiny dab of glue.
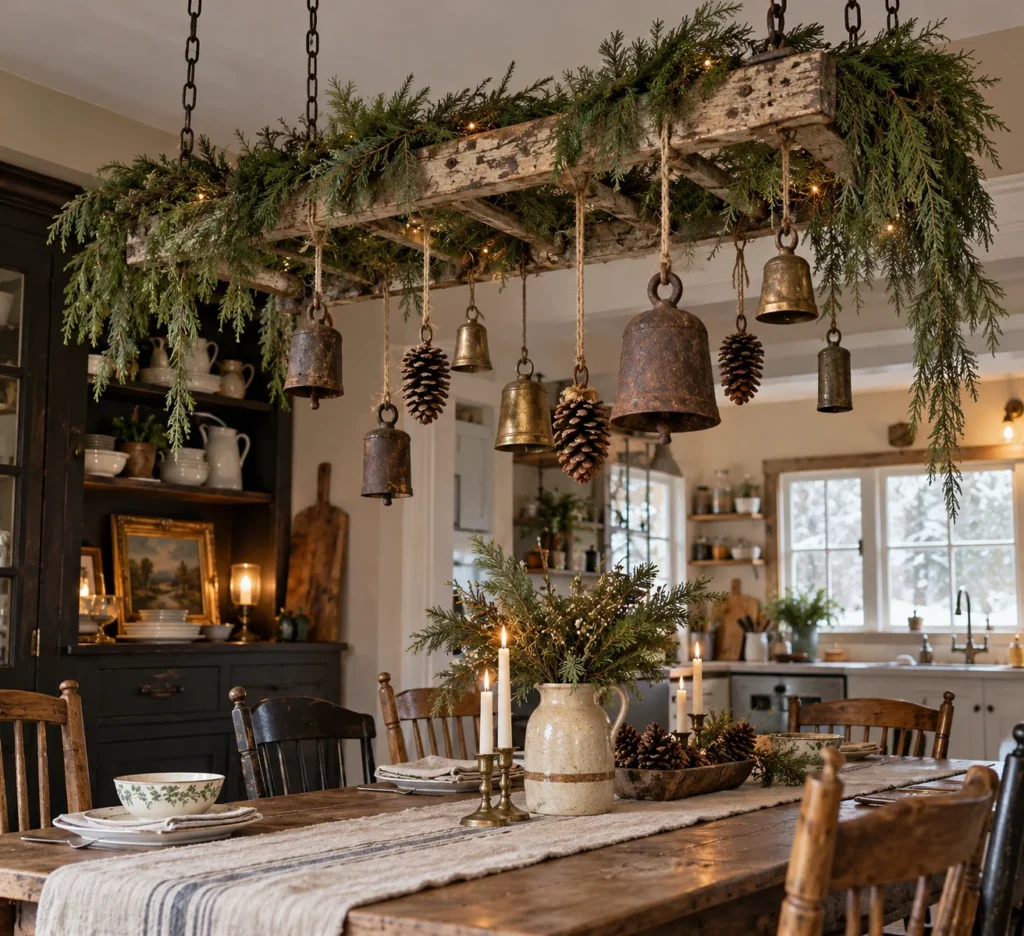
6. Suspended Wooden Ladder Swag With Weeping Pine and Vintage Bells
Feels like · farmhouse kitchen loft
The Look and Floating Illusion: A short antique wooden ladder hangs flat from the ceiling, draped in soft pine with old bells dangling from each rung. It’s rustic and full, perfect over a farmhouse table or island.
Hardware and Rigging Supplies:
- A lightweight wooden ladder, about 4 feet
- Four lengths of chain or 30 lb test line
- Ceiling hooks screwed into joists
- Faux pine garland and vintage bells
Step-by-Step Suspension Blueprint:
- Locate joists with a stud finder and install two or four hooks rated for the total weight.
- Hang the ladder level from all four corners.
- Drape pine along the rails and hang bells from each rung at slightly different lengths.
Headroom and Safety Check: This one is too heavy for adhesive hooks, so it’s best for homeowners who can screw into joists. Keep it 30 inches or more above any surface people work or eat at.
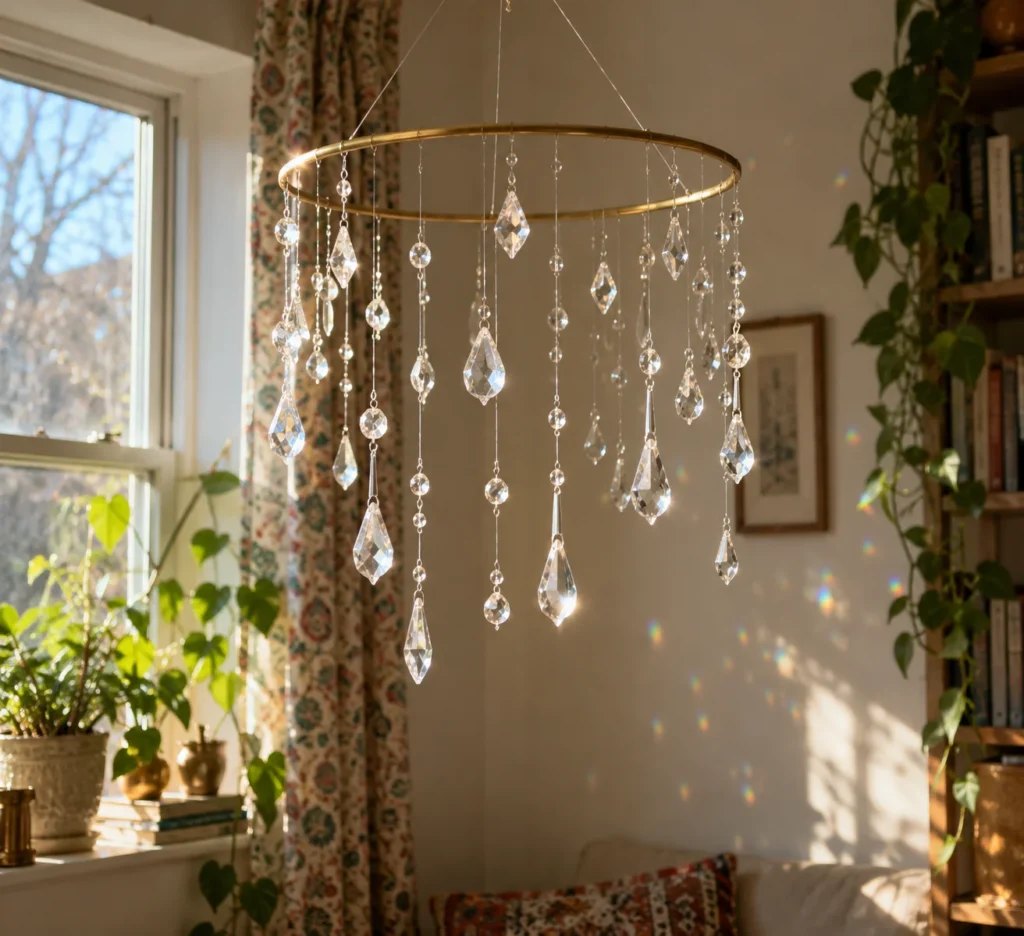
7. Brass Embroidery Hoop Mobile With Floating Crystal Drops
Feels like · a little sparkling carousel
The Look and Floating Illusion: A slim brass hoop hangs level, with clear crystal-look drops dangling all the way around. As it turns gently, it throws tiny rainbows across the walls.
Hardware and Rigging Supplies:
- A 12 to 16 inch brass or gold metal hoop
- Acrylic crystal-look drop ornaments
- Clear monofilament
- A small swivel hook
Step-by-Step Suspension Blueprint:
- Tie three lines to the hoop at even spacing and gather them into a swivel hook.
- Hang drops all around the hoop at alternating short and long lengths.
- Hang the swivel from a ceiling hook so the mobile turns freely.
Headroom and Safety Check: Acrylic drops are much lighter and safer than real glass. Hang it near a window for rainbows, but away from ceiling fans.
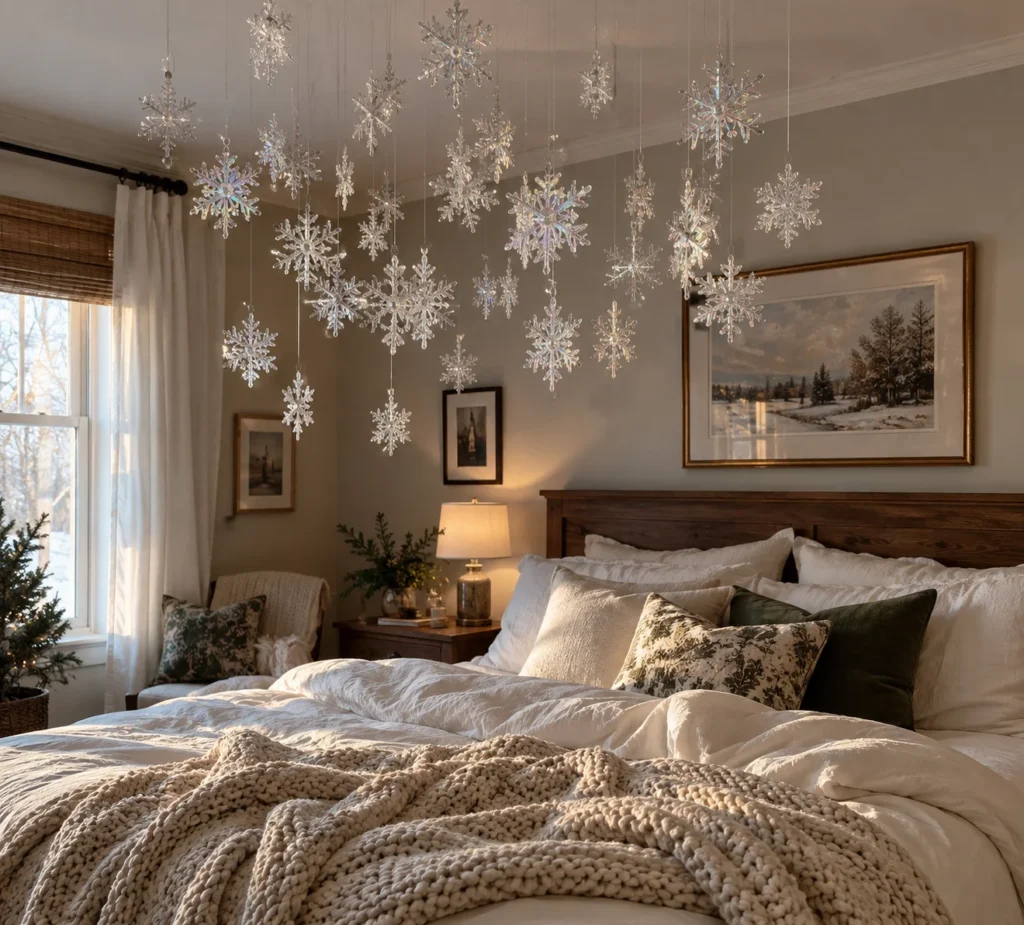
8. Blizzard Swarm of Acrylic and Iridescent Snowflakes Above the Bed
Feels like · falling asleep in a snowfall
The Look and Floating Illusion: Dozens of clear and iridescent snowflakes float over the bed at different heights, shimmering with every bit of light. Lying back, it looks like snow drifting down from the ceiling.
Hardware and Rigging Supplies:
- 20 to 30 lightweight acrylic and iridescent snowflakes
- Clear monofilament
- Lightweight removable ceiling hooks
- Painter’s tape for marking spots
Step-by-Step Suspension Blueprint:
- Mark 6 to 8 hook spots in a loose cluster above the bed.
- Tie three or four snowflakes onto each line at different points, spaced 4 to 6 inches apart.
- Hang each line from a hook, varying the overall lengths.
Headroom and Safety Check: Keep the lowest snowflake at least 3 feet above your head when you’re sitting up in bed. Only use lightweight acrylic here, never glass. Keep the bedding calm and simple, like the ideas in my minimalist bedroom hygge styling guide.
9. Crown Molding Drop With Long Burgundy Ribbons and Wine Bulbs
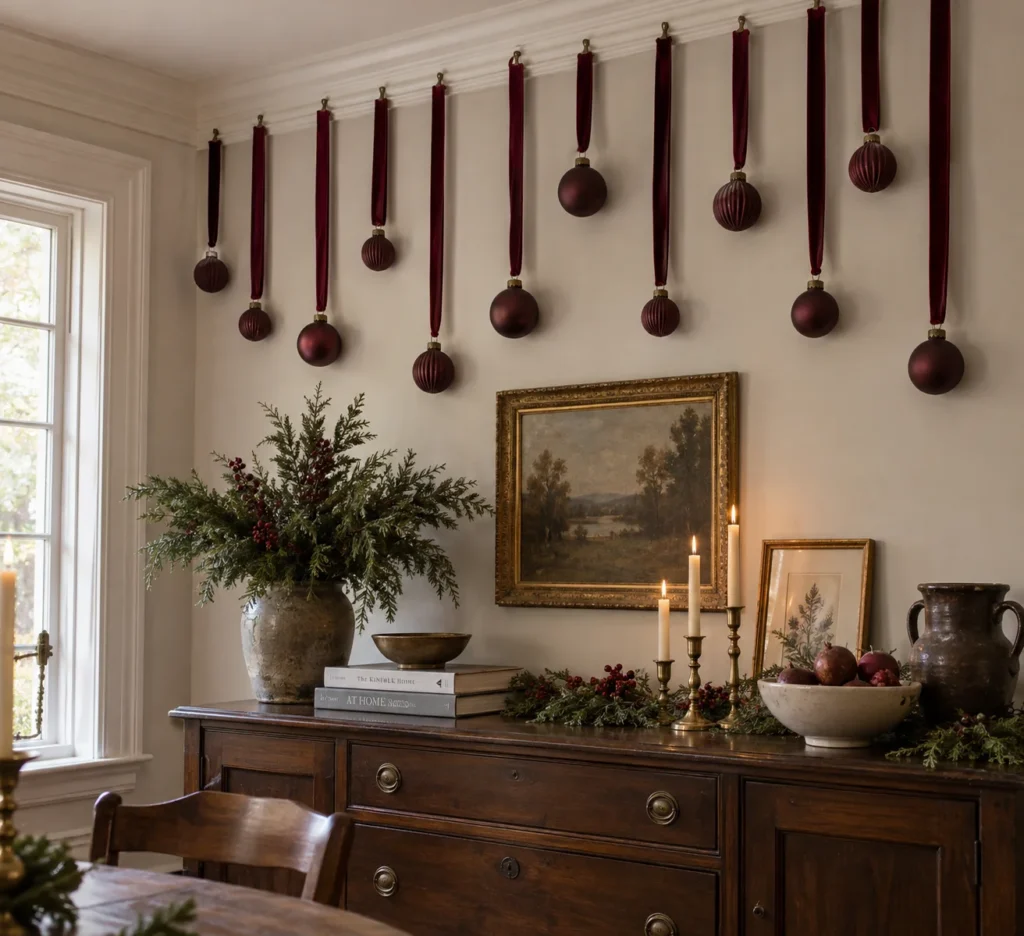
Feels like · Victorian parlor glamour
The Look and Floating Illusion: Long burgundy velvet ribbons drop from the crown molding along one wall, each ending in a matte wine-colored bulb. It frames the room like a rich, festive curtain.
Hardware and Rigging Supplies:
- 1 inch burgundy velvet ribbon
- Matte wine-colored shatterproof bulbs
- Crown molding hooks that clip over the top edge
Step-by-Step Suspension Blueprint:
- Slip molding hooks over the crown molding every 12 to 18 inches.
- Tie ribbons in alternating long and short lengths.
- Knot a bulb to the end of each ribbon and hang it from a hook.
Echo the same burgundy velvet on the mantel for a pulled-together room, like the setups in my Thanksgiving mantel decor ideas.
Headroom and Safety Check: Molding hooks need no adhesive or drilling. Keep ribbons above furniture so nobody leans into them, and stop them well short of the floor.
10. Archway Tension Rod Ornament Fringe Between Rooms
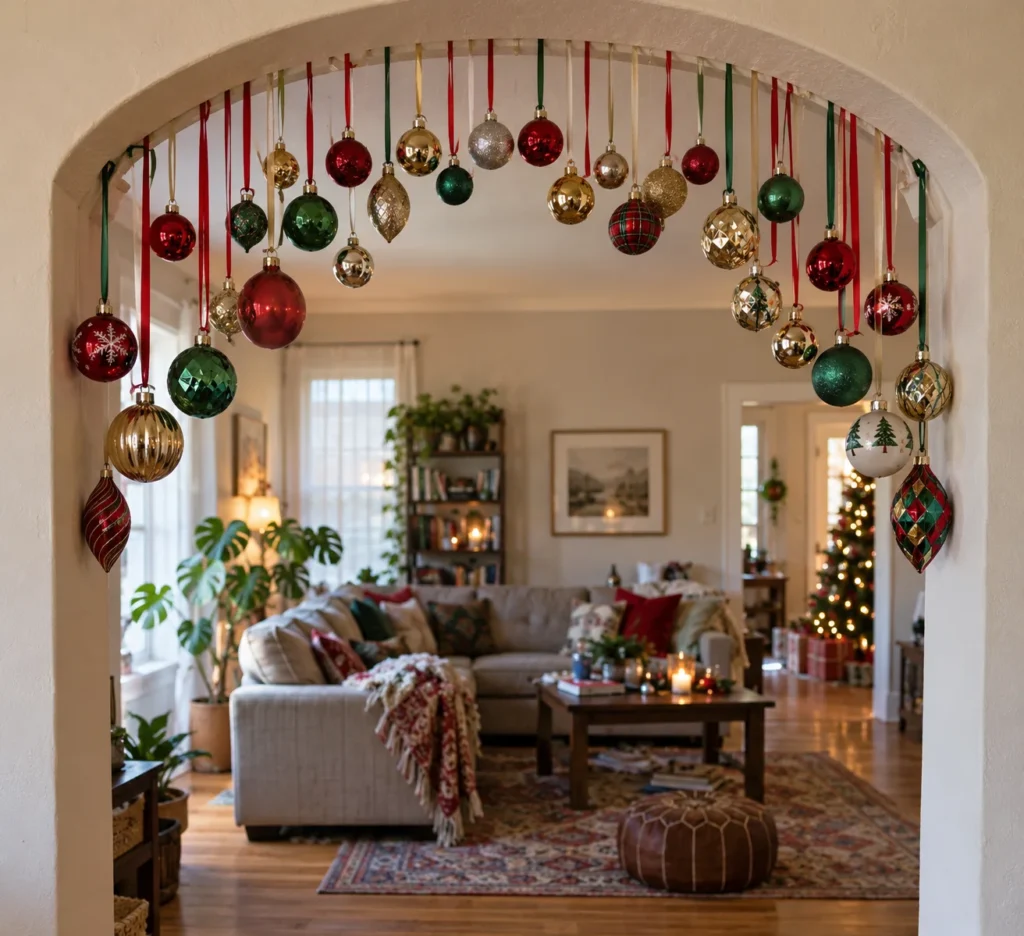
Feels like · walking into a holiday party
The Look and Floating Illusion: A row of ornaments hangs just inside a doorway or arch, framing the passage like a sparkling valance. Everyone walking through gets a little festive moment.
Hardware and Rigging Supplies:
- A rubber-tipped tension rod sized to the opening
- Short lengths of monofilament or ribbon
- 20 to 30 small shatterproof ornaments
Step-by-Step Suspension Blueprint:
- Twist the tension rod tight near the top of the opening.
- Tie ornaments on short lines, 4 to 10 inches long.
- Hang them along the rod with the longest at each end and the shortest in the middle.
Headroom and Safety Check: Keep the lowest ornament above 7 feet in the center of the doorway so nobody walks into it. Shorter drops in the middle keep the walking path clear.
A reader in a rental pressed adhesive hooks straight onto her textured ceiling to hang a big ornament cloud. When she took them down, each hook pulled off a circle of paint and texture, and patching them took a whole weekend.
The fix: On rentals, hang from curtain rods, light fixtures, molding hooks or tension rods whenever you can. If you must use adhesives, keep pieces very light and use the painter’s tape buffer.
11. Horizontal Hula Hoop Greenery Wreath With Cascading Ornaments
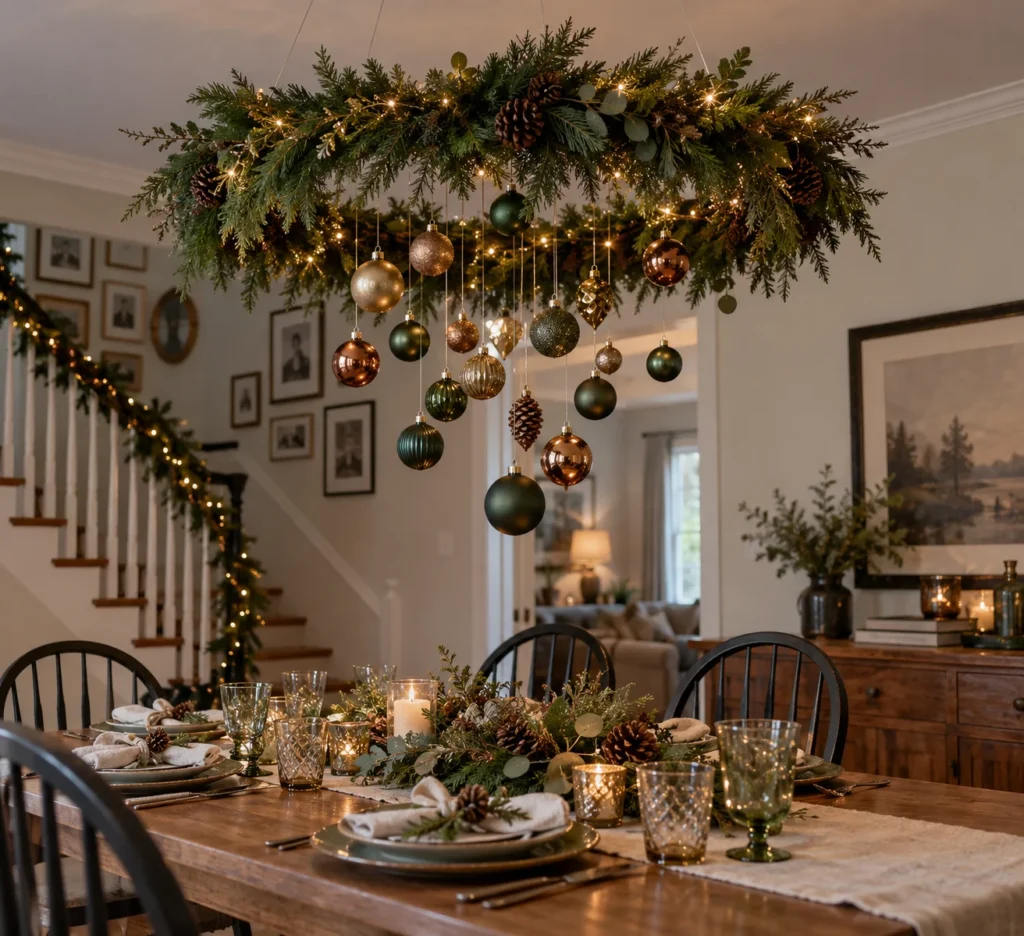
Feels like · a floating forest crown
The Look and Floating Illusion: A large hoop wrapped in greenery hangs flat like a crown, with ornaments falling from its center in a soft cone. It looks like a designer chandelier for the cost of a hula hoop.
Hardware and Rigging Supplies:
- A lightweight plastic hula hoop
- Faux greenery garland and floral wire
- 15 to 25 shatterproof ornaments
- Clear monofilament and a ceiling hook
Step-by-Step Suspension Blueprint:
- Wrap the hoop with garland and secure it with floral wire.
- Tie four lines evenly around the hoop and gather them at one point above.
- Run a few lines across the center of the hoop and hang ornaments from them, longest in the middle.
Headroom and Safety Check: Weigh the finished piece and choose a hook rated well above it. Faux greenery keeps it lighter than fresh.
12. Mirrored Mini Disco Ball Galaxy Catching Fairy Lights
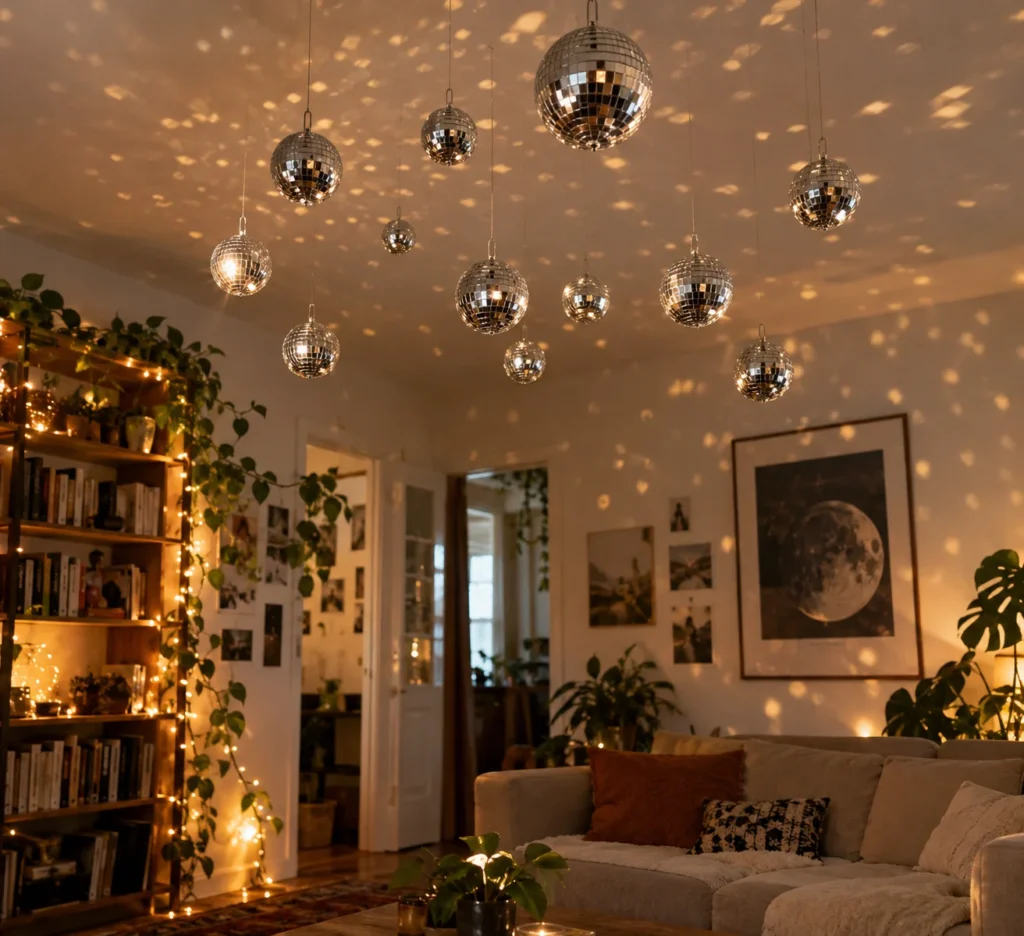
Feels like · a holiday dance party
The Look and Floating Illusion: A scattering of tiny mirrored disco balls hangs across the living room ceiling, throwing little dots of light everywhere. Turn on the fairy lights and the whole room sparkles.
Hardware and Rigging Supplies:
- 10 to 15 mini mirrored disco ball ornaments
- Clear monofilament
- Lightweight removable ceiling hooks
- Warm fairy lights nearby
Step-by-Step Suspension Blueprint:
- Space hooks in a loose cluster above a seating area.
- Hang disco balls at different heights, 12 to 30 inches below the ceiling.
- Aim a lamp or fairy lights toward them to catch reflections.
My warm cozy home lighting ideas show how to position warm lamps so reflections feel soft and cozy instead of harsh.
Headroom and Safety Check: Choose mini disco balls made with lightweight foam cores. Keep them well away from ceiling fans, which can spin lines into a tangle.
13. Glass Terrarium Orbs With Preserved Moss and Micro Lights
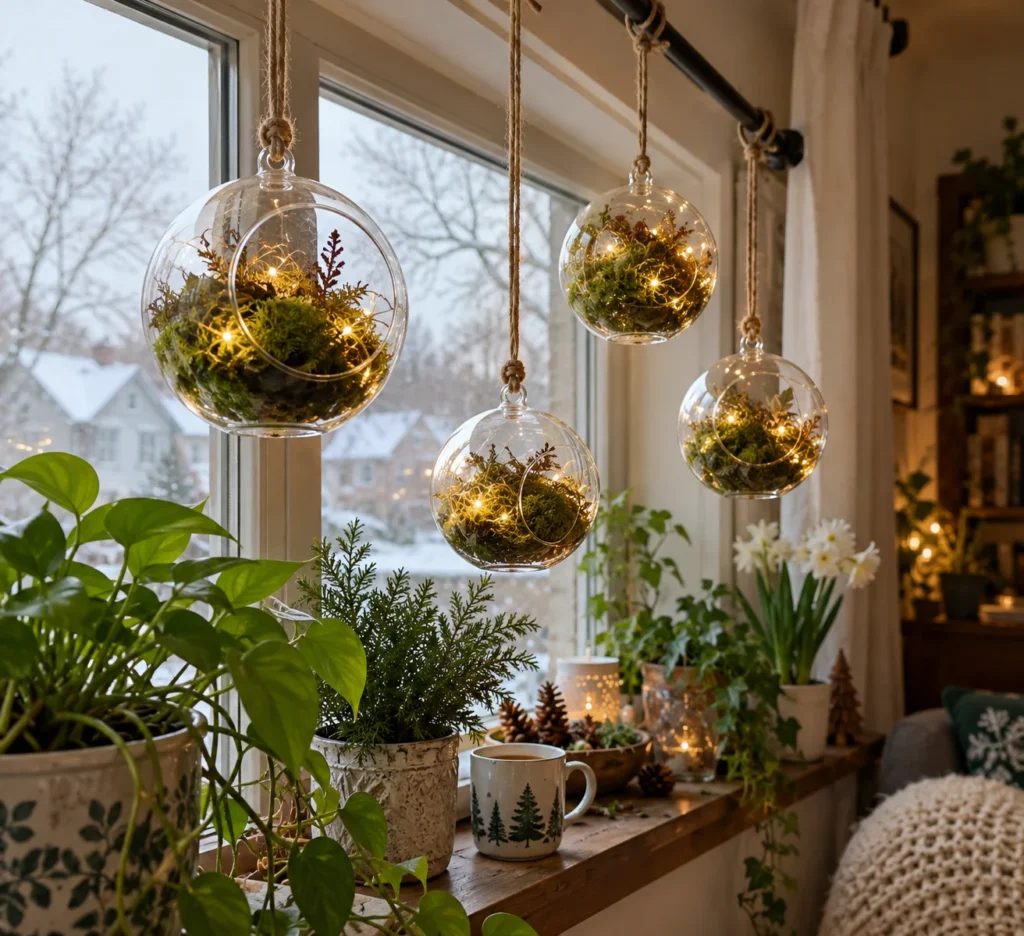
Feels like · tiny glowing worlds
The Look and Floating Illusion: Little hanging orbs, each holding a nest of moss and tiny fairy lights, glow softly like lanterns. They look magical in a window or above a reading chair.
Hardware and Rigging Supplies:
- 3 to 5 hanging terrarium orbs, acrylic for overhead spots
- Preserved moss
- Battery micro LED lights
- Jute twine or monofilament
Step-by-Step Suspension Blueprint:
- Fill each orb with moss and coil the lights inside, hiding the battery in the moss.
- Hang them from a curtain rod or window frame hook at staggered heights.
Headroom and Safety Check: Use acrylic orbs anywhere people walk beneath them. Glass orbs are fine in a window out of reach.
14. Kitchen Island Pot Rack With Jingle Bells and Frosted Baubles
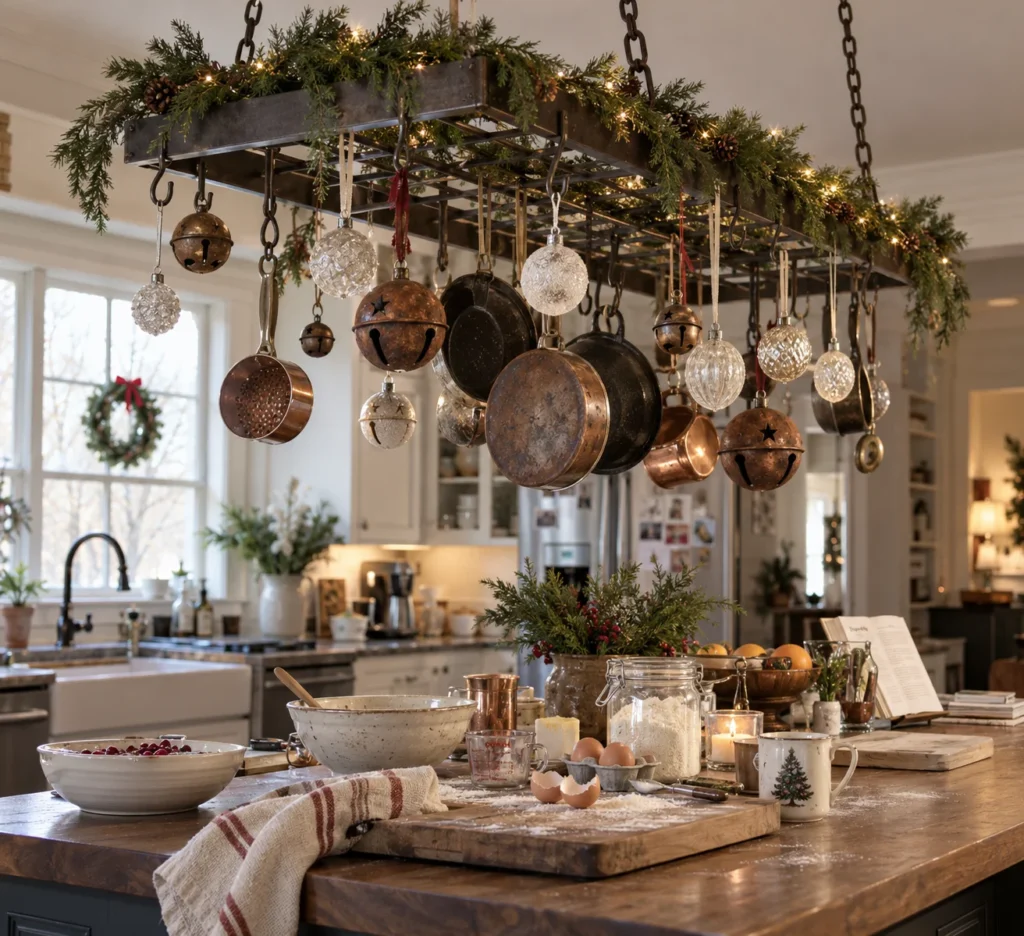
Feels like · Christmas baking day
The Look and Floating Illusion: The pot rack over the kitchen island swaps pans for jingle bells, frosted baubles and a garland of greenery. It turns the busiest spot in the house into the most festive.
Hardware and Rigging Supplies:
- An existing hanging pot rack
- S hooks
- Large jingle bells and frosted shatterproof baubles
- A slim faux garland
Step-by-Step Suspension Blueprint:
- Wrap the garland around the rack frame.
- Hang bells and baubles from S hooks at different lengths.
- Leave a few pans in place if you still cook there daily.
Headroom and Safety Check: The pot rack is already anchored for weight, so it’s a safe place to hang decor. Keep anything flammable well away from the cooktop and range hood.
15. Chandelier Medallion Halo of Short-Drop Gilded Baubles
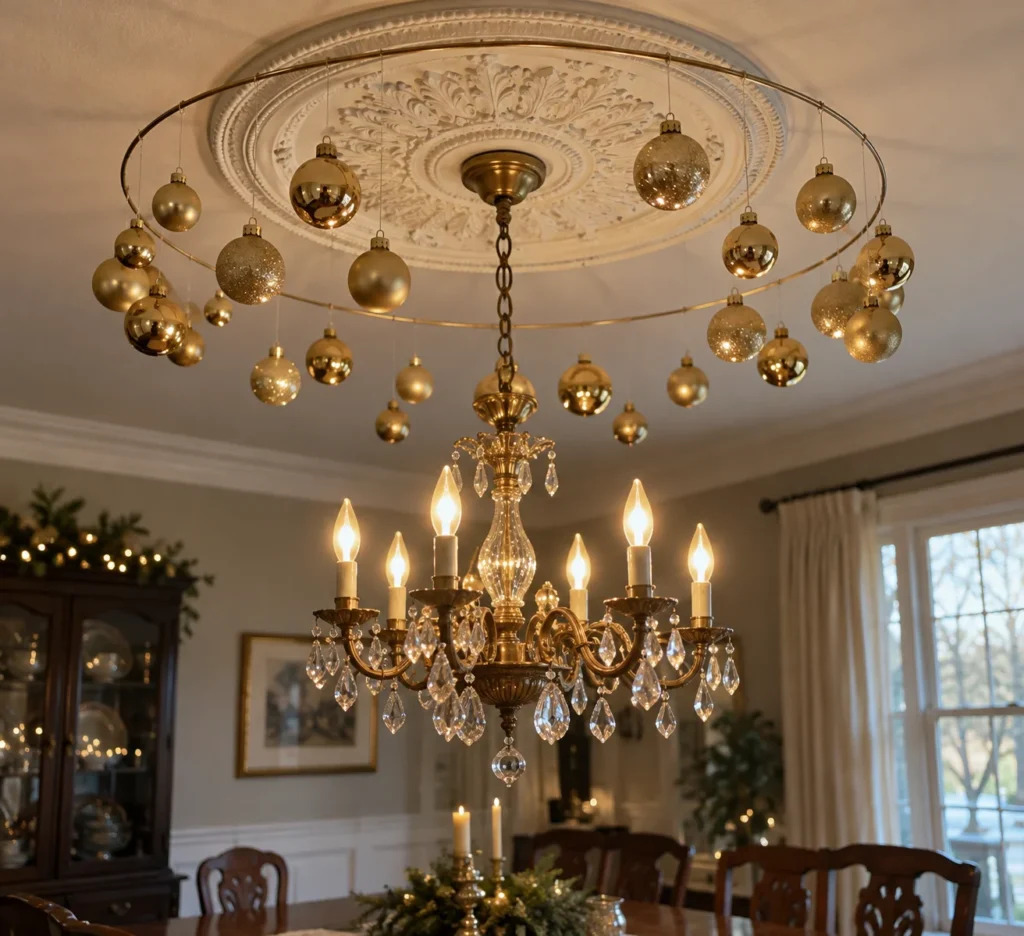
Feels like · a glowing golden crown
The Look and Floating Illusion: Short gold baubles circle the ceiling medallion around your chandelier like a sparkling halo. It frames the light fixture and makes it look even grander.
Hardware and Rigging Supplies:
- 20 to 30 small gilded shatterproof baubles
- A thin wire ring slightly larger than the medallion
- Clear monofilament
- LED bulbs for the chandelier
Step-by-Step Suspension Blueprint:
- Hang the wire ring from the chandelier chain or canopy with three short lines so it sits just below the medallion.
- Tie baubles to short lines, 3 to 8 inches.
- Attach them all around the ring, alternating lengths.
Headroom and Safety Check: Check that your fixture can handle a little extra weight, and turn it off before installing. Use LED bulbs and keep baubles a few inches from them so nothing overheats.
3 Critical Rigging and Hardware Rules for Ceilings
- Use the painter’s tape buffer trick. Stick a square of delicate-surface painter’s tape on the ceiling first, then press the adhesive hook onto the tape. When it’s time to take it down, the tape peels away cleanly instead of pulling up paint. Keep in mind this lowers how much the hook can hold, so only use it for very light pieces like paper stars and acrylic snowflakes, and test one spot first. Skip adhesives entirely on textured or popcorn ceilings.
- Respect knot slippage. Monofilament fishing line is slick, so a single knot can work itself loose over a few weeks. Tie a double or triple knot, or a surgeon’s knot, and add a tiny dab of clear craft glue on each knot. Trim tails to about 1/4 inch.
- Prioritize shatterproof materials. Anything hanging over people, beds or tables should be lightweight plastic, acrylic or foam. If a hook or knot ever fails, a shatterproof bauble bounces, while glass shatters.
Frequently Asked Questions
How do you hang ornaments from the ceiling without damaging it?
Use existing anchors like light fixtures, curtain rods, pot racks and crown molding hooks first. For light pieces, removable ceiling-rated adhesive hooks over a strip of painter’s tape usually come off cleanly.
What is the best string for hanging Christmas ornaments from the ceiling?
Clear monofilament fishing line is the most invisible, with 8 lb test for small baubles and 20 lb or more for heavier pieces. Thin velvet ribbon works well when you want the hanging line to show.
How high should ornaments hang above a dining table?
Keep the lowest ornament at least 30 inches above the tabletop. That leaves room for serving dishes and lets guests see each other across the table.
There’s nothing quite like looking up and seeing ornaments floating overhead, glowing in the evening light. With the right hooks, careful knots and a little clearance math, these ideas for hanging Christmas ornaments from the ceiling can bring that magic home safely all season. Pick your favorite, grab a ladder and some fishing line, and pin it to Pinterest so it’s ready when the decorating starts.