How to Clean Solar Yard Lights: A Friendly Guide to Brighter Nights
So, you’ve got those cute little solar yard lights lining your walkway or garden, but lately… they’re not shining like they used to. Maybe they’re flickering, dull, or just not turning on at all. Annoying, right?
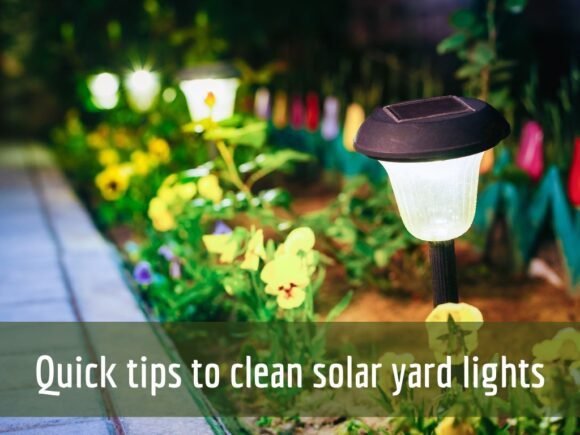
Don’t toss them just yet. In most cases, all they need is a good cleaning—and no, it’s not as tricky as it sounds. I’ve had solar lights in my yard for years (I’m a bit obsessed ), and every time they start slacking off, a quick clean-up makes a huge difference.
So, grab your cleaning supplies and a little motivation, and I’ll show you exactly how to clean solar yard lights—in the simplest, most practical way possible.
Why You Should Clean Your Solar Yard Lights Regularly
Let’s be real—solar lights are outside all the time. That means they’re constantly exposed to dirt, dust, pollen, spider webs, rain, and whatever else nature throws their way.
Here’s What Happens When You Don’t Clean Them:
-
Dust and grime block the solar panel, so it can’t charge the battery.
-
The light lens gets cloudy, making the light look dim or yellow.
-
Moisture and dirt can mess with the electronics inside.
-
Bugs and mold (yes, even mold smell) can start building up around them.
FYI: You don’t need fancy tools or harsh chemicals. Just a few simple steps and some household items.
How to Clean Solar Yard Lights – Step by Step
Here’s the method I swear by for getting your solar lights shining bright again.
What You’ll Need:
-
Soft cloth or sponge
-
Mild dish soap
-
Warm water
-
Soft toothbrush
-
Screwdriver (optional, for opening the light)
-
Baking soda (for cloudy lenses)
-
Vinegar (optional for deeper cleaning)
-
Cotton swabs or Q-tips
1. Remove the Solar Lights from the Ground
Start by gently pulling the lights from the ground or wherever they’re installed. Be careful not to yank—some are connected with thin wires.
Pro Tip: Clean your lights during the daytime so they can recharge right after you’re done.
2. Clean the Solar Panel
The most important part is the solar panel—that little square on the top that collects sunlight.
Steps:
-
Mix a small amount of mild dish soap with warm water.
-
Dip a soft cloth into the soapy water and gently wipe the panel.
-
Use a soft toothbrush to scrub away stubborn grime or bird droppings.
-
Rinse with clean water and wipe dry.
Important: Never use abrasive cleaners or scrubbers—they can scratch the panel and reduce efficiency.
3. Clean the Light Housing and Lens
This is where the light shines through. If it’s cloudy or dusty, your light will look weak—even if the battery is fully charged.
For Clear Plastic or Glass Lenses:
-
Wipe with a damp cloth.
-
If it’s still foggy, make a paste of baking soda and water and gently polish the lens.
-
Rinse thoroughly and dry.
Want to go the extra mile? Use a bit of vinegar to remove hard water stains or mildew.
4. Open and Check the Inside (Optional but Recommended)
If your lights are really dim or not working at all, it might be time to open them up.
How to Do It Safely:
-
Use a screwdriver to open the battery compartment.
-
Check for corrosion or moisture inside.
-
Wipe with a dry cloth or Q-tip.
-
If the battery is leaking or looks rusted, replace it with a rechargeable AA or AAA battery (check the specs on your light).
5. Reassemble and Test Your Lights
After everything is dry and clean, pop the lights back together and set them in a sunny spot for a full day of charging.
You’ll likely notice a major difference that night—clearer, brighter, longer-lasting light. 🌟
Common Questions: Let’s Clear Things Up
Why do my solar lights stop working even after cleaning?
It could be:
-
Dead or old batteries
-
Solar panel not getting enough direct sunlight
-
Water damage from heavy rain or sprinklers
-
Internal wiring issues
If you’ve cleaned everything and they still won’t work, try replacing the battery first. It usually does the trick.
How often should I clean my solar yard lights?
IMO, once every 4–6 weeks is ideal. More often if you live in a dusty area or during pollen season.
Can mold smell come from solar lights?
Oddly enough—yes. If your lights are placed near mulch or damp ground, moisture can build up inside or around them, leading to a musty or mold smell. If that happens:
-
Open the light housing.
-
Let it dry out completely.
-
Wipe with a bit of vinegar to neutralize the odor.
No one wants their beautiful yard to smell like a wet basement, right? 😬
Extra Tips for Keeping Solar Yard Lights in Great Shape
Once they’re clean, keep your lights happy with these quick care tips:
-
Place them in full sun for at least 6–8 hours daily.
-
Avoid placing them under trees or near sprinklers.
-
During heavy rain or snow, store them indoors if possible.
-
Every few months, apply a plastic lens polish to keep the lights from yellowing.
What to Do With Old or Broken Solar Lights
If you’ve cleaned and replaced the battery but your light still doesn’t work, it may be time to retire it.
Ideas:
-
Recycle the solar panel and battery properly.
-
Repurpose the light casing for a DIY project (like a cute mini lantern).
-
Replace the light module if you’re into tinkering.
Final Thoughts: Light Up Your Yard the Right Way
Cleaning your solar yard lights is one of those super satisfying tasks that gives instant results. In just a few minutes, you’ll go from dull, weak lighting to a bright, welcoming glow that makes your garden, walkway, or porch shine.
Let’s recap:
-
Clean the solar panel and lens with soapy water and a soft cloth.
-
Use baking soda or vinegar for stubborn grime or fog.
-
Check inside for corrosion or mold smells, and swap out batteries if needed.
-
Keep your lights dry and sunny for best performance.
At the end of the day, solar lights are an easy, eco-friendly way to light up your outdoor space. But like anything, they need a little TLC every now and then. So next time your lights are slacking off, give them a spa day—they deserve it.