19 Simple Christmas Dinner Table Settings for an Effortless, Welcoming Feast
You spent two hours on the centerpiece. It’s gorgeous, all spilling pine and tall tapers and a candelabra you borrowed from your sister. Then everyone sits down, and your uncle has to lean sideways to see his own wife. The roast potatoes come out, and there’s nowhere to put them. The gravy boat ends up on a chair.
I’ve hosted enough Christmas dinners to know the table isn’t a display case. It’s a workspace for passing food and a place for people to see each other. The prettiest setups I’ve made were also the simplest: greenery laid flat, candles kept low, a few edible touches and soft linen, all done in about fifteen minutes.
These simple Christmas dinner table settings are built around that idea. Every one keeps faces visible, leaves room for the food and still looks lovely in photos.
Under 10 inches
Max centerpiece height so every face stays in view.
12 inch corridor
Clear center strip for shared platters and gravy.
24 inches per guest
Enough elbow room to cut the roast comfortably.
Table Setting and Clearance Matrix
Tip: Swipe left/right on mobile screens to read all columns.
| Setting Style | Hero Centerpiece Element | Best Dishware Pair | Serving Clearance |
|---|---|---|---|
| Scandinavian Flat-Lay | Eucalyptus laid flat with clear votives | Matte white stoneware and light oak boards | Greens under 3 inches, full 12 inch corridor |
| Cottage Orchard | Pears, clementines and olive sprigs | Cream ironstone and green glass tumblers | Fruit clusters kept to the ends of the table |
| Bistro Candlelit | Short brass candlesticks and stub tapers | Classic white plates and bistro wine glasses | Candles in pairs so platters slot between |
| Woodland Foraged | Moss tray, pinecones and bare twigs | Speckled brown stoneware and wood chargers | One low tray at center, sides left open |
Low-Profile Centerpieces and Flat-Lay Greens
1. The Eucalyptus and Votive River
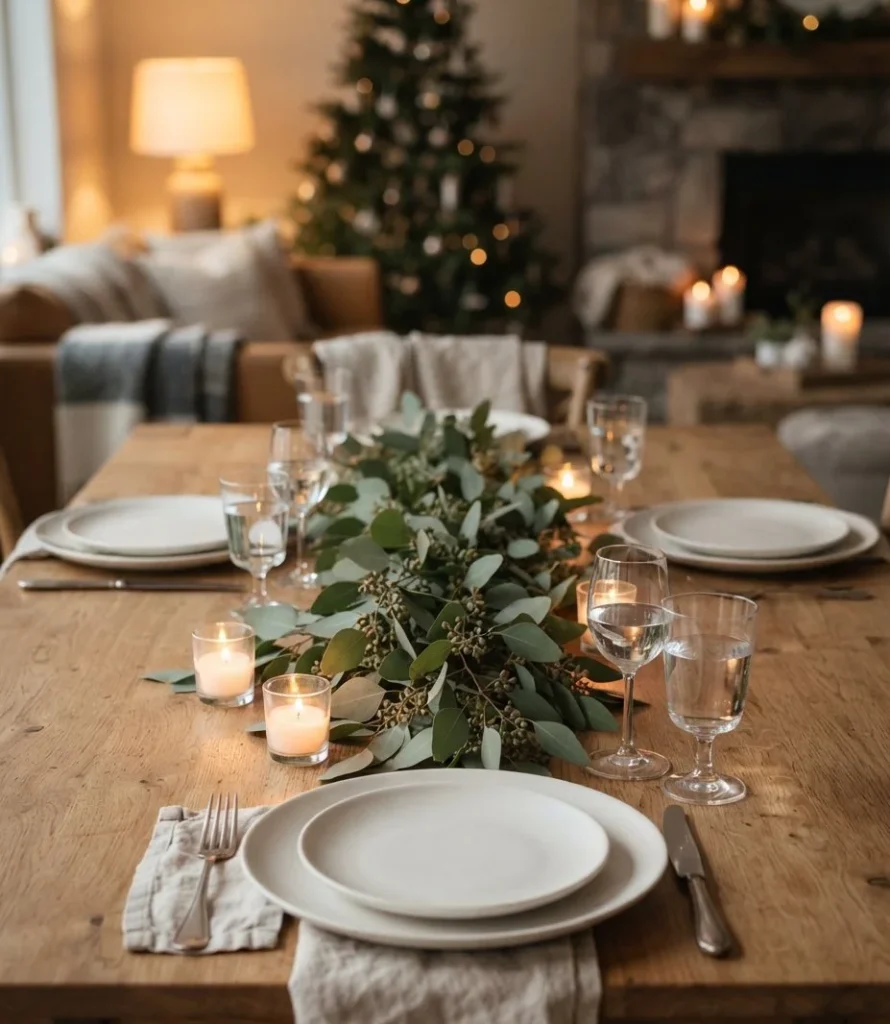
Feels like · a quiet Nordic cabin after dark
The Concept: Silvery round eucalyptus leaves laid flat down the table, with tiny flames flickering between them like a winding stream.
Key Elements: Silver dollar eucalyptus stems, a dozen clear glass votives, unscented white tealights. The candle glow sets the whole mood here, and if you want the rest of the room to match, my warm cozy home lighting ideas show how to dim the overheads and let lamps take over.
How to Style It:
- Lay stems end to end down the middle of the table, overlapping them slightly so no bare wood shows.
- Tuck votives into the gaps every 8 to 10 inches, alternating slightly left and right.
- Light the candles five minutes before guests sit so the wax has pooled.
Host and Serving Specs: Keep the eucalyptus line about 6 inches wide and under 3 inches tall. Votives stand around 2.5 inches, so sightlines stay wide open, and you still have room on each side of the line for platters.
Quick Budget Hack: Grocery store eucalyptus bunches cost a few dollars each and last well over a week out of water. Two bunches cover a six-seat table.
2. The Olive Branch and Clementine Scatter
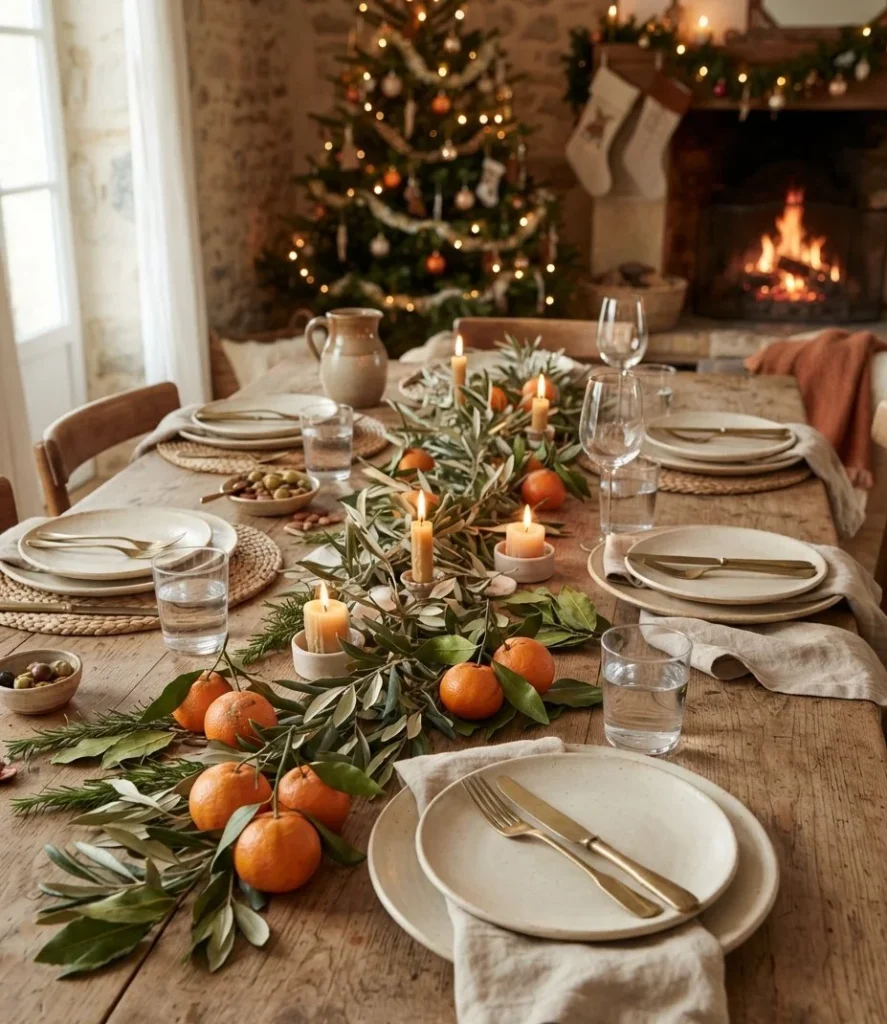
Feels like · a long lunch in a Mediterranean courtyard
The Concept: Soft grey-green olive branches trailing down the table with bright clementines tucked in like little suns.
Key Elements: Fresh olive branches, eight to ten clementines with leaves still attached, a few bay leaves.
How to Style It:
- Lay olive branches in a loose, uneven line down the center.
- Nestle clementines in clusters of two or three, leaving a few with their leaves showing.
- Tuck bay leaves under the fruit so nothing rolls.
Host and Serving Specs: The tallest point sits around 4 inches. Keep fruit clusters at least 12 inches apart so a serving dish fits between any two of them.
Quick Budget Hack: The clementines become dessert or tomorrow’s breakfast, so nothing is wasted. Ask a florist for olive trimmings, which are often cheaper than full stems.
3. The Moss Tray Mini Landscape
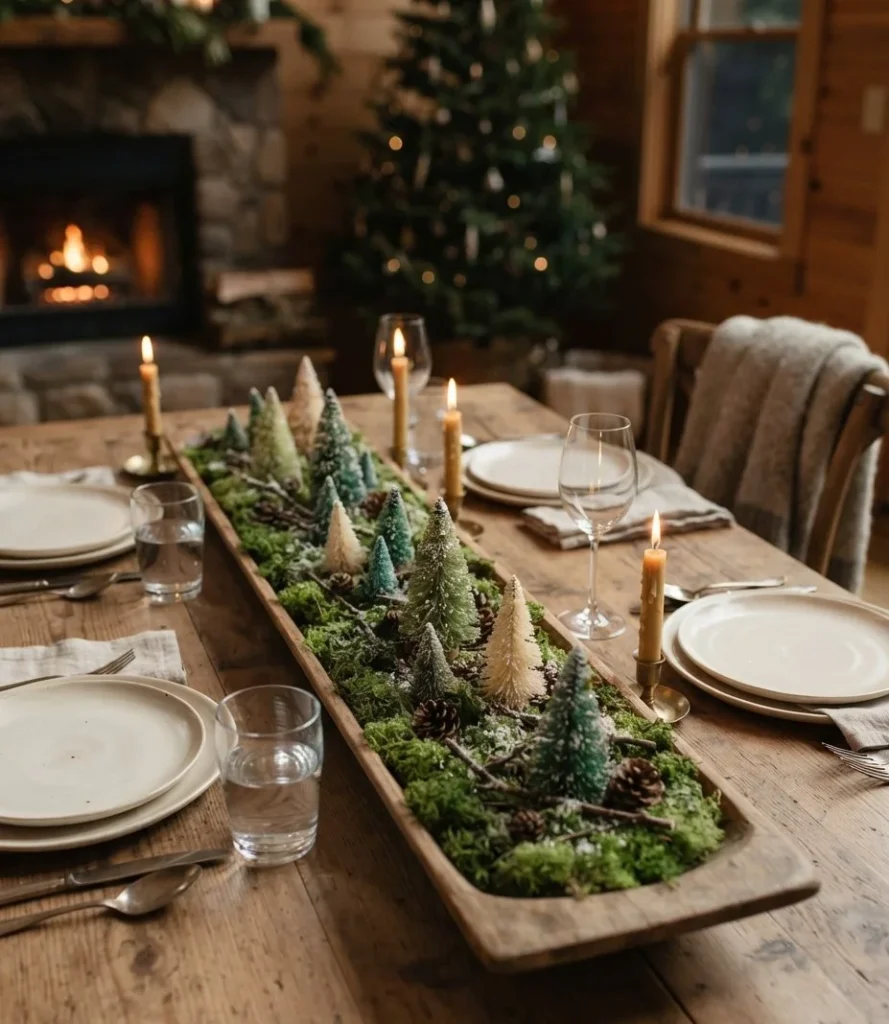
Feels like · a snowy forest floor in miniature
The Concept: One long, shallow wooden tray filled with soft moss and tiny bottlebrush trees, like a little woodland scene at the center of the table.
Key Elements: Preserved reindeer moss or sheet moss, three to five small bottlebrush trees, a few mini pinecones, a light dusting of faux snow.
How to Style It:
- Line the tray with moss, pressing it down so it sits flat.
- Place the trees in a loose, off-center group, tallest near the middle.
- Add pinecones and a whisper of faux snow.
Host and Serving Specs: Use a tray no wider than 8 inches and trees no taller than 6 inches. The tray takes one spot in the center, so platters can sit at either end.
Quick Budget Hack: A thrifted wooden drawer or bread board works as the tray. Bottlebrush trees go on deep discount the week after Christmas, so stock up for next year.
4. The Floating Candle and Cranberry Bowl
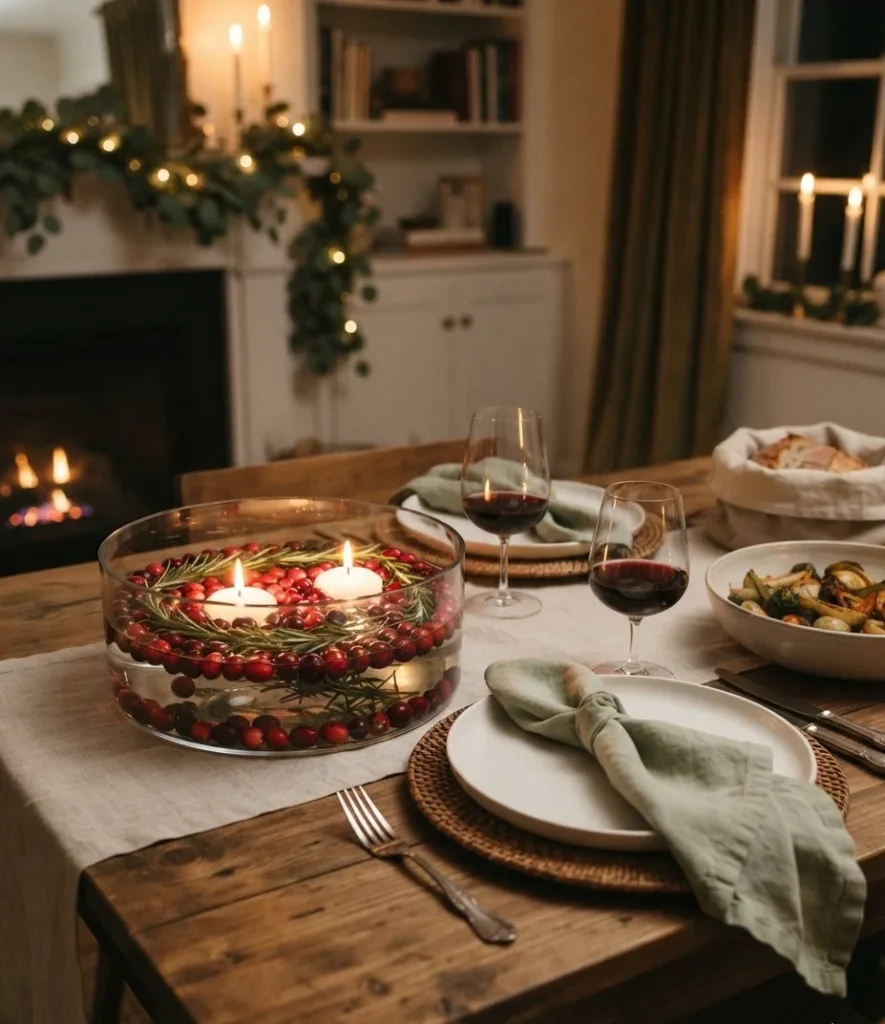
Feels like · candlelight on a frozen pond
The Concept: A wide, low glass bowl of water with bright cranberries bobbing around floating candles.
Key Elements: A wide shallow glass bowl, fresh cranberries, three floating candles, a few sprigs of fresh rosemary.
How to Style It:
- Fill the bowl about two-thirds full with cold water.
- Pour in a cup of cranberries and float the candles on top.
- Drop in a few rosemary sprigs and ring the base with more rosemary.
Host and Serving Specs: A bowl around 10 to 12 inches wide and 4 inches deep keeps everything low. Set it at one end of a long table, not dead center, so the middle stays clear for the roast.
Quick Budget Hack: A clear glass salad bowl you already own works perfectly. One bag of cranberries is plenty.
Edible Accents and Tactile Place Settings
5. The Pear Place Cards
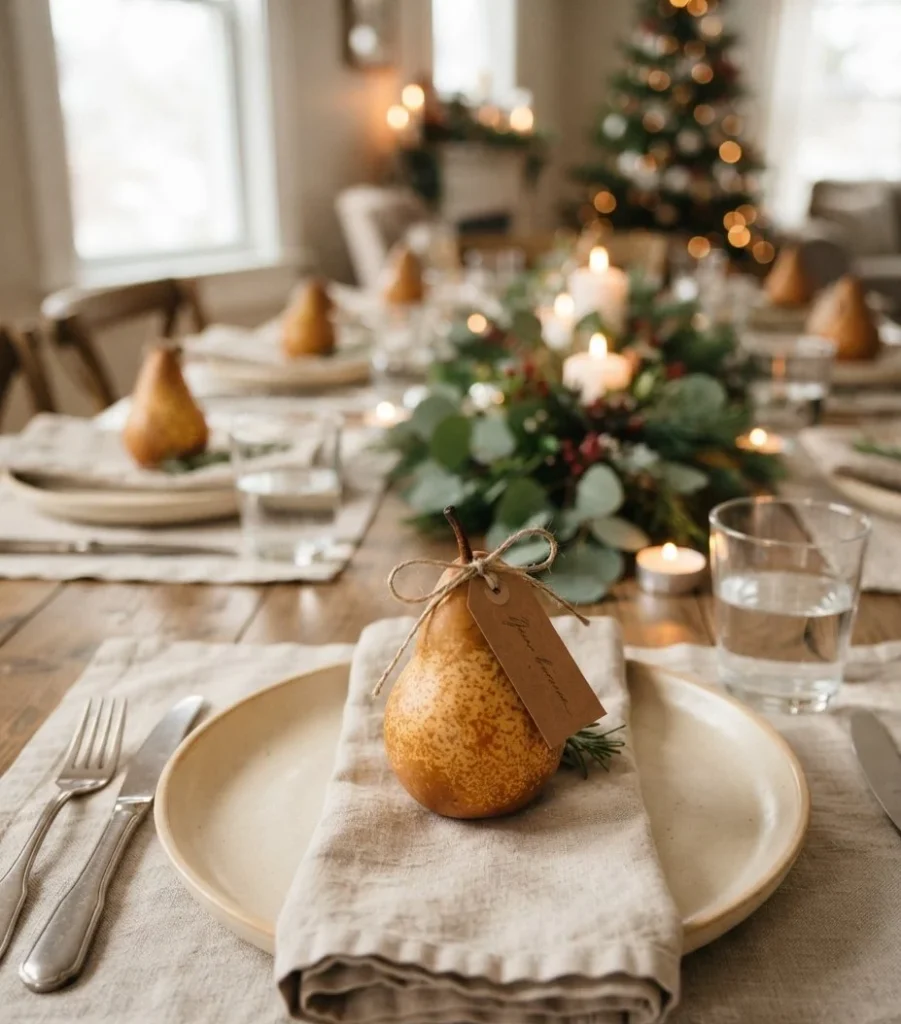
Feels like · a handwritten welcome from an old friend
The Concept: A single speckled pear at every plate, with each guest’s name on a small tag hanging from the stem.
Key Elements: Bosc or red Anjou pears, small kraft paper tags, thin twine or ribbon.
How to Style It:
- Write names on the tags in your own handwriting.
- Tie each tag around the pear stem.
- Set the pear on top of the folded napkin or at the upper left of each plate.
Host and Serving Specs: Pears stand 4 to 5 inches tall and sit inside each guest’s 24 inch zone, so they never crowd the center corridor.
Quick Budget Hack: Pears cost less than printed place cards, and guests can take them home. Slice a small flat spot on the bottom so they stand upright.
6. Sugared Rosemary and Cranberry Plate Garnish
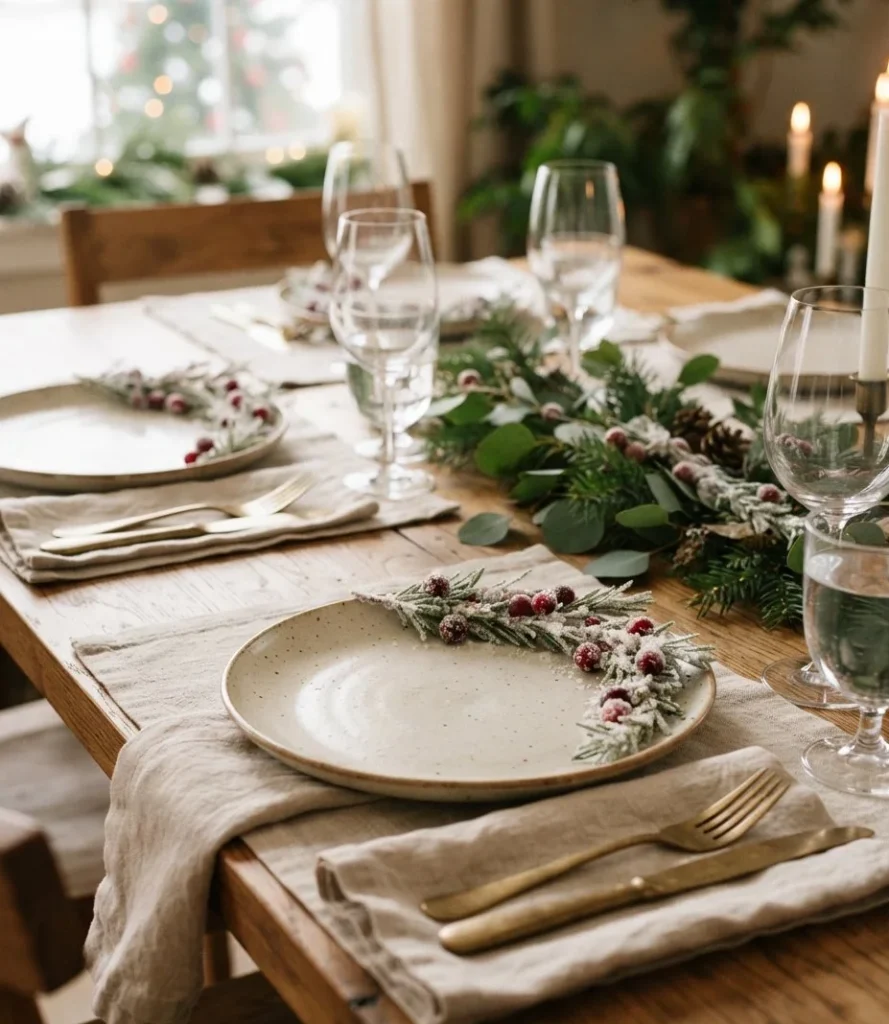
Feels like · frost sparkling on a winter morning
The Concept: A tiny frosted cluster of rosemary and cranberries sitting right on each plate like a little jewel.
Key Elements: Fresh rosemary sprigs, fresh cranberries, simple syrup, granulated sugar.
How to Style It:
- Dip rosemary and cranberries in simple syrup, then roll them in sugar.
- Let them dry on parchment for an hour.
- Place one sprig and three cranberries at the edge of each dinner plate.
Host and Serving Specs: The garnish takes up about 3 inches on the plate rim and adds zero height to the table. Guests can move it to their bread plate when the food arrives.
Quick Budget Hack: Make a double batch and use the extras to top dessert or cocktails. One pack of rosemary covers a table of eight.
7. The Mini Bread Loaf Place Setting
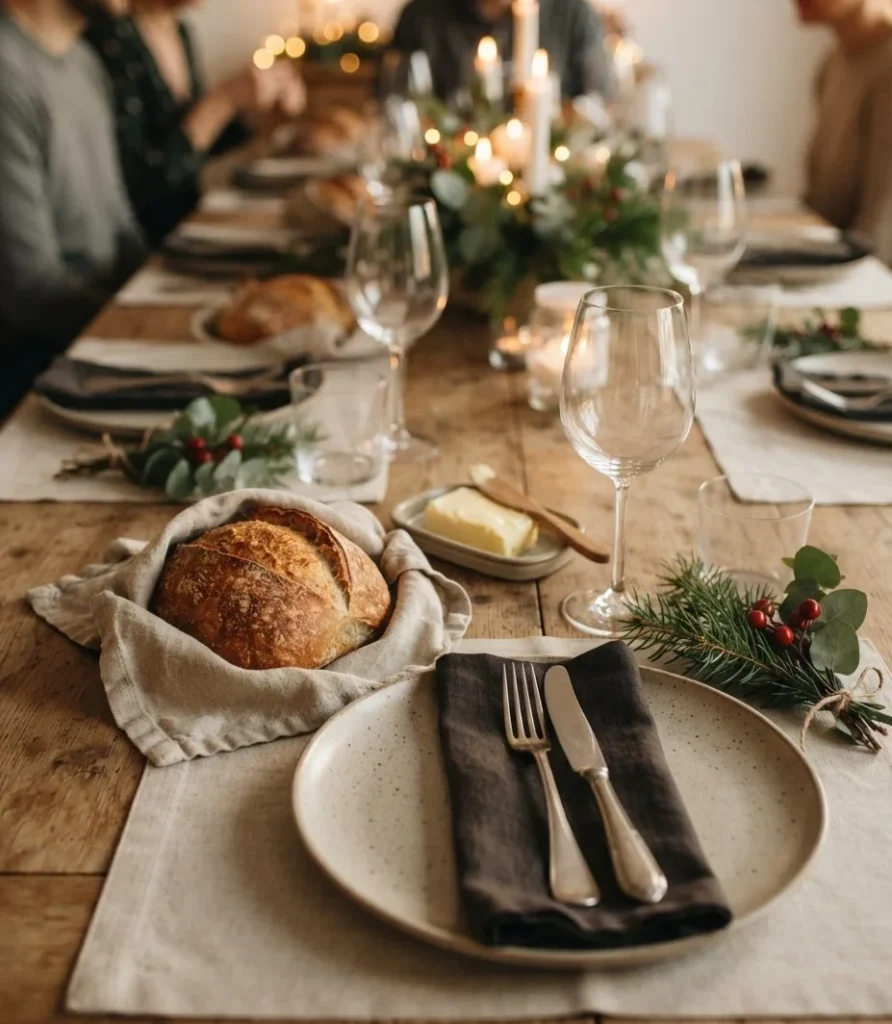
Feels like · the smell of a village bakery at dawn
The Concept: A warm little round loaf wrapped in a linen square waiting at every seat.
Key Elements: Individual dinner rolls or mini boules, small linen or cotton squares, a small dish of butter shared between two guests.
How to Style It:
- Warm the rolls just before guests sit.
- Wrap each one loosely in a linen square and place it on the bread plate.
- Set small butter dishes between every two places.
Host and Serving Specs: Individual bread means no bread basket hogging the center corridor. Keep butter dishes under 4 inches wide so they tuck between settings.
Quick Budget Hack: Cut the linen squares from an old tablecloth or a clean flour sack towel. Store-bought rolls, warmed for five minutes, taste homemade.
8. The Pomegranate and Walnut Tabletop Scatter
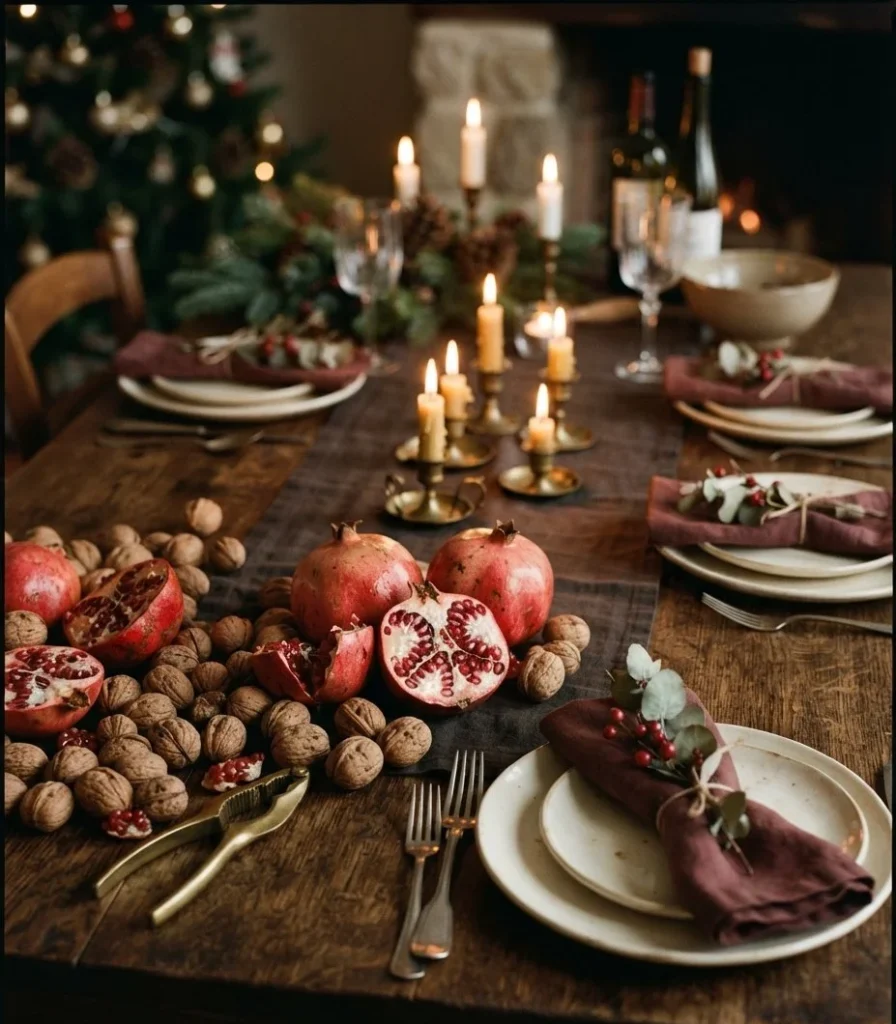
Feels like · an old harvest still life come to life
The Concept: Split pomegranates showing their ruby seeds, scattered with whole walnuts in the shell along the table.
Key Elements: Four to six pomegranates, a bag of walnuts in the shell, a nutcracker set out for guests.
How to Style It:
- Crack two pomegranates open by hand and leave the rest whole.
- Place them in small groups along the table edges, not the center.
- Scatter walnuts around each group and leave the nutcracker nearby.
Host and Serving Specs: Keep the scatter within 4 inches of the place settings, outside the 12 inch center corridor. Set open pomegranates on small saucers so the juice doesn’t stain the linen.
Quick Budget Hack: Walnuts turn into a snack after dinner, and the cracking keeps kids busy while adults talk.
A friend of mine built a stunning 20 inch arrangement of cedar, roses and tall tapers for her Christmas table. Ten minutes into dinner, her husband quietly lifted the whole thing onto the floor because nobody could see across the table and the turkey platter had nowhere to go. The best photo of the night was the arrangement sitting next to the dog bed.
The fix: Before guests arrive, sit in one chair and look across. If you can’t see the face of the person opposite you, lower or move the centerpiece.
Glassware, Ceramics and Candlelight Glow
9. The Mismatched Stoneware Stack
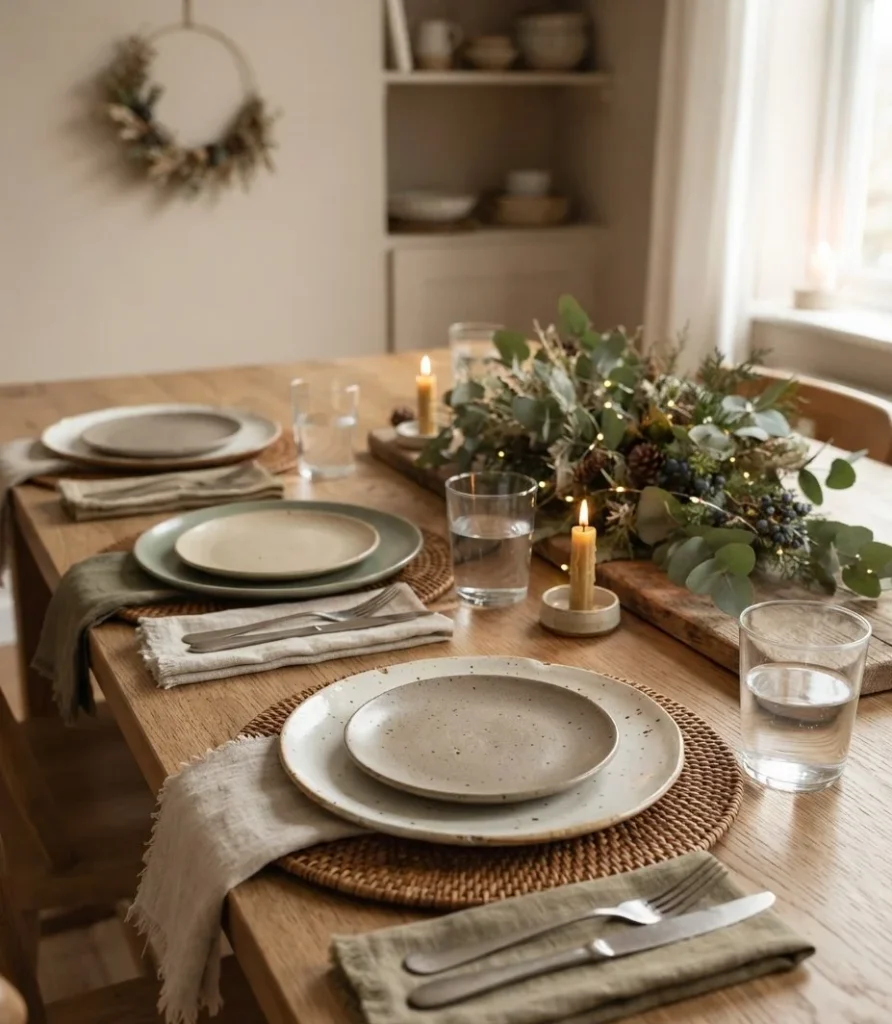
Feels like · a potter’s studio set for a family meal
The Concept: Rough, speckled stoneware plates in slightly different glazes, stacked to add texture at every seat.
Key Elements: Speckled stoneware dinner plates, smaller salad plates in a contrasting glaze, a wood or rattan charger. Pair it with a quiet centerpiece from my neutral dining room centerpiece styling guide so the plates stay the star.
How to Style It:
- Set the charger first, then the dinner plate.
- Add a salad plate in a different glaze on top.
- Rotate glazes around the table so no two neighbors match exactly.
Host and Serving Specs: A 13 inch charger fits comfortably inside a 24 inch place setting with room for cutlery. On a 36 inch wide table, that still leaves about a 10 to 12 inch center strip for serving dishes.
Quick Budget Hack: Thrift stores are full of single stoneware plates. Mismatched is the whole point, so buy whatever glazes share a warm color family.
10. The Wine Glass Cloche Candles
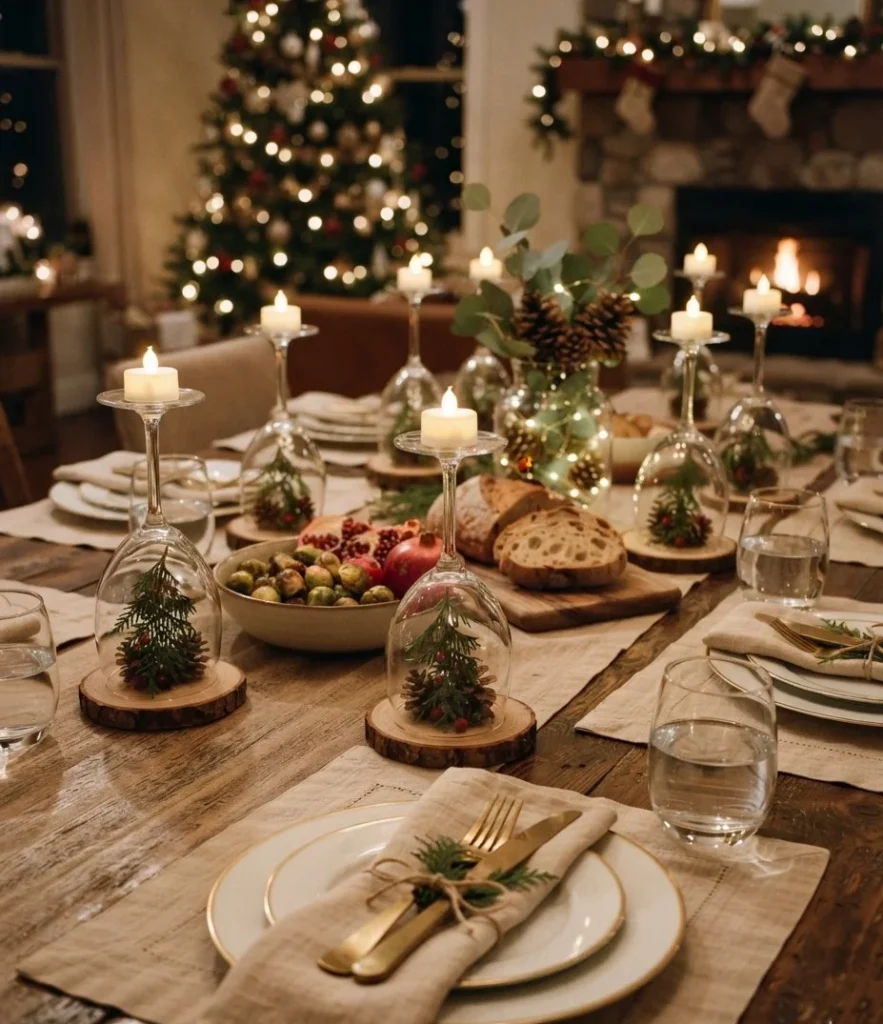
Feels like · tiny snow globes glowing down the table
The Concept: Upside-down wine glasses covering small sprigs of greenery, with a tealight glowing on each flat base.
Key Elements: Five or six inexpensive wine glasses, cedar or boxwood sprigs, tiny pinecones, tealights.
How to Style It:
- Place a small sprig and a mini pinecone on the table.
- Turn a wine glass upside down over it.
- Set a tealight on the flat foot of the glass and space them evenly.
Host and Serving Specs: Most standard wine glasses stand 7 to 8 inches upside down, so with the tealight they stay just under 10 inches. Space them 14 to 16 inches apart so a platter fits between each pair.
Quick Budget Hack: Dollar stores sell wine glasses for very little. Use battery tealights if kids will be at the table.
11. Short Brass Candlesticks in Pairs
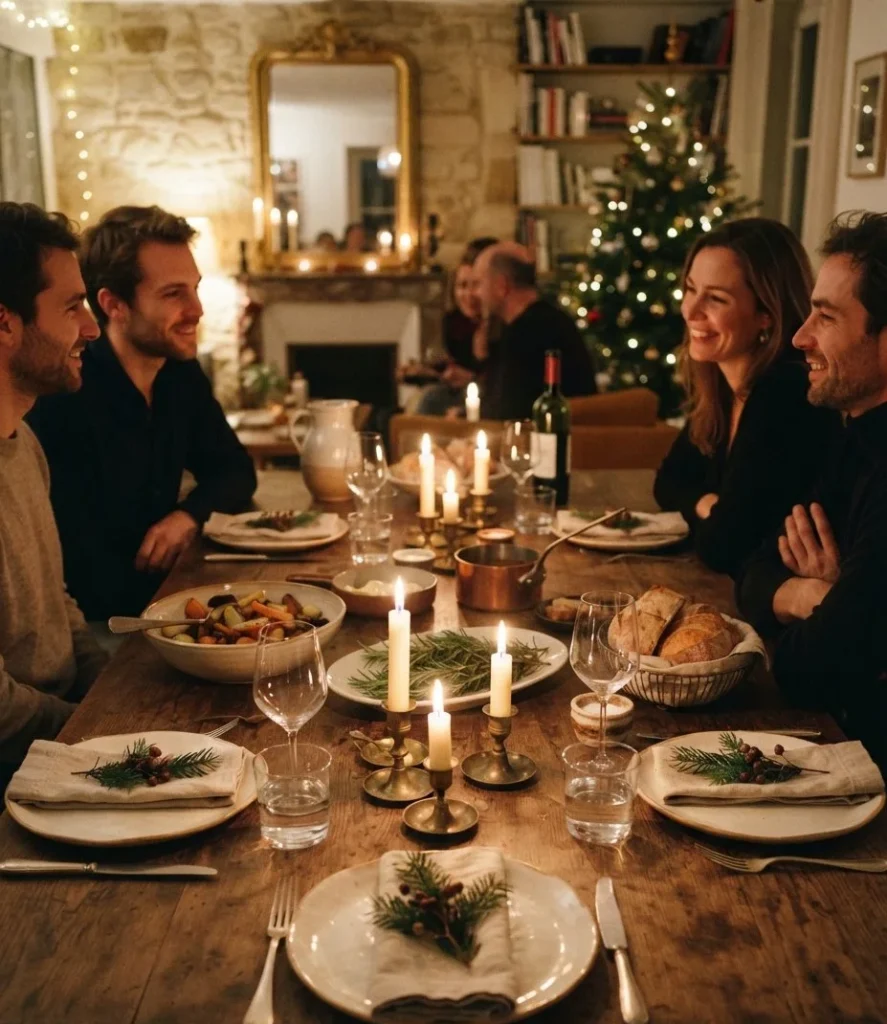
Feels like · a corner table at a candlelit Paris bistro
The Concept: Low brass holders with short stub candles, grouped in pairs so their warm light hits faces instead of rising over them.
Key Elements: Six to eight short brass candlesticks around 3 inches tall, 6 inch ivory tapers or stub candles.
How to Style It:
- Group candlesticks in pairs rather than a single line.
- Place one pair at each end and one near the center.
- Light them just before serving.
Host and Serving Specs: A 3 inch holder with a 6 inch candle stays around 9 inches, below eye level for a seated adult. Pairs leave long open gaps for serving dishes, which a continuous row of candles never does.
Quick Budget Hack: Vintage brass candlesticks turn up constantly at thrift stores. Mismatched ones look collected, and a quick polish brings back the shine.
12. Forest Green Glass Tumblers
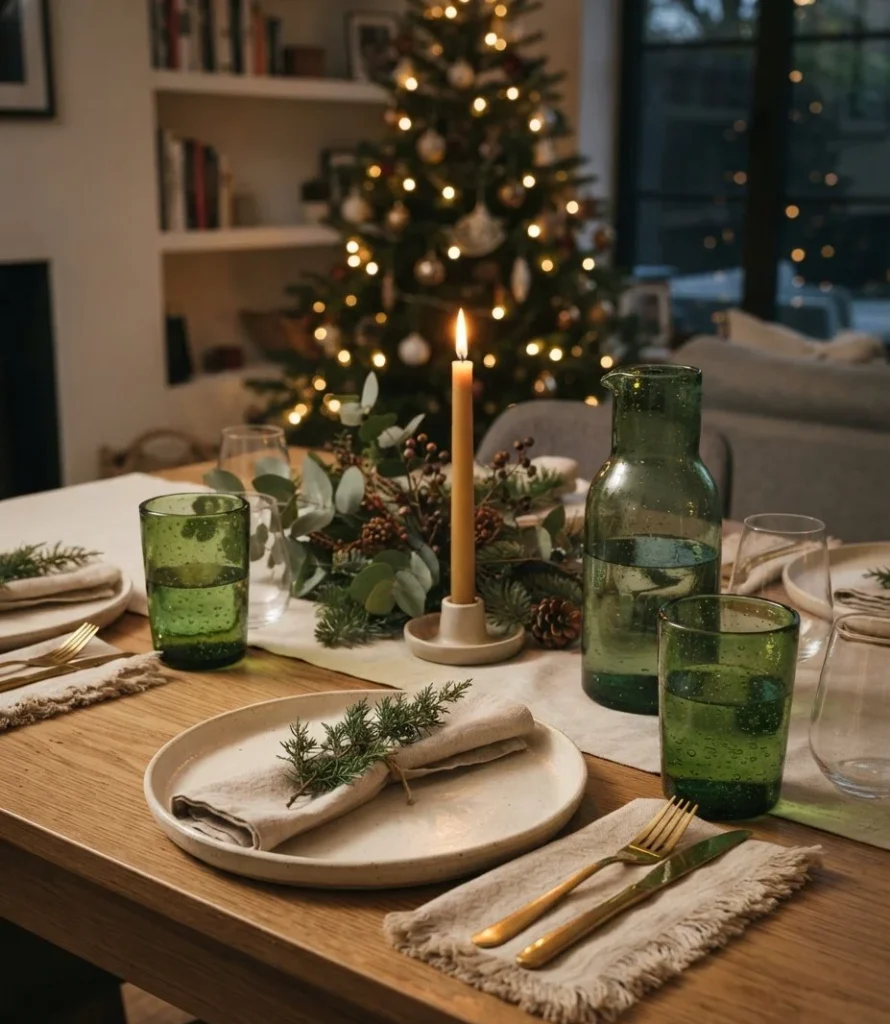
Feels like · light through an old bottle on a windowsill
The Concept: Chunky green glass tumblers at every seat that catch the candlelight and add color without any extra decor.
Key Elements: Green glass tumblers for water, clear stemless wine glasses, a matching green glass water carafe.
How to Style It:
- Set the green tumbler at the top right of each plate.
- Place the wine glass just behind and to its left.
- Fill the carafe and set it near the middle so guests refill themselves.
Host and Serving Specs: Stemless glasses sit around 4 to 5 inches tall and tip over far less when platters get passed. Keep glassware inside the place setting, never in the center corridor.
Quick Budget Hack: Recycled green glass tumblers are cheap at home stores and thrift shops. They’re sturdy enough for everyday use all year.
Minimalist Linens, Host Tricks and Chair Touches
13. Bare Wood With Linen Placemats
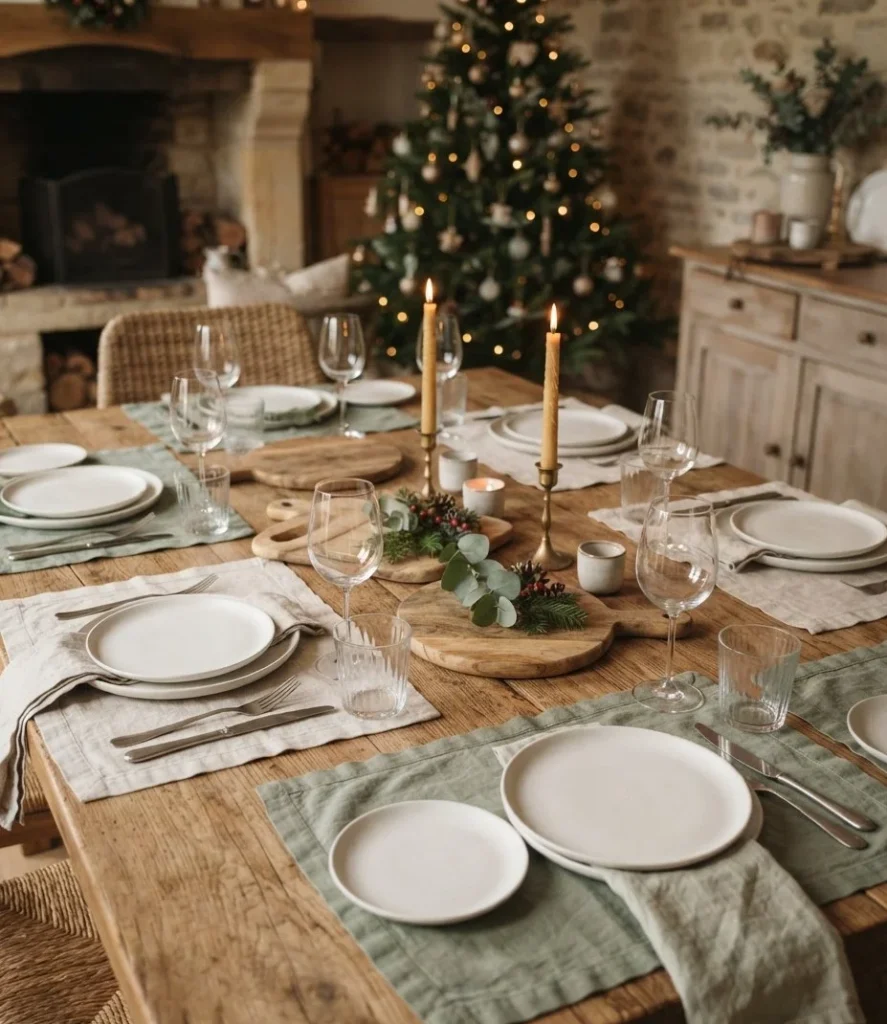
Feels like · a farmhouse kitchen scrubbed clean for company
The Concept: Skip the tablecloth and let the warm grain of the wood show, with soft linen placemats marking each seat.
Key Elements: Stone washed linen placemats in oatmeal or sage, matching napkins, trivets for hot dishes.
How to Style It:
- Wipe the table and let it dry fully.
- Place mats with their edges about 1 inch from the table edge.
- Set wooden or cork trivets down the center before the food comes out.
Host and Serving Specs: Standard 14 by 19 inch placemats fit neatly into a 24 inch place setting. Pre-placed trivets mark exactly where the hot dishes will land so nobody scrambles.
Quick Budget Hack: Cut placemats from a linen curtain panel and fray the edges. No sewing needed.
14. Sheepskin and Wool Throw Chair Drapes
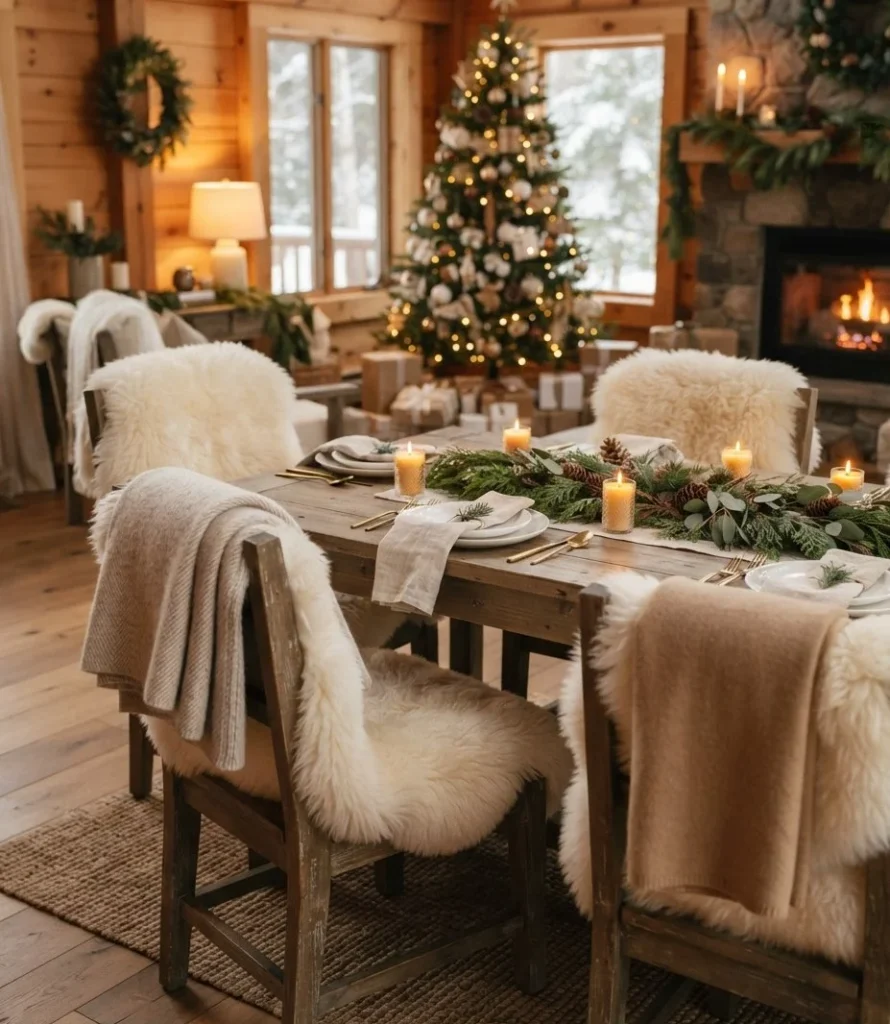
Feels like · the coziest seat in a mountain lodge
The Concept: Soft sheepskins and folded wool throws draped over dining chairs so everyone wants to stay for dessert.
Key Elements: Faux or real sheepskins for the end chairs, folded wool throws for the rest. It’s the same soft layering I rely on in my minimalist bedroom hygge styling, just moved to the dining room.
How to Style It:
- Drape a sheepskin over the host and head chairs.
- Fold wool throws in thirds and hang them over the other chair backs.
- Keep colors neutral so the table stays calm.
Host and Serving Specs: Keep drapes off the seat front so chairs slide in and out easily. Leave at least 36 inches behind each chair so guests can stand up without bumping the wall.
Quick Budget Hack: Borrow throws from the sofa and bedrooms for the night. Everything goes back the next morning.
15. Mini Wreaths on Chair Backs
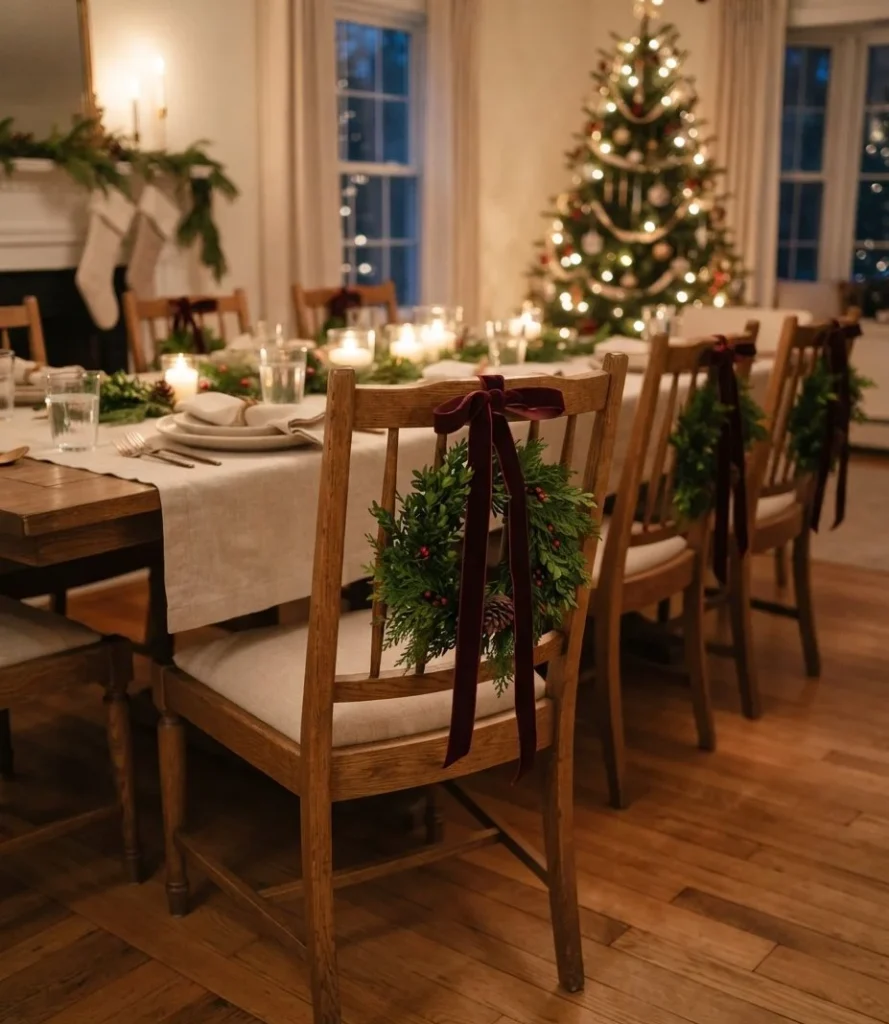
Feels like · a little gift waiting behind every guest
The Concept: Small green wreaths tied to the back of each chair with a long ribbon, festive without touching the tabletop at all.
Key Elements: 6 to 8 inch boxwood or cedar wreaths, 1 inch velvet ribbon in deep red or forest green.
How to Style It:
- Loop ribbon through each wreath.
- Tie it around the top rail of the chair back.
- Let the ribbon tails hang evenly.
Host and Serving Specs: The wreath should hang between the top rail and the middle of the chair back, so guests don’t lean on it. Nothing here takes up table space.
Quick Budget Hack: Bend a wire hanger into a small circle and wrap it with trimmings from your tree or yard.
One host I heard about set a beautiful table for ten with chargers, three glasses per guest, place cards and a full garland down the middle. When the food came out, there was literally nowhere for the ham, the sides or the gravy. Everything went back to the kitchen counter and guests had to line up buffet style anyway.
The fix: Set your empty serving dishes on the table before guests arrive. If they don’t fit, pull back the decor until they do.
16. The Side Serving Station
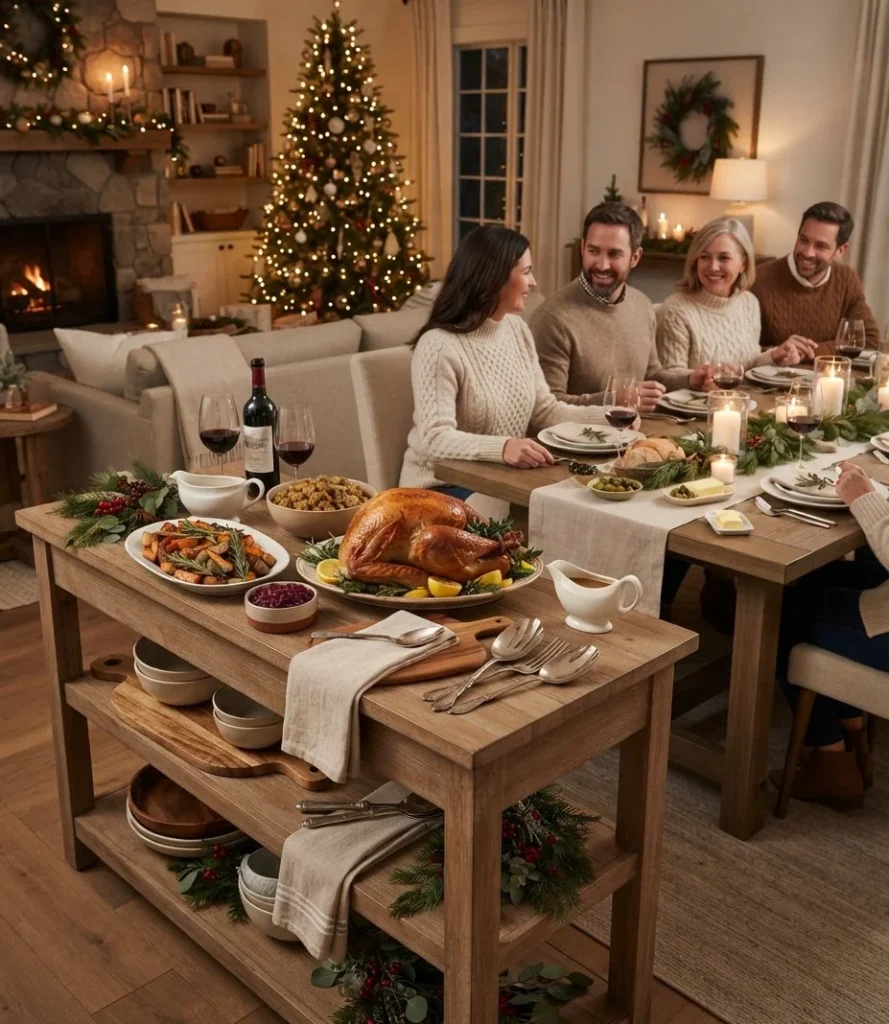
Feels like · a relaxed Sunday supper at a friend’s house
The Concept: Big platters live on a nearby console or kitchen island, and only the smaller shared dishes stay on the table.
Key Elements: A console, sideboard or cleared kitchen counter, wooden boards, small handwritten labels.
How to Style It:
- Put the roast and largest sides on the station.
- Keep gravy, cranberry sauce and bread on the table.
- Add a small sprig of greenery on each board to tie it to the table.
Host and Serving Specs: Place the station within a few steps of the table. Leave the 12 inch center corridor for small shared dishes only, and the table never feels crowded.
Quick Budget Hack: No console? A bookshelf cleared off at waist height or an ironing board covered with a tablecloth works in a small apartment.
17. Salt, Butter and Gravy Pods at Each End
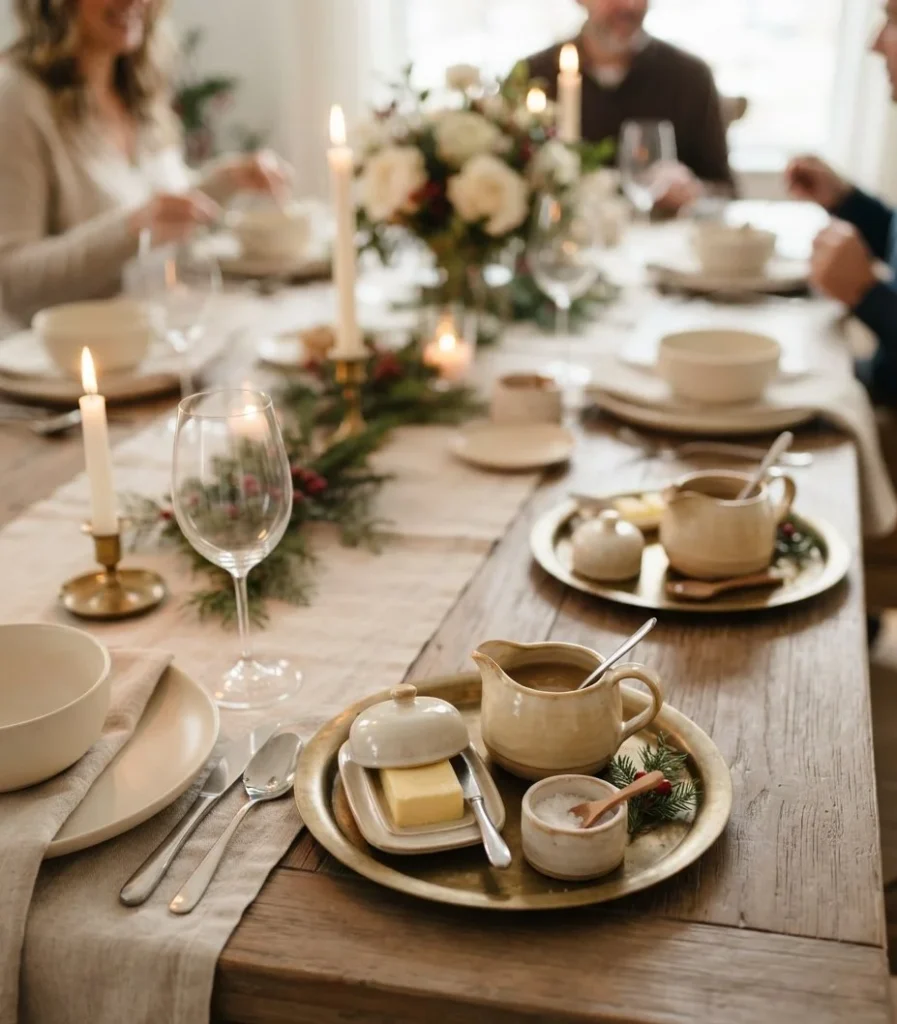
Feels like · everything you need, right where you reach
The Concept: Two small matching sets of condiments, one at each end of the table, so nobody has to shout “pass the salt” across five people.
Key Elements: Two small gravy boats, two butter dishes, two salt cellars with tiny spoons, two small trays to hold each set.
How to Style It:
- Group each set on a small wooden or brass tray.
- Place one tray at each third of the table.
- Refill from the kitchen between courses.
Host and Serving Specs: Trays around 8 by 10 inches fit neatly into the center corridor. Everything stays under 5 inches tall.
Quick Budget Hack: Small ramekins and a creamer from your cupboard work just as well as matching sets.
18. The Handwritten Menu Card
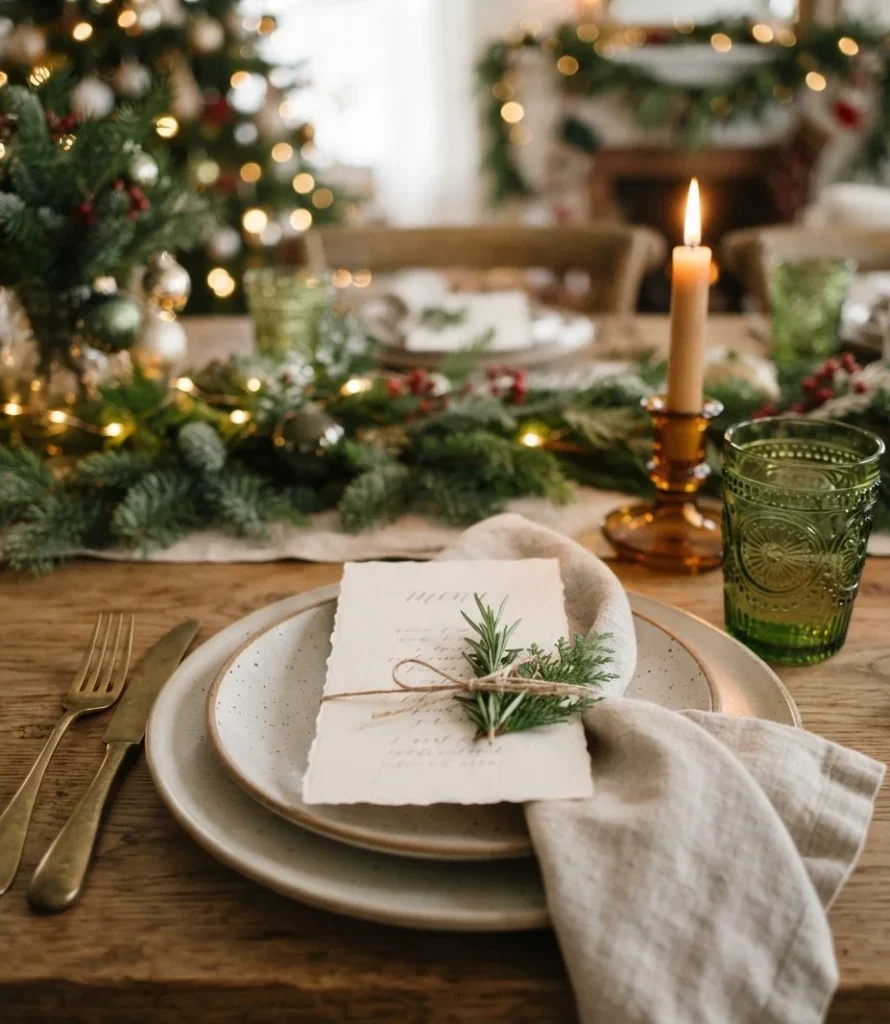
Feels like · a little restaurant in your own dining room
The Concept: A simple card resting on each plate that lists the courses, so guests know what’s coming and save room for pie.
Key Elements: Cream cardstock, a dark ink pen, small sprigs of greenery, twine.
How to Style It:
- Write or print the menu on small cards.
- Tuck each card under the salad plate or between the napkin folds.
- Add a tiny sprig across the top corner.
Host and Serving Specs: A 4 by 7 inch card lies flat on the plate and adds no height. Guests can slide it aside when the food arrives.
Quick Budget Hack: Cut cards from a brown paper grocery bag and write the menu with a white paint pen.
19. The Low Kids’ Table With Floor Cushions
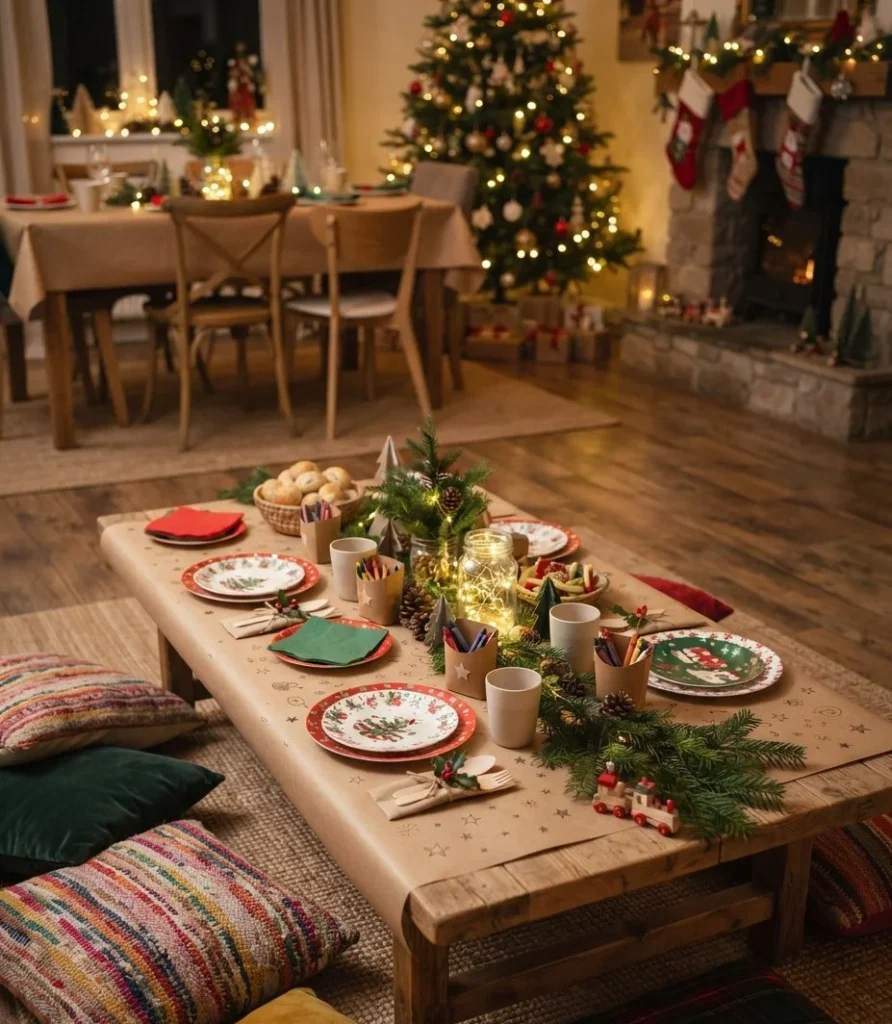
Feels like · the table every kid secretly wants to sit at
The Concept: A coffee table dressed up for the youngest guests, with floor cushions for seats and paper you can draw on.
Key Elements: A cleared coffee table, kraft paper roll, crayons in small cups, floor cushions. The cushions and throws from your fall living room decor ideas work perfectly here, so you don’t need to buy anything new.
How to Style It:
- Cover the coffee table with kraft paper and tape it underneath.
- Draw a plate outline at each seat and write every child’s name.
- Set out unbreakable plates, crayons and a cushion per child.
Host and Serving Specs: A coffee table around 16 to 18 inches high is a comfortable height for kids on cushions. Keep it within sight of the main table so parents can relax.
Quick Budget Hack: The kraft paper doubles as the tablecloth and the activity. Roll it up after dinner and save the drawings.
Frequently Asked Questions
How high should a Christmas table centerpiece be so guests can talk comfortably?
Keep it under 10 inches, candle flames included. If you can see the face of the person across from you while seated, it’s the right height.
How much tabletop clearance should I leave for shared food platters?
Leave a clear strip about 12 inches wide down the center. Allow 24 inches for each place setting so plates and platters never compete.
Which greenery types last longest on a dining table without shedding needles into food?
Eucalyptus, olive, bay, boxwood and magnolia hold up for days and don’t drop needles. If you want evergreen, cedar and fir shed far less than spruce.
How can I make an everyday dinner setting look festive on a tight budget?
Add low candles, fruit you’ll eat anyway and a few sprigs of yard greenery. Your regular plates look instantly festive with that combination.
The best simple Christmas dinner table settings aren’t the ones that win on Instagram. They’re the ones where everyone can see each other, reach the potatoes and stay long after the plates are cleared. Keep it low, keep it warm and leave room for the food, because that’s where the real memories happen.